How to Uninstall NetBarrier X9–Intego Products Uninstall Support
This is the tutorial blog that tells how to exactly uninstall NetBarrier X9 from macOS and Mac OS X, and this is the fifth removal guide blog to of Intego products uninstall support in our website. If you have problem with Intego applications removing, keep reading our updating stories here.
“Connected to the Internet, your Mac is no more immune to intrusion than the next computer. To the bad guys, it’s just an IP Address and open ports, and accessing your personal information via these cyber-criminal gateways is easier than you want to know. Intego NetBarrier blocks unsolicited visitors in their tracks, keeping the bad guys out of your Mac.”
From intego.com, NetBarrier X9 provides automatic protection as you move from one location to the next, so whether you’re at home, work, or grabbing coffee at your favorite cafe, you’ll be safeguarded against strangers and suspicious applications
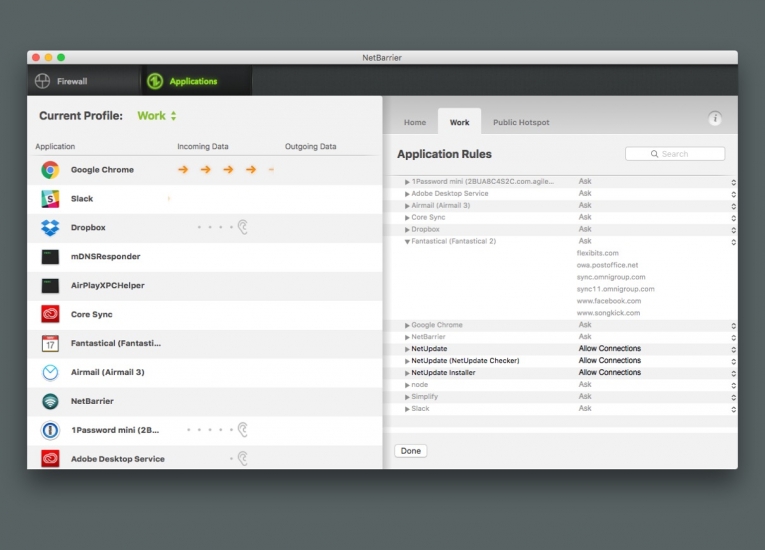
Check more details in the previous stories of completely uninstall &remove Intego VirusBarrier 2017, Intego Mac Premium Bundle X9 and ContentBarrier X9:
- How to Remove ContentBarrier X9
- How to Uninstall Intego Mac Premium Bundle X9
- How Should I Fast Remove Intego VirusBarrier 2017
Conventional Ways to Uninstall NetBarrier X9
Back to the point though, this story is focusing on how user should fast &safely uninstall NetBarrier X9, keep reading to more useful tips.
1. Quit NetBarrier X9
No matter which way you’d like to try in your Mac, you should quit the running NetBarrier X9 firstly, in case fail in the road of removal.
Like we used to say and as always, you can quit it by methods a, b, c, d as following:
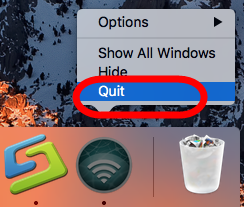
a. Right click the NetBarrier X9 icon on Dock, and then choose Quit;
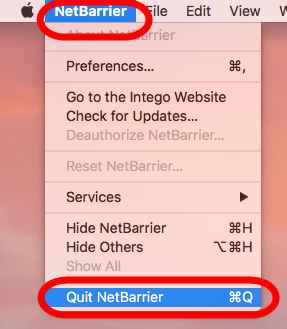
b. Click the setup on the top left corner near Apple icon, and choose Quit NetBarrier X9 option (press Command +Q)
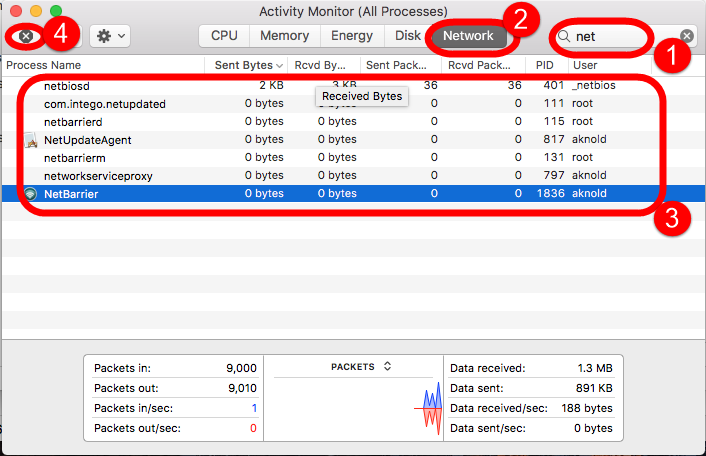
c. Negative Activity Monitor from Application >> Finder >> Dock, click the Network button, select all running process of NetBarrier X9 for Mac, then click X on the left, hit Quit to confirm the exit.
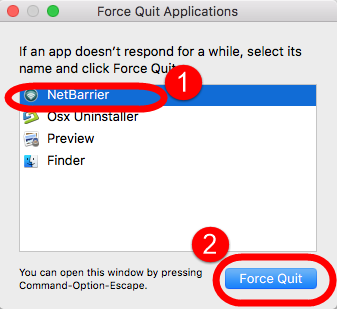
d. If a, b, c didn’t work, then try force quit window by pressing shortcuts of Command+Option+Esc.
2.1. Uninstall NetBarrier X9 by Intego Installer
a. Launch the location which you installed NetBarrier X9 in the first time of your computer;
b. Click Mac Internet Security X9 Installer;

c. Click Uninstall Software in the next popup page;
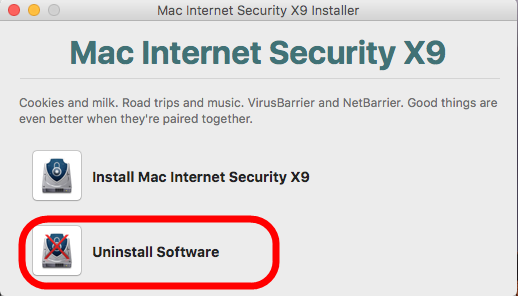
d. Click “Remove” button and follow the instructions to complete the removal.
2.2. Uninstall NetBarrier X9 by Mac Trash
- Click the Finder icon on Dock;
- Click Application on the left panel;
- Find Intego folder in Application and drag it straightly into Trash;
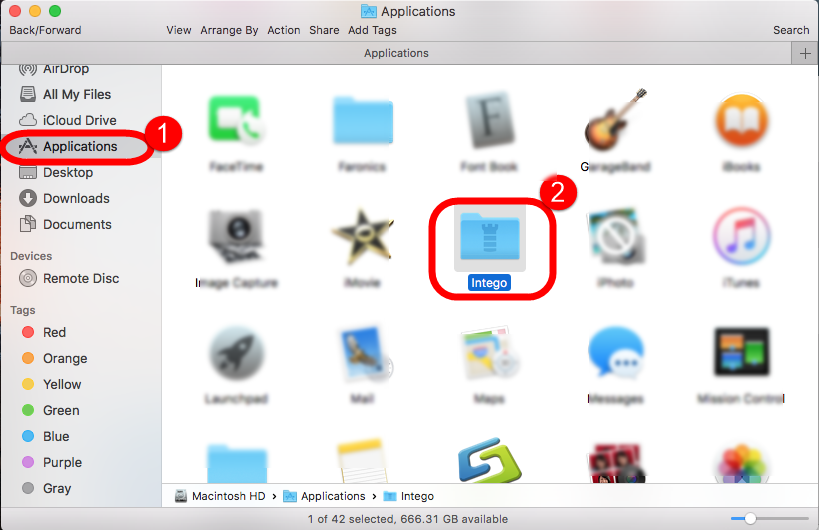
- Or right-click it and choose “Move to Trash”;
Now you’ve only done the half way from finish the whole removal process, keep doing it by the following instruction to clean up the leftovers of NetBarrier X9:
3. Delete all leftovers in Library folder
- Launch “Finder”
- Go to Menu Bar, and select Go > Go to Folder…
- Type “~/library” in the box, hit Go
- Next search the files in the name of NetBarrier X9/intego in the most usual folders in Application Support,
- Caches,
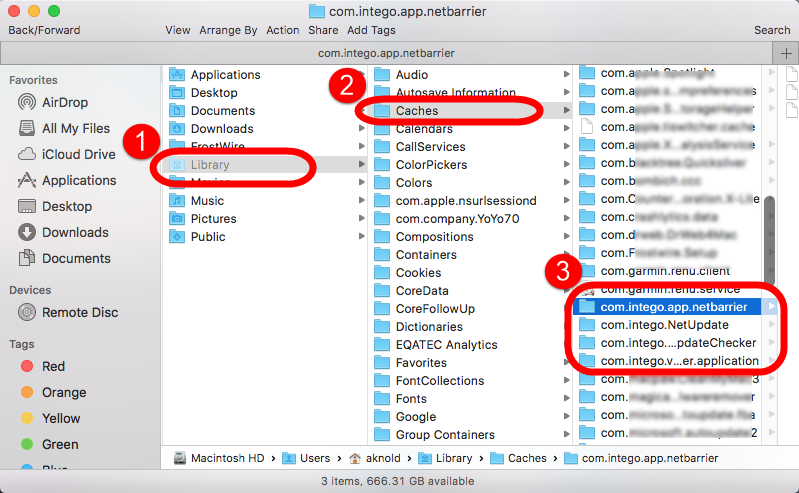
- and Preference;

- Once they showed right-click to delete all of them
- Finally, right-click Trash, choose Empty the Trash to confirm your whole removal.
Unluckily, some leftovers remained in other folders like ~Library/C:

However, some users fail to uninstall NetBarrier X9 by Intego Installer or Mac Trash, because they find NetBarrier X9 in Mac:
- NetBarrier X9 cannot be dragged into Trash;
- NetBarrier X9 still in the Launchpad;
- Some files about NetBarrier X9 still found in my computer;
- …
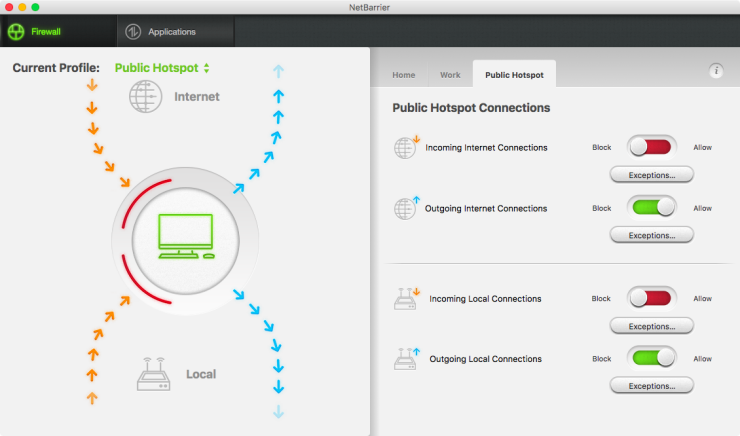
What can I do to completely uninstall NetBarrier X9?
Fast Uninstall NetBarrier X9 with Osx Uninstaller
If you have those problems, don’t worry, we will offer the fast way to quickly uninstall NetBarrier X9 from macOS and Mac OS X.
1. Download and install the OU package from the green button.
2. Follow the detail steps to completely remove NetBarrier X9:
Step 1: Easily find NetBarrier X9 for Mac and select it in the interface after launching OU, and then click the button “Run Analysis”;
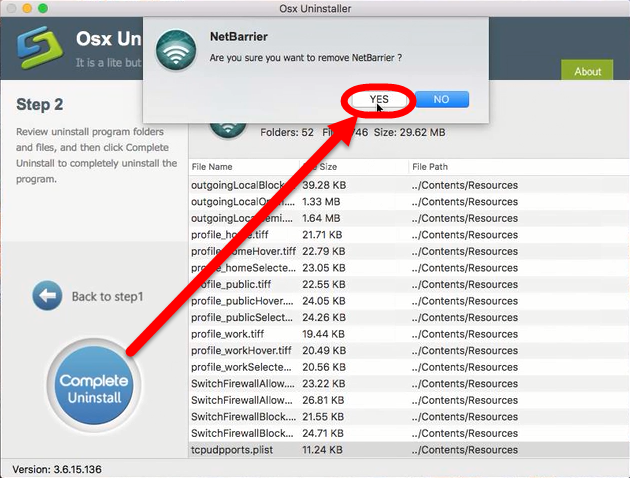
Step 2: Easily click on button Complete Uninstall to conduct the regular removal. Then click Yes to delete all leftovers scanned;
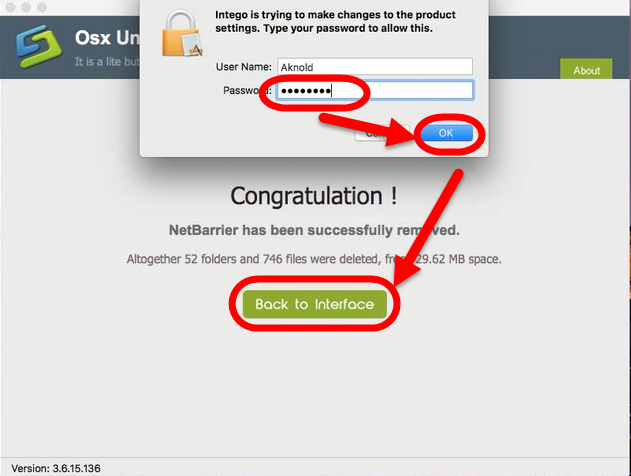
Step 3: Not in a second you will receive a congratulation massage in Step 3, which means you have successfully removed NetBarrier X9 from macOS system.
You can also learn more details and information to remove NetBarrier X9 by this video tutorial:
Is it easy for you to operate the removal process to completely uninstall NetBarrier X9 from Mac computer? Anyway, if have trpuble during the removal, leave the comment bellow, we will answer you as quickly as we can. More Intego products uninstall support please wait to update, or type the key word Intego in the search box to check out exist stories at present.


 $29.95/lifetime