SOLVED: How Should I fully Remove TeamSpeak 3 Client in Mac OS X?
I have been running a TeamSpeak 3 Client now for a while and I wonder how do I do the fully remove it? Which files are created during installation? Please help me to fully remove TeamSpeak 3 Client for Mac?

That question was from gunnarflax, a user of TeamSpeak 3 Client in macOS, clearly, he couldn’t uninstall TeamSpeak 3 Client for Mac from computer, if you like him getting trouble to eliminate TeamSpeak 3 Client from macOS, don’t worry, this page will offer detailed removal guides to help truly remove it.
Introduction of TeamSpeak 3 Client
TeamSpeak is your ideal voice and text chat app for online gaming, education and training, internal business communication, and staying in touch with friends and family.
Method I: Quickly Remove TeamSpeak 3 Client for Mac with Easier Helper
Firstly, if you’d like to get rid of this app in quite fast time, then you might take a look on the fast way to remove TeamSpeak 3 Client with the help of automatic tool—Osx Uninstaller is worked for all kinds of installed applications in macOS and Mac OS X, follow the removal guide to uninstall TeamSpeak 3 Client now step by step as follow:
Step 1. Quit process of TeamSpeak 3 Client from Running
Different choices you can do to completely end process of TeamSpeak 3 Client from macOS as bellow:
a. Right click the TeamSpeak 3 Client icon on Dock, and then choose Quit option;
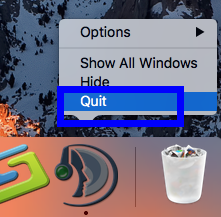
When you quit TeamSpeak 3 Client from Dock, but it is still working in background as the matter of fact, so try b or c.
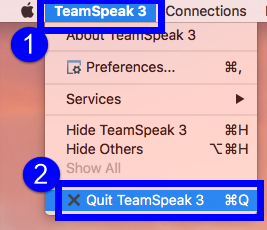
b. Click the setup on the top left corner near Apple icon, and choose Quit TeamSpeak 3 Client option (press Command +Q)
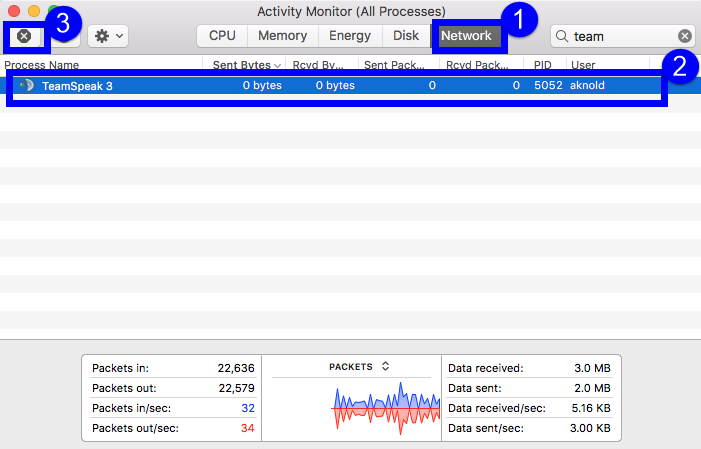
c. Click Finder on Dock, then launch Application folder, select Activity Monitor. Click the Network button, select all running process of TeamSpeak 3 Client for Mac, then click X on the left, hit Quit to confirm the exit.
d. If a, b, c didn’t work, then try force quit window by pressing shortcuts of Command-Option-Esc.
Step 2. Download Osx Uninstaller and install successfully on Your Mac
Step 3. Fast & Quickly Remove TeamSpeak 3 Client for Mac (three steps)
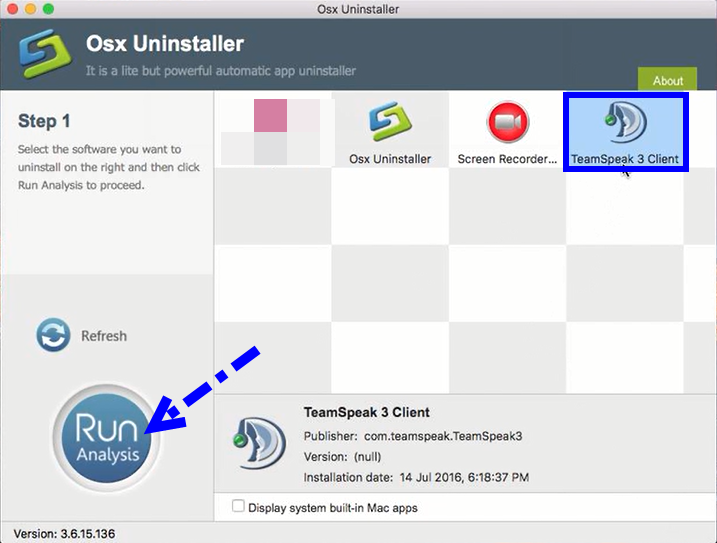
1. After launching OU, easily find TeamSpeak 3 Client for Mac and select it, and then click the button “Run Analysis” on the lower left;
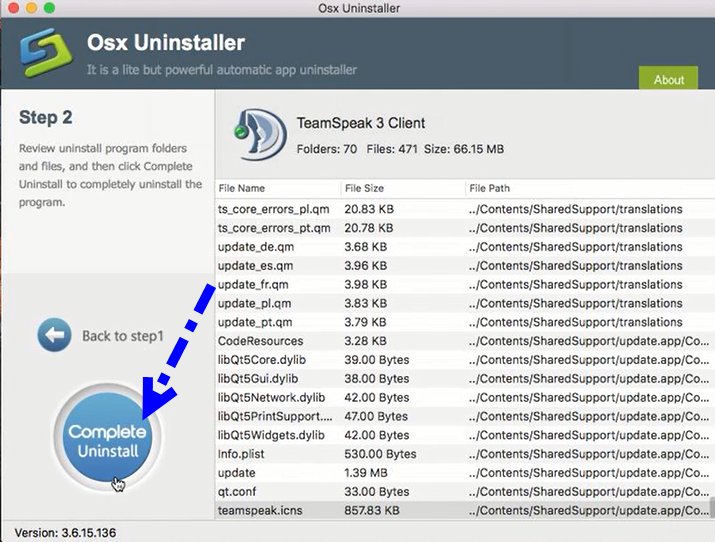
2. Easily click on button Complete Uninstall to conduct the regular removal. Then click Yes to delete all leftovers scanned;
3. Then the tool will delete all leftovers of TeamSpeak 3 Client just as it had scanned in step 2, you will receive a congratulation massage.
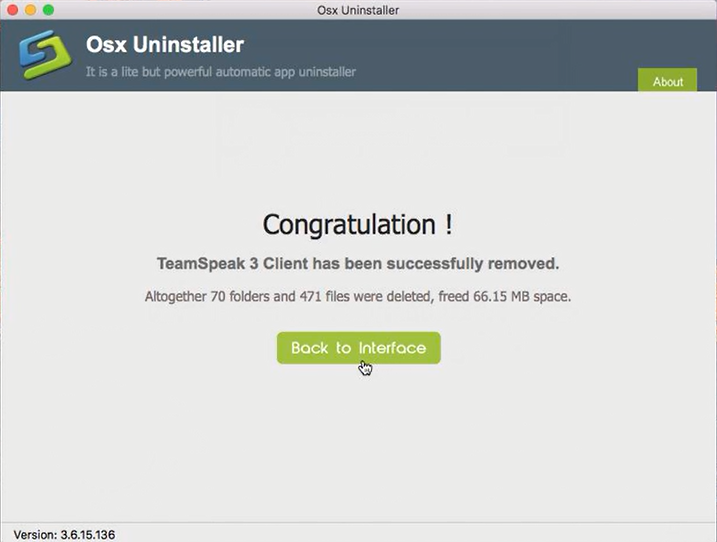
Congratulations, now you have successfully removed TeamSpeak 3 Client in your Mac computer, exit the uninstaller, and then restart your Mac to let the changes take effect.
You can also watch the whole removal process with easier helper in bellow video to learn more details:
Subscribe OU Channel to watch more software removal videos
Take Simple Steps to Uninstall PureVPN for Mac
Completely Remove & Uninstall Garmin Express for Mac, Uninstall Mac Applications
Method II: Uninstall TeamSpeak 3 for Mac Manually
In case you don’t know, Mac OS X Trash function could help you remove the main executable file of TeamSpeak 3. It is an effective way to Remove TeamSpeak 3 Client from the Mac but you still need to finish more things.
Step 1. Quit process of TeamSpeak 3 Client from Running
Seam as method I, you need to close down TeamSpeak 3 and terminate all processes of it in order to make the uninstall procedure run smoothly. Repeat the seam steps to turn down TeamSpeak 3 Client.
Step 2. Remove TeamSpeak 3 icon to the Trash
To uninstall TeamSpeak 3 on your Mac, you can simply open the Applications folder and locate TeamSpeak 3. Once you have located TeamSpeak 3 in the Applications folder, you can drag it to your Trash in order to complete the removal.
- Click the Finder icon on Dock and open a Finder window
- Click Application on the left panel;
- Click the TeamSpeak 3 Client in the interface;
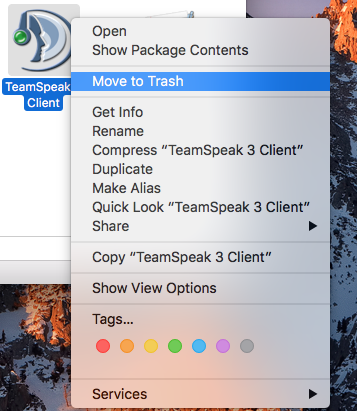
- Drag it straightly into Trash;

- Or right-click it and choose “Move to Trash”;
Step 3. Clean up Leftovers to Uninstall TeamSpeak 3 Client Completely
Like gunnarflax asked “Which files are created during installation?”, as the matter of fact, for instance, TeamSpeak 3 will generate lots of associated files, including caches, plugins, binaries, library, preferences, Dock icon, saved states, etc, all of them could be called additional files. Generally, the leftovers are located in these three folders ( /Library/Preferences/, /Library/Application Support/ /Library/Caches/ ) then you need to find them out and clean up the associated files of the application you just removed previously.
- Click “Go” menu at the top of the screen and select “Go to Folder”;
- Type “~Library” in the box to launch library interface;
- Open “Preferences” folder and then search the related files of TeamSpeak 3 Client;
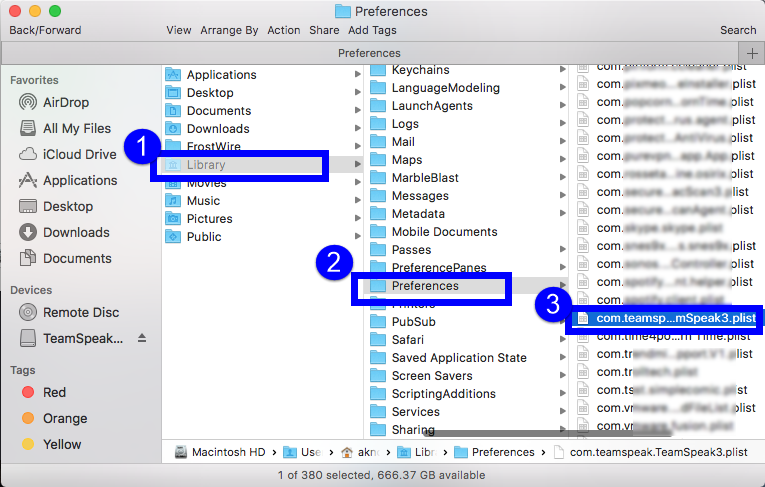
- Remove all files you find out in this folder to the Trash directly.
- Turn back to “Library” folder, repeat the seam steps in “Caches” folder;
- “Application Support” folder;
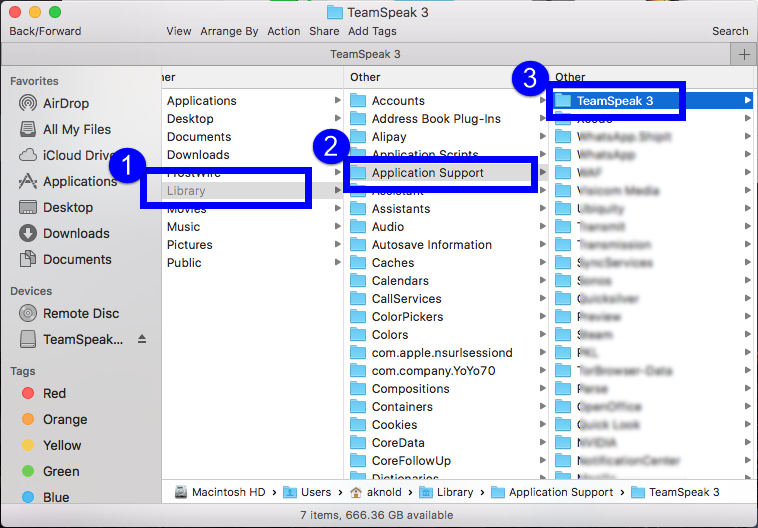
- Clean up the caches of TeamSpeak 3 Client;
- Delete the supported files associated with the application;
- Once it finished, Empty the Trash and restart your Mac let the changes take effect.
After all, take care when you clean up the leftovers of TeamSpeak 3 Client in the Library folder, or you will rather cause damage to the app or the computer in the later using. Choose one that fit your situation best to fully remove TeamSpeak 3 Client now, hope it helps you out of the trouble, see you in the next one.
 $29.95/lifetime