How to Totally Uninstall CyberDuck for Mac
Have no idea how to uninstall CyberDuck on your Mac? Check out this tutorial.
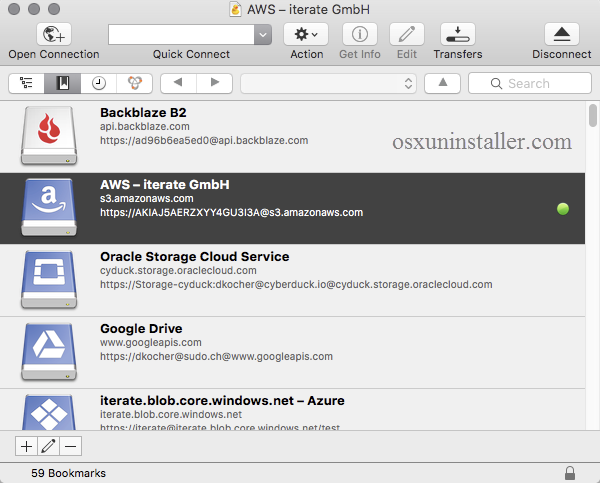
CyberDuck for Mac is an open source client for FTP and SFTP, WebDAV, OpenStack Swift, Google Drive and Amazon S3. It includes a bookmark manager, and supports Many OS X core system technologies such as Spotlight, Bonjour and the Keychain. If you need to regularly upload and download files from multiple servers, CyberDuck works as a free FTP client to handle almost all FTP transfers.
But what if you want to uninstall CyberDuck from your Mac? Once installed, CyberDuck is integrated well with your Mac, and over time it may creates bulks of files stored deep in your system. How can you get rid of unwanted app without hassle? This tutorial provides two different solutions to help you remove CyberDuck.

Easily & Quickly Remove CyberDuck via Osx Uninstaller
Wonder if there is any one-stop solution to help remove any unwanted Mac app? If you desire to uninstall CyberDuck effortlessly, then try this reputable uninstall helper. Osx Uninstaller is specially designed for both novices and experienced users to perfectly remove any problematic, stubborn or malicious apps. Wanna fully uninstall CyberDuck? What you need to do is quite simple: launch > select > uninstall.
Watch the clip to experience how it works to help you perfectly uninstall CyberDuck.
So here are the 4 simple steps you can follow to fully uninstall CyberDuck on Mac:
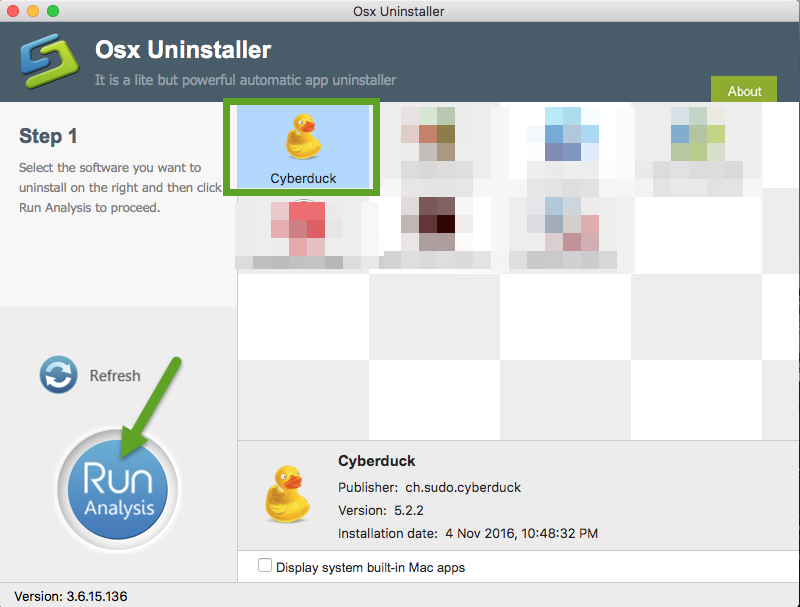
1. (Force) quit CyberDuck if it is running, and run Osx Uninstaller from Launchpad.
2. Click CyberDuck on the interface, and click Run Analysis to scan its components.
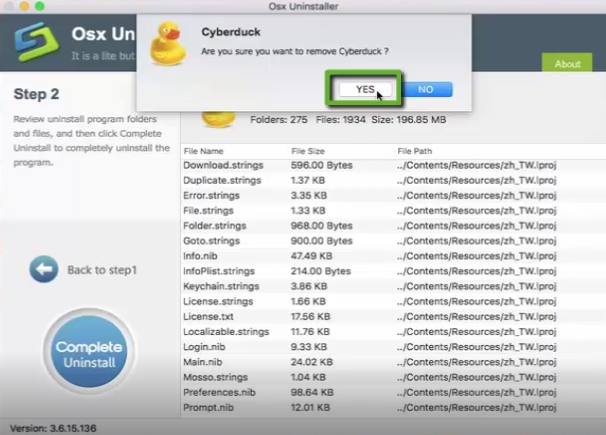
3. Review the components pertaining to CyberDuck, click Complete Uninstall button, and then click Yes in the pop-up dialog box to perform a thorough uninstall.
4. Once the removal is complete, click Back to Interface button to re-scan your Mac.
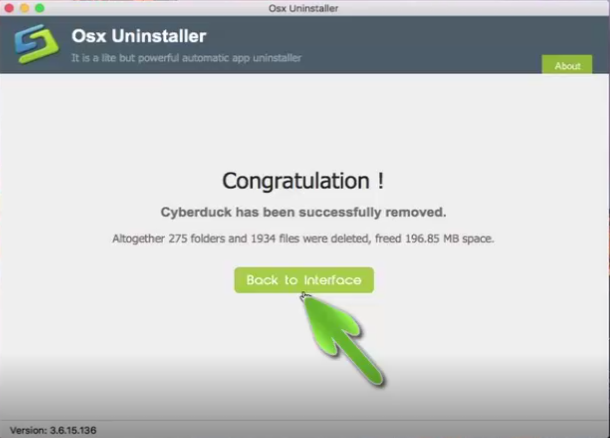
Generally, CyberDuck should have disappeared from the interface, as well as your Mac system. Uninstalling CyberDuck via Osx Uninstaller turns out to be incredibly simple and swift. It makes app removal an absolute breeze and totally hassle-free.
Don’t hesitate to give Osx Uninstaller a try and you’ll love the convenience it brings.
Manual Way to Uninstall CyberDuck from Your Mac
To uninstall CyberDuck using Osx Uninstaller is time-saving and trouble-free. But if you prefer to uninstall CyberDuck without this handy tool, we also offer the detailed instructions to guide you through the CyberDuck removal process. Let’s begin now.
Step 1. force quit CyberDuck
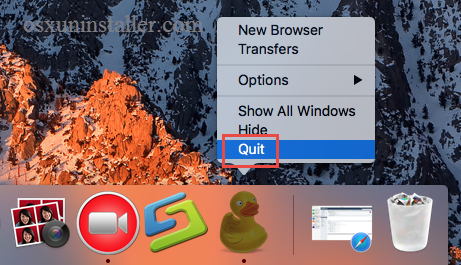
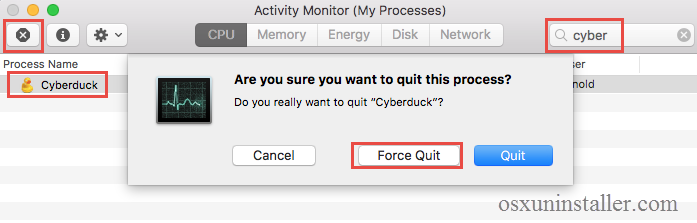
Prior to the uninstall, you are supposed to deactivate all the processes related to CyberDuck, or else you might fail to thoroughly get rid of all its components. In our test, if CyberDuck appears on the Dock, you may fail to quit this app by right-clicking on its icon and choosing Quit option. To properly quite CyberDuck, do the followings:
- Type Activity Monitor in the Spotlight, and click to open up this application.
- Type CyberDuck in the search box, click to select the process with the name of CyberDuck in the list, and click the Quit Process icon in the left corner of the window.
- Click Quit in the pop-up dialog box, and if that doesn’t work, then try Force Quit.
Step 2. uninstall CyberDuck
Make sure that you have logged into your Mac with an administrator account, and you might be asked for a password again when you try to delete something in the Finder.
(1) Delete CyberDuck in Launchpad
- Click the Launchpad icon on the Dock, and type CyberDuck in the search box.
- Hold on CyberDuck icon until the icon begins to wiggle and shows the “X” .
- Tap the “X” in the left top corner to remove CyberDuck from there.

This way works for the apps which are downloaded and installed via the App Store. Once you click the X icon, the app will be uninstalled instantly from your Mac.
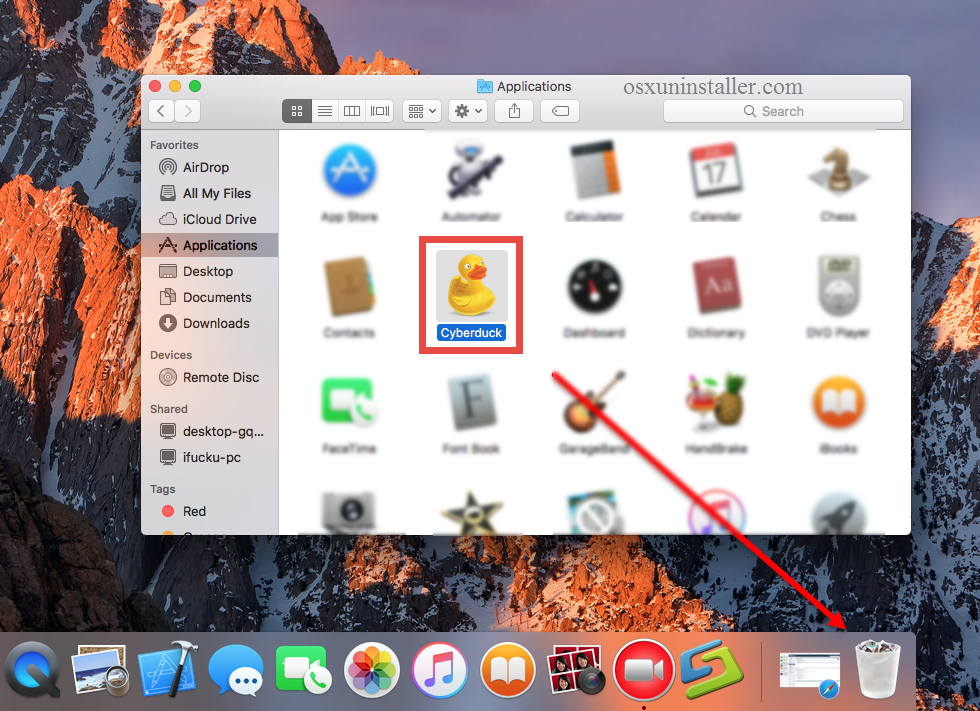
(2) Drag CyberDuck to the Trash
- Open the Finder and head to the Applications folder on the left panel.
- Drag CyberDuck to the Trash in the dock (or click it and press Cmd + Del).
- Right click the Trash icon on the dock, and choose Empty Trash option.
Notice: the act of emptying the Trash is irrevocable, and everything in the Trash will be deleted immediately, so be cautious when you are emptying your Trash.
This is the most common method to uninstall apps in all versions of Mac OS X. In most cases it can smoothly remove the app you choose from sight. If you fail to drag the app to the trash, try to reboot your Mac into Safe Mode and uninstall it again.
Step 3. detect CyberDuck leftovers
Even though you have successfully removed CyberDuck from the Applications folder /Launchpad, many of its components are not fully deleted yet. As we mentioned before, CyberDuck creates preference, cache and support files during the first setup and daily usage. Those items remains on the system after the standard uninstallation. If you decide not to use CyberDuck, you’d better clear up all its invalid components, to take back the disk space which may reach to several hundred megabytes.
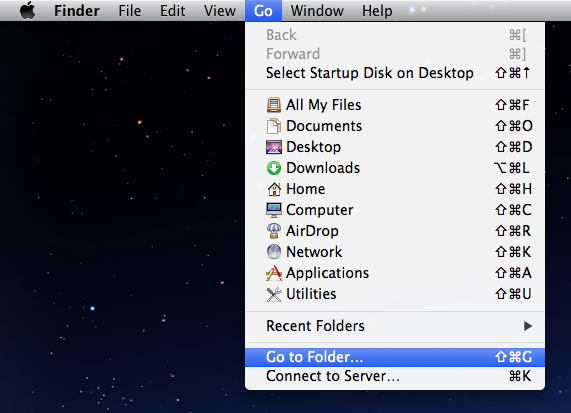
- Open the Finder, click the “Go” from the Menu Bar, select the entry: Go to Folder…
- Type the path of the current user’s Library Folder: /Library, and hit Enter key.
- Type the name of target app or its vendor in the Search Bar, and click on “Library”.
- Identify the matched items, right click on them and choose Move to Trash option.
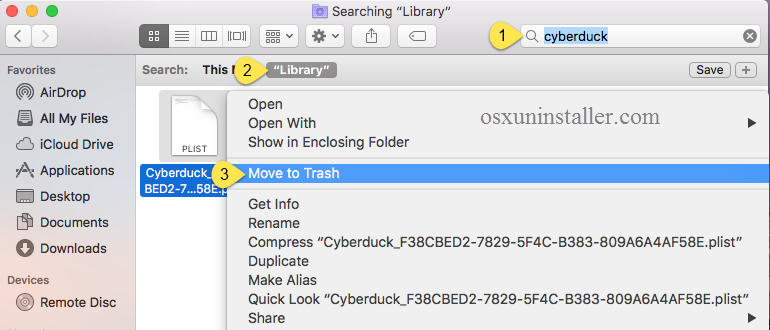
- Meanwhile, locate and delete the associated items in the folder ~/Library.

If there are some hidden files you fail to locate or identify, do a web search about the app components. Besides, you can utilize the Terminal app (located in Utilities folder) to list the contents of the directory in question and then delete the offending items.
Step 4. empty the Trash (with caution)
After you moved all associated items to the Trash, the last thing is to empty the Trash. Again, make sure you haven’t mistakenly delete anything before emptying the Trash.
- Right click on the Trash icon in the dock.
- Choose Empty Trash and click OK in the pop-up dialog.

- Alternatively, you can empty the Trash by choosing the Empty Trash under the Finder menu.
- In case you cannot empty the Trash, reboot your Mac and do it again.
So that’s the end for manually uninstalling CyberDuck. If you manage to detect all its lingering components, CyberDuck should be effectively deleted from your Mac. Yet, many users fail to locate all the items pertaining to CyberDuck. If you still cannot fully uninstall CyberDuck, we recommend you to utilize Osx Uninstaller to handle this task.
Anytime you run into issues when uninstalling CyberDuck via Osx Uninstaller, please contact our support team, and our technical experts will reply you within 24 hours.
Related Removal Tutorials:
Uninstall NetSpot for Mac – How to Remove NetSpot
Removal Guides – Uninstall Folx on Mac with Osx Uninstaller
 $29.95/lifetime