Share Four Tips for Removing FUSE on Mac
“I just found the app labeled FUSE on my Mac but I don’t know what it is nor remember why and when I installed that. Is it OK if I remove this app from the Applications folder as I don’t need it? Is there a way to check if it has gone forever?”
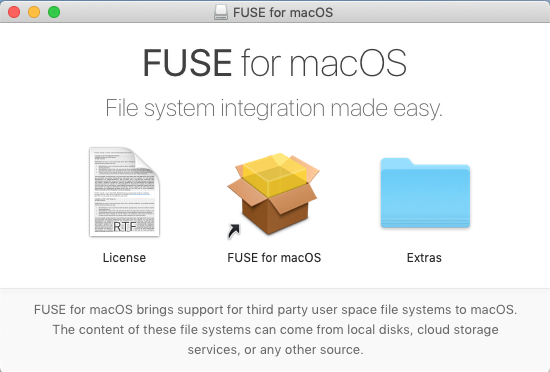
About the app: Formerly known as MacFuse, FUSE is a filesystem extension that allows you to read (and maybe write) disks that are formatted in non offical formats. The latest stable release is Fuse 3.9.0, which supports Mac OS X 10.5 and later.
How can you completely uninstall FUSE on your Mac? You may think about this question when you installed the incompatible version or plan to switch to another software for better support. If you are not satisfied with a simply deletion in the Applications folder, read through this post to learn four tips for uninstalling FUSE.
Tip 1: what to do before you start the uninstall?
Some Mac novices may often neglect a point that, an app must be quit before you try to uninstall it, otherwise you will not be able to uninstall it from the Applications folder. There are multiple ways of (force) quitting an open app in macOS / Mac OS X:
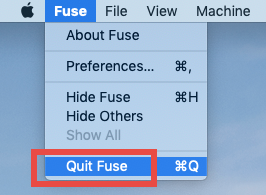
- (1) Right click on the app icon in the Dock and choose Quit;
- (2) Find the app icon in the top menu bar, click on it and choose Quit [app name];
- (3) Launch Activity Monitor in Dock, type the app name in the search box, select the process, click X button on the upper left corner, and click Quit in the pop-up dialog;
- (4) Press Command – Option – ESC(Escape) to bring up the Force Quit Applications window, select the app you want to stop running, and click Force Quit button
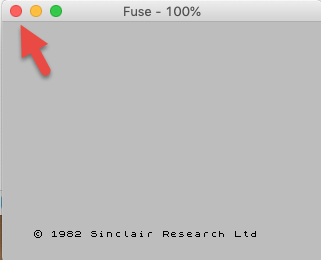
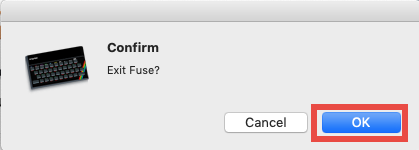
Besides, in the latest version of macOS, the app will stay in Dock if you recently open it up. You can right click on FUSE in Dock and choose Options > Remove from Dock. After doing those preparation works, you can start the standard uninstall.
Tip 2: how can you manually uninstall FUSE?
Generally, you can uninstall an app by deleting it in the Applications folder and Trash. That works in all version of Mac system, and here are the detailed steps to follow:
- Click Finder icon in Dock, and click Applications from the sidebar or the Go menu
- Locate FUSE in the folder, right click the icon and choose Move to Trash (alternatively, drag the app icon toward the Trash in Dock and drop it into the Trash)
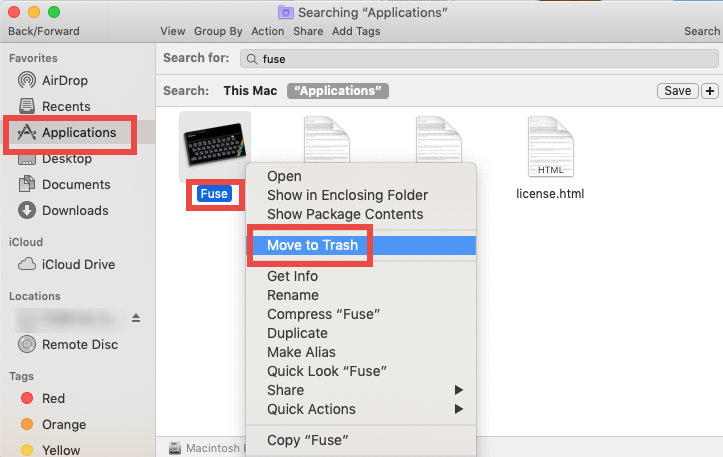
- Choose Empty Trash from Finder menu (or right click on Trash in Dock and choose Empty Trash), and then click Empty Trash button in the pop-up confirmation window
Note that the act of emptying the Trash is irrevocable. If there are other items in the Trash, you can delete FUSE individually there to avoid unnecessary risk. To do so, right click on its icon in Trash, choose Delete Immediately, and click Delete button.
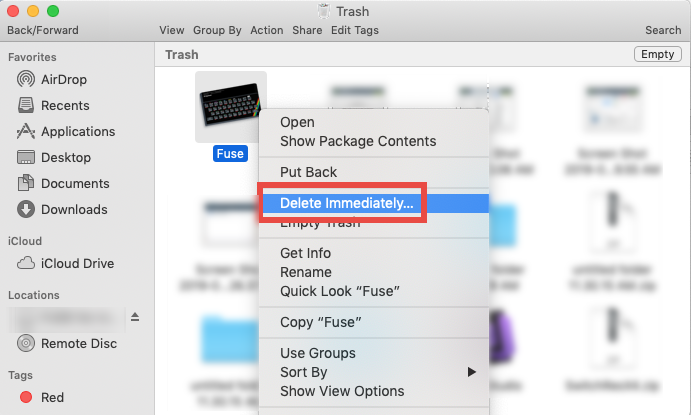
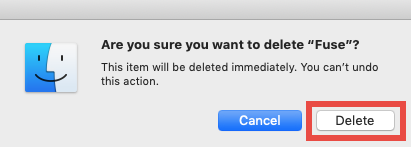
Besides, you can head to the System Preferences pane, and check if FUSE exists there. If so, click the Remove FUSE button in FUSE pane to start the removal of this utility.
What if Fuse is not in the Applications folder or System Preferences pane but you do see its traces on your Mac? How to get rid of FUSE in this case? The solution is to make use of the Uninstaller app stored in the FUSE.dmg file to perform the removal.
- Download the FUSE.dmg file from the official site, and open it up on your Mac
- Double click to open up the Extra folder in the file, and then run Uninstaller app
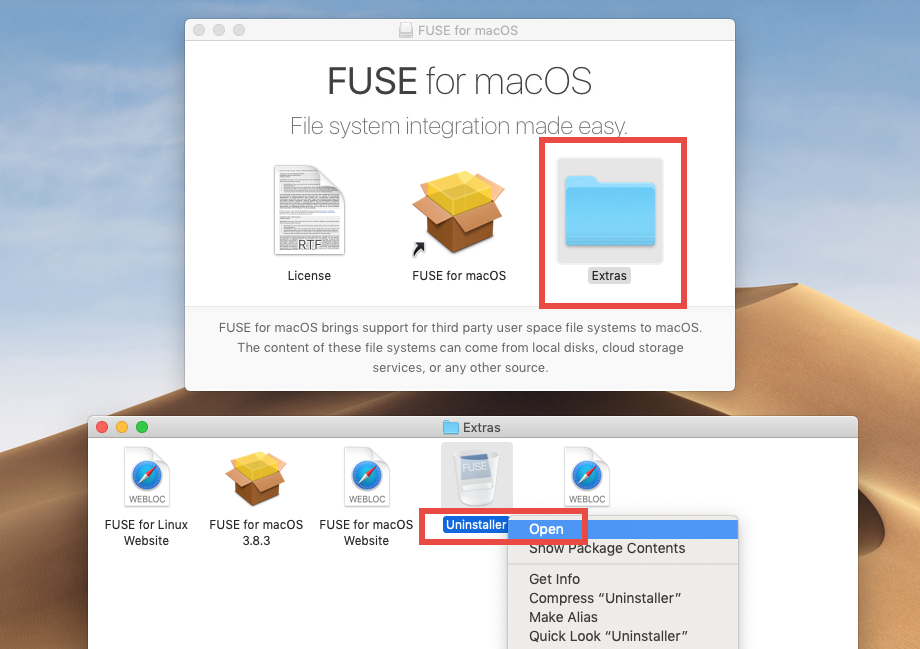
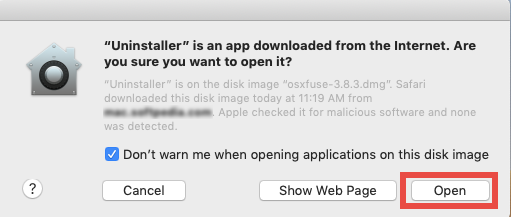
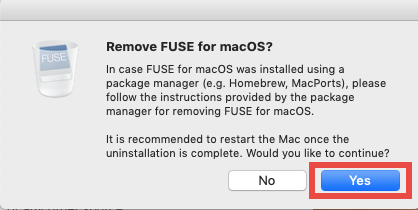
- Click Open button in the pop-up window, and then click Yes button afterwards
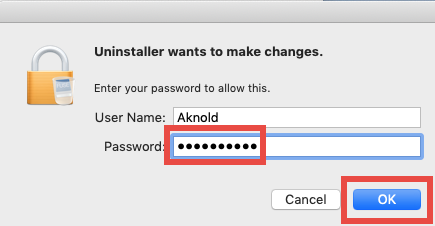
- When prompted, enter your password and click OK button to execute the removal
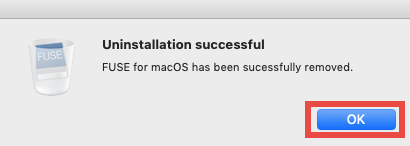
- Click OK when the uninstallation completes, and then reboot your Mac if necessary
After removing FUSE the app itself, what else do you need to do? Continue reading.
Tip 3: how to thoroughly clean up FUSE traces?
Just like some users have reported that, there still exist some files pertaining to FUSE even you have used the built-in uninstaller to remove this app. To clean out the app leftovers from the whole system, you can conduct a manual deletion via the Finder.
- In an active Finder window, choose Go > Go to Folder from the menu bar
- Type ~/Library in the box, and click Go button to access to the hidden folder

- Click Search in the upper right corner of the window, type FUSE in the search bar
- As the search result appears, locate the items that contain the keyword in their names, control-select them all, right click on any of them, and choose Move to Trash
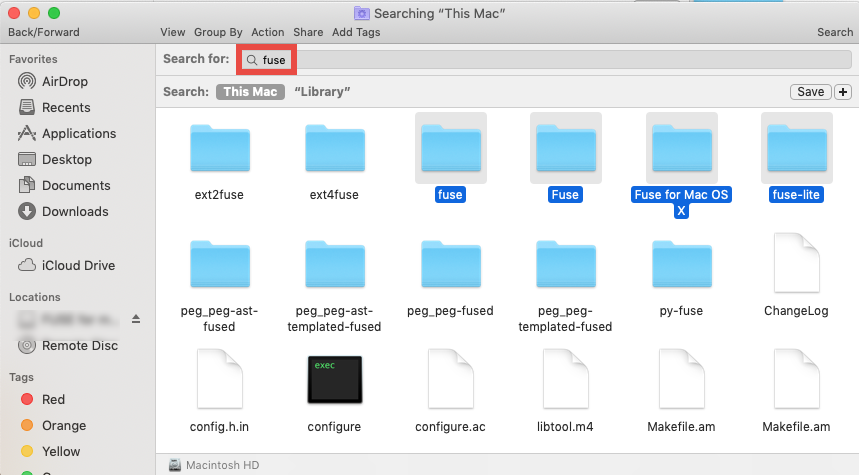
- Click Library under the search box, and delete matched items in this folder
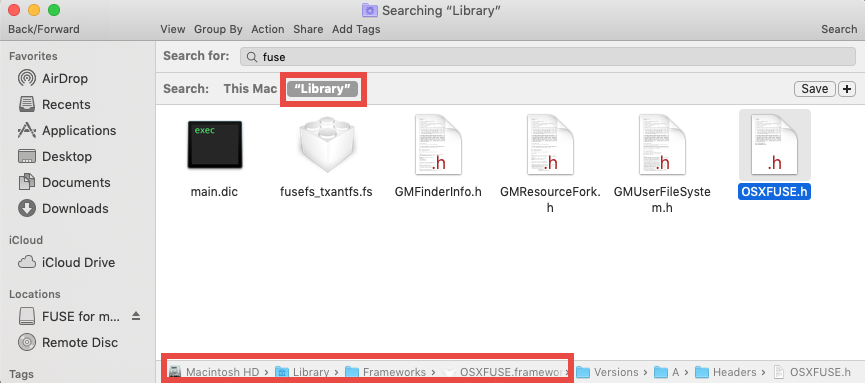
- Again, search for and delete FUSE-related items in the /Library folder
Important: don’t touch anything that are irrelevant to FUSE. Mistakenly deleting other unrelated items might affect the normal use of other apps or even the system. After deleting FUSE-related items into Trash, you could leave them there for a few days, thus you can still reverse the change if your system or some apps function abnormal.
Tip 4: what is the better way to remove FUSE?
When you are trying to remove a bunch of unwanted apps, you will have to repeat the aforementioned steps again and again, which is quit troublesome and time-consuming. Is there a hassle-free way to do this job? Here we would recommend you to utilize a professional removal utility, like Osx Uninstaller, thus you can free up your hands.
To start with, click the button below to download Osx Uninstaller, install it on your Mac, then launch it and follow the onscreen prompts to complete the registration.
After that, you will be able to uninstall FUSE and other apps by three simple steps:
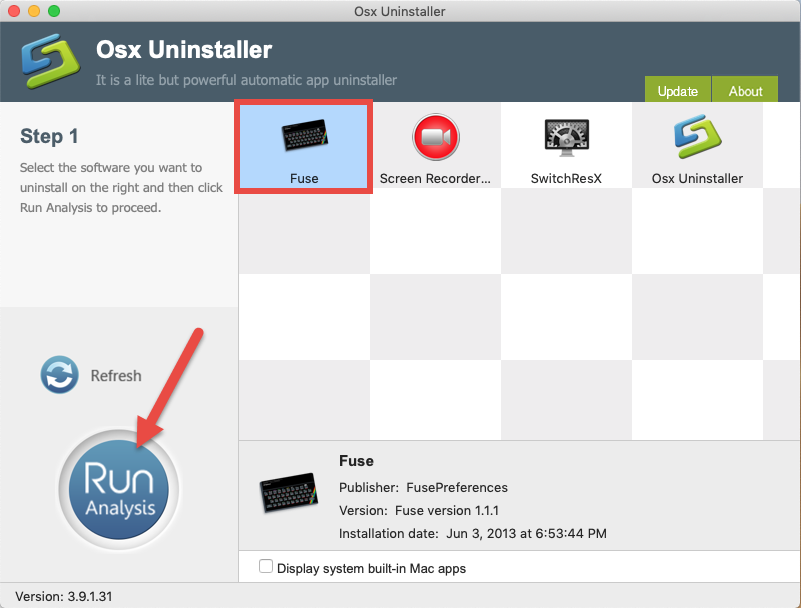
Step 1. Select FUSE (or any unwanted app) in the interface, and click Run Analysis
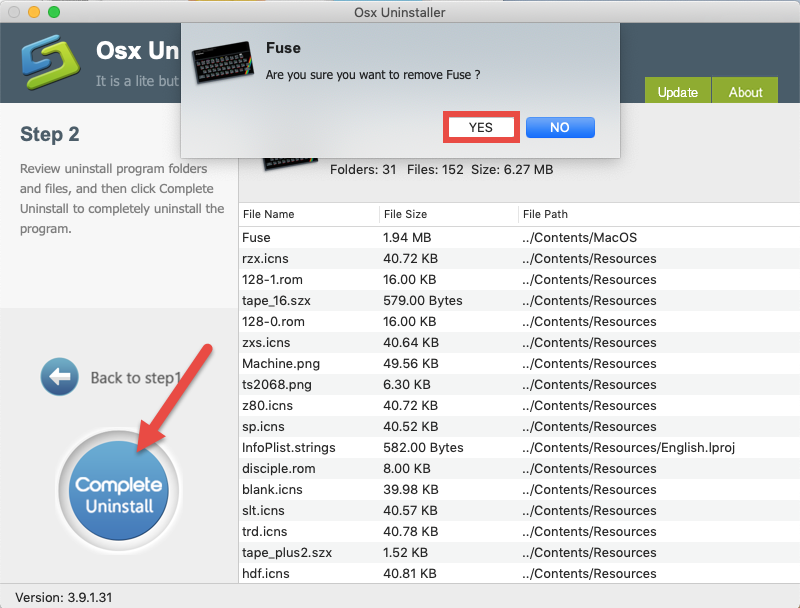
Step 2. Click Complete Uninstall button, and click Yes in the confirmation dialog
Step 3. Click Back to Interface to re-scan your Mac, and then quit Osx Uninstaller
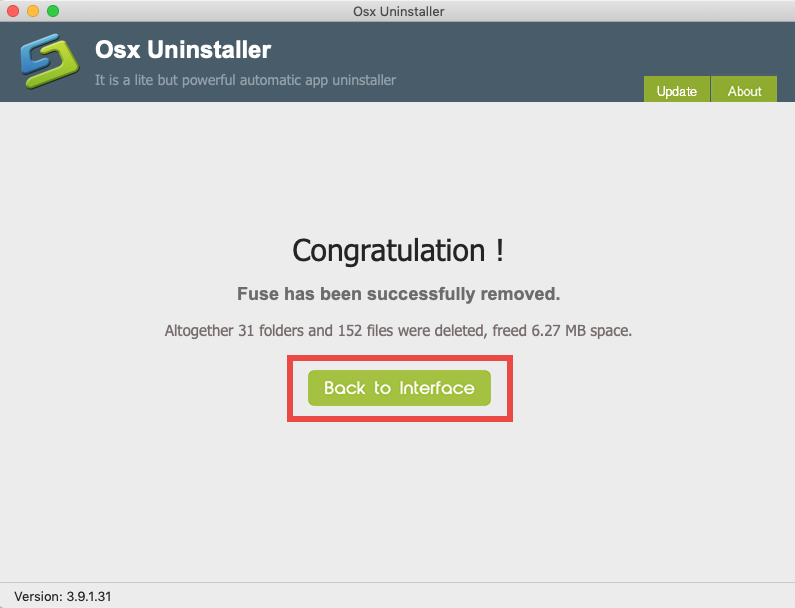
See? The whole process lasts less than one minute and all components of FUSE have been easily removed from your Mac. Compared with the manual removal discussed in the former section, this approach is undoubtedly more efficient and time-saving.
Which option will you prefer to choose? Contact us if you need further assistance.
Related link:
How to Uninstall Tuxera NTFS for Mac Effectively
Follow Proper Steps to Uninstall NTFS-3G for Mac


 $29.95/lifetime