How Can I Fully Uninstall Viber for Mac (Solved)
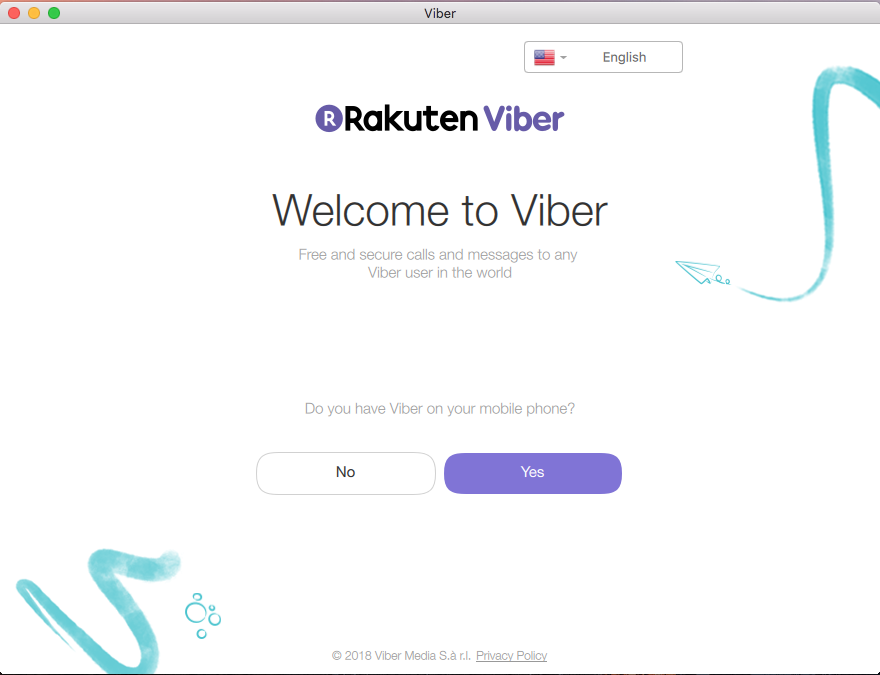
Viber stops working on your Mac? Wondering how to thoroughly uninstall Viber for a fresh installation? You can surely delete it in the Applications folder to perform the removal, but some of components may remain and cause problems on your Mac. If you wish to have a clean uninstall, read through this post to learn the proper ways.
In the following we will show you two different ways of uninstalling Viber for Mac. You can either take manual steps to delete Viber and its leftover, or instead, run a professional tool like Osx Uninstaller, if you prefer to save time or avoid troubles.
Conventional Means to Uninstall Viber from Mac
To delete all traces of Viber created on your Mac, you will go through three stages:
Step 1. Deactivate Viber
Prior to the uninstall, you should go to check if the app is running or not. If Viber is in use, you will not be able to delete the app to the Trash.
- To quit running Viber, right click on Viber in Dock, and choose Quit Viber.
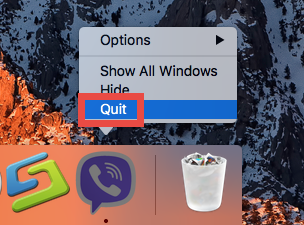
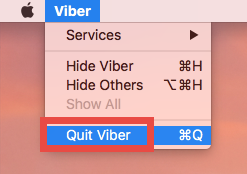
If the app is frozen or stop responding, you can press the Command – Option – Esx keystroke to activate the Quite Applications windows, then choose Viber in the list, click Force Quit button, and click Force Quit again in the pop-up dialog.
If you are not sure whether this app has been fully deactivated, do the followings:
- Open up Activity Monitor from Dock, via Launchpad or through Spotlight.
- Type Viber in search box, and select the process that contains the keyword.
- Click the X icon on the upper left corner, and click (Force) Quit in pop-up dialog.
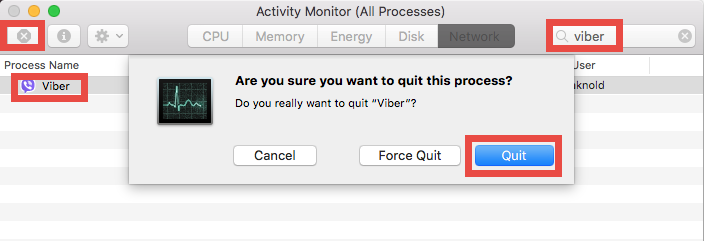
After that, you can go ahead to uninstall Viber through the /Applications folder.
Step 2. Uninstall Viber
Uninstalling Viber for Mac is quite simple as you only need to delete it from the Applications folder in Finder. Here are the detailed instructions you could follow:
- Open up Finder, and head to the /Applications folder from the sidebar.
- Locate and select Viber, drag its icon to the Trash in Dock, and drop it there. Alternative, you can right click on Viber and choose Move to Trash option.
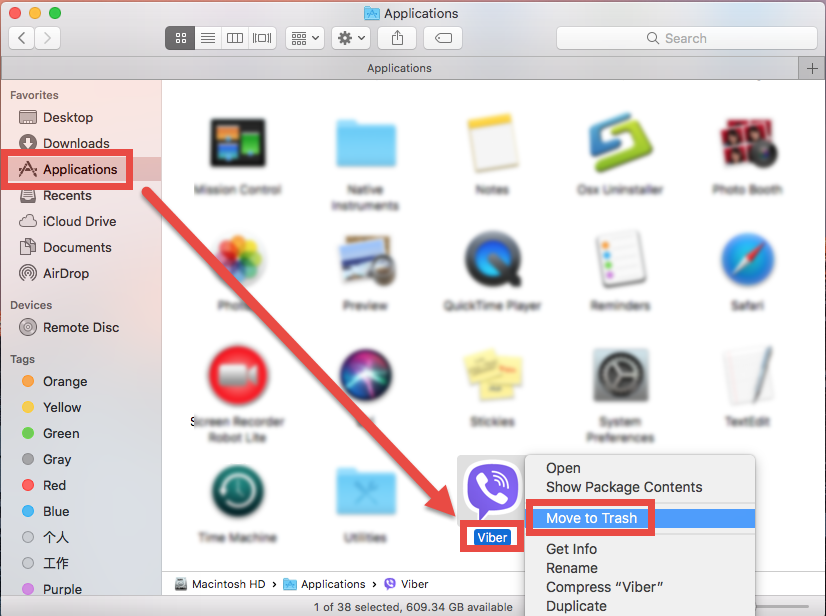
- Head to the Finder in the Menu Bar, and choose Empty Trash option.
Note that emptying the Trash will permanently remove all the items thrown inside. Before that, make sure that everything in Trash is no longer needed. To avoid any risk in this part, you can open up Trash and delete the Viber app alone there (right click on Viber, choose Delete Permanently, and click Delete in the pop-up dialog).
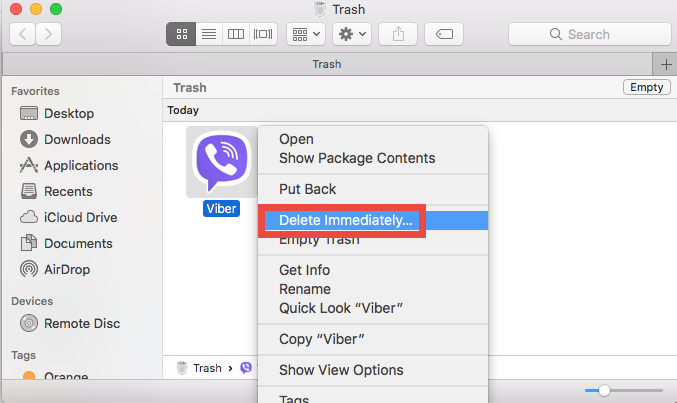
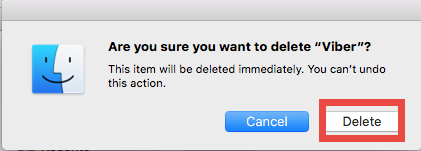
For the apps that get installed through the Mac App Store, you can also perform the uninstall through the Launchpad. Here’s how to uninstall an app via Launchpad:
- Head to the Launchpad, and search for Viber.
- Press and hold the app icon until it starts to jiggle.
- Click the X icon appearing in the upper left corner of the icon.
- Click Delete button in the pop-up dialog to confirm the uninstall.
So that’s how to remove Viber from your Mac. Now go ahead to the next stage.
3. Delete Viber leftovers
Typically, Viber will create some files/folders and store them inside the hidden ~Library folder, and those items will not disappear along with the deletion of the app. To hunt down and wipe off those app leftovers, follow the steps shown below:
- Open the Finder, head to the Go menu in Menu Bar, and choose Go to Folder.
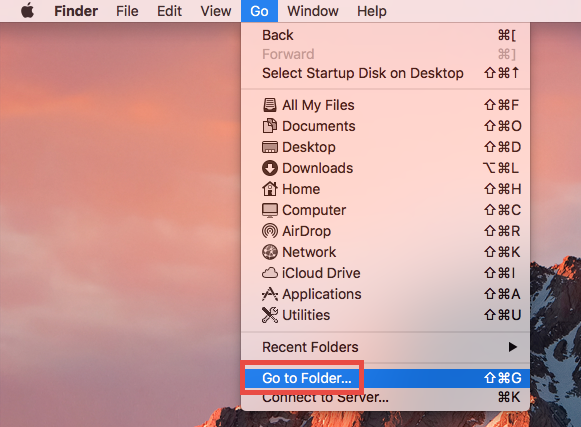
- Type ~/Library in the box that appears, and hit Enter key to open up the folder.

- Search for the items whose names contain Viber in the locations:
~/Library/Caches/, ~/Library/Preferences/, ~/Library/PreferencePanes/, ~/Library/ApplicationSupport/, ~/Library/LaunchAgents/, ~/Library/LaunchDaemons/, ~/Library/StartupItems/
Warning: Don’t rush to delete any file if you are not sure whether it belongs to Viber, as deleting unrelated items could affect other apps or even the system. You can move the suspicious files to the Desktop and see if your Mac works normally like before. If nothing bad happens, you can consider to delete those items from your Mac.
To locate Viber leftovers precisely, use the Search feature in Finder:
- In ~/Library, click Search in upper right corner, and type Viber in search bar.
- Click “Library” under the bar to show the result in the specific folder.
- Select the matched items in the search result, and delete them to the Trash.
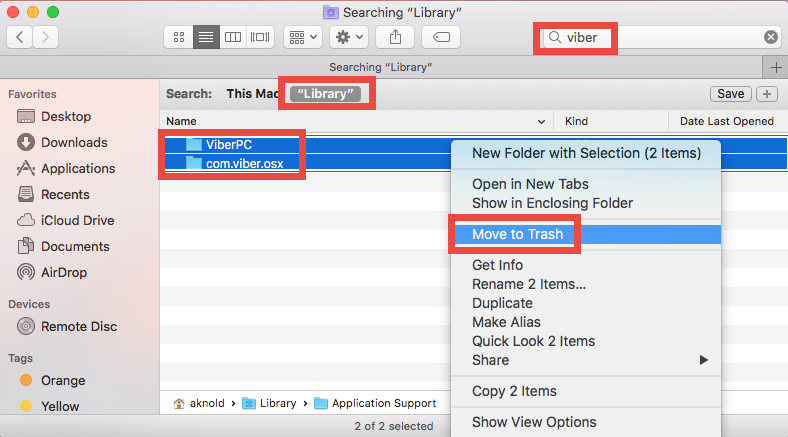
- After that, repeat the steps to delete any Viber leftover stored in Library folder.
- Finally, empty the Trash to permanently get rid of all Viber traces.
Now you should have removed all components of Viber from macOS/Mac OS X. If any uninstall issue persists, make sure you carry out the correct steps listed above. Or instead, you can adopt the hassle-free way below to achieve a perfect uninstall result.
One-Stop Solution to Uninstall Viber for Mac
Manually deleting unwanted apps may require much time, patience and skills. On the contrary, utilizing a professional uninstaller is an easy-to-operate option, especially for Mac beginners. The question is: which utility is suitable and powerful enough for all-level users? As a lightweight yet professional Mac remover, Osx Uninstaller stands out for its ability to remove all components of any Mac app within a few seconds.
Watch this video clip to know how to use Osx Uninstaller to easily remove Viber:
Here are the simple steps you can follow to fully remove all Viber-related items:
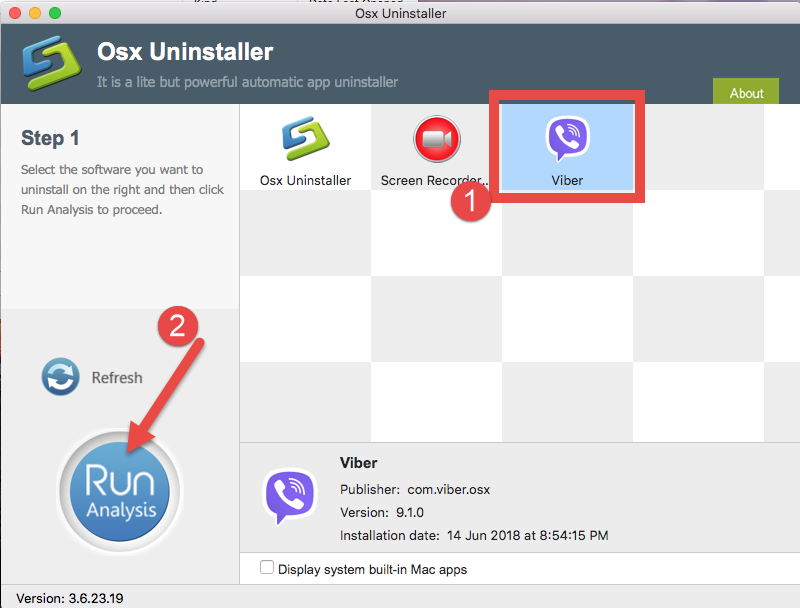
1. Launch Osx Uninstaller, select Viber and click Run Analysis button.
2. Click Complete Uninstall, and then click Yes to execute the uninstall.
3. Click on Back to Interface button to re-scan currently installed apps.
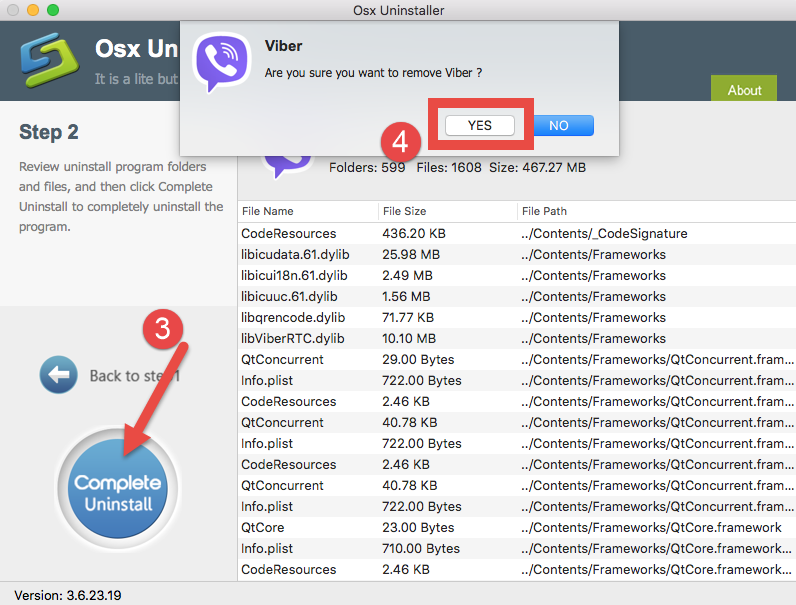
Quite impressive, right? Osx Uninstaller is featured with intuitive interface, streamlined process, and satisfactory uninstall result. With it in hand, you can skip those complicated steps like searching for app remnants. Give it a try now?
To sum up, this post shares the proper ways of uninstalling Viber and notes some tricks in performing a clean uninstallation. Which option do you prefer to use – the more time-saving, trouble-free one or the totally manual, money-free one? As a paid software which requires a valid license to perform the final uninstall, Osx Uninstaller also guarantees a full refund on condition that it fails to solve customer’s uninstall issues. If you don’t want to pay for it, the conventional uninstalling way work as well.


 $29.95/lifetime