How do I Uninstall Norton Security 2018 on my iMac? Removal Guides
Does Norton Security slow down your Mac’s performance? Are you looking for a proper way to uninstall it without any trouble? Whatever your reason to uninstall Norton Security on Mac, it is important to remove the software completely and correctly. And here’s how to do that!
Some users said using Mac Trash to remove Norton Security for Mac, does it work?
“After upgrading to OS X 10.8.1, I’ve decided to us Sophos instead of Norton Internet Security for Mac. Is it a simply drag to the trash from the application folder?”
The answer maybe not, dragging the Norton Security to trash is only half part of the whole procedure, you may need to delete its remained files and folders in hard drive of your iMac, too. Removing it manually will not remove all the files, and will result in half-uninstalled software that will cause other problems.
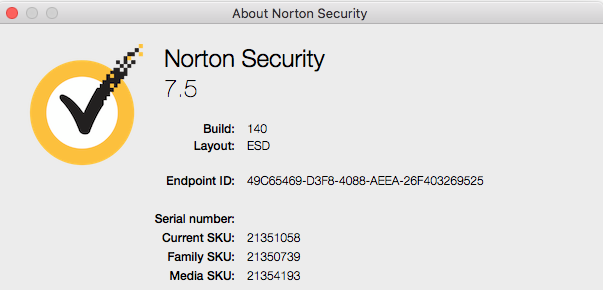
What is Norton Security?
Norton Security, developed by Symantec Corporation, is a cross-platform security suite that provides subscription-based real-time malware prevention and removal in addition to identity theft protection and performance tuning tools. Other features include a personal firewall, email spam filtering, and phishing protection. Released on September 23, 2014 as part of Symantec’s streamlined Norton line, it replaces the long-running Norton Internet Security as their flagship antivirus product.
How to Uninstall Norton Security manually?
Follow the removal guides to uninstall Norton Security from iMac step by step:
1.Shut down the app
Make sure you have shut down all process of Norton Security just in case anything happened to stop the removal.
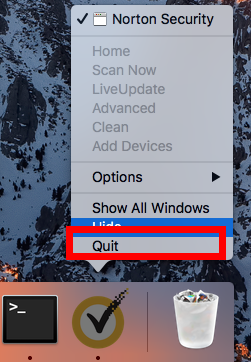
a. Right click the Norton Security, icon on Dock, and then choose Quit;
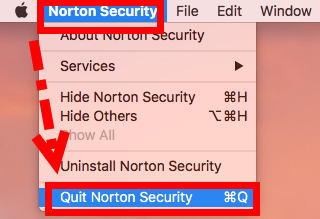
b. Click the setup on the top left corner near Apple icon, and choose Quit Norton Security (press Command +Q);
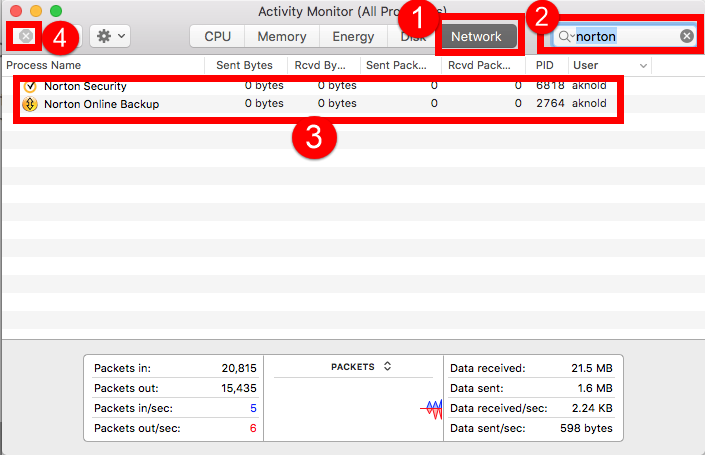
c. Negative Activity Monitor from Application >> Finder >> Dock, click the Network button, search the key word of Norton Security and then select all running process of Norton Security, then click X on the left, hit Quit to confirm the exit;
d. If a, b didn’t work, then try force quit window by pressing shortcuts of Command+ Option+ Esc. Select the Norton Security icon in the window and hit Force Quit.
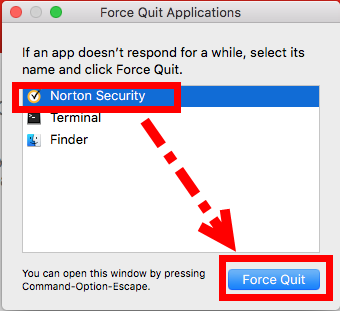
2. Drag Norton Security into Trash
Clearly, there is no uninstaller in Norton Security folder, so I guess you need to remove it by manual.
- Open Applications folder on the left of Dock;
- Find the Norton Security icon and click on it
- Hold and drag the icon to Trash;
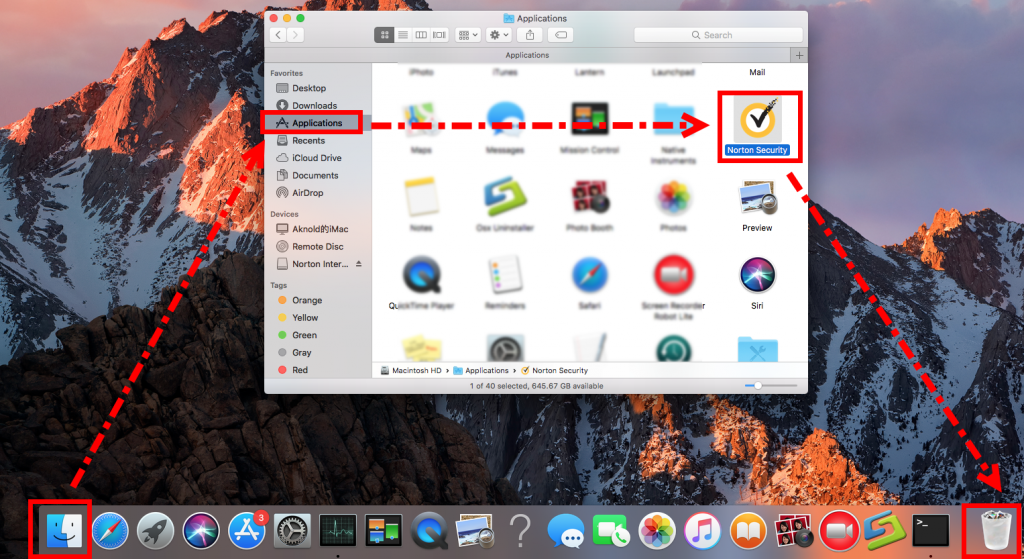
3. Delete the leftovers
Not finished yet, continue to remove Norton Security with all components and files/folders (leftovers), follow our guide to delete it step by step:
- Launch Finder, and choose the Go > Go to Folder from the Menu Bar.
- Type ~/Library in the Go to Folder box and hit Enter key to open it up.
- Next type the key word Norton Security in the search box of Library folder, select “Library”
- Then right click all the items in the list to Move to Trash
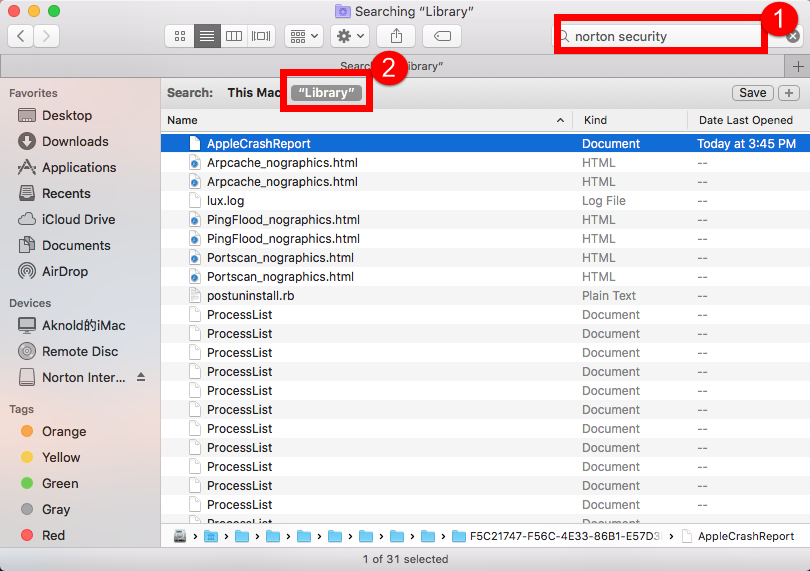
- You need also to check these three folders:
/Library/C
/Library/Application Support/;
/Library/ Preferences/
/Library/Caches
/Library/Logs
/Library/Cookies
/Library/Norton
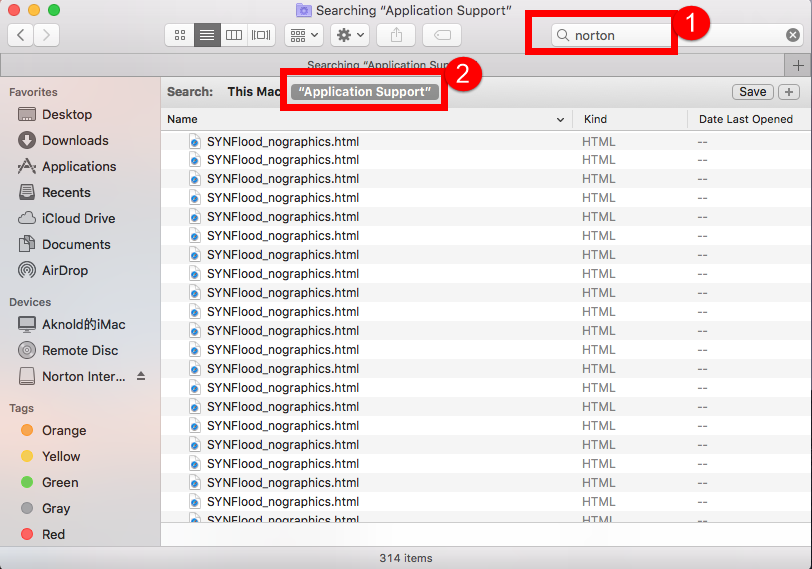
- Finally, after checking all those folders, right click on the Trash and Empty Trash.
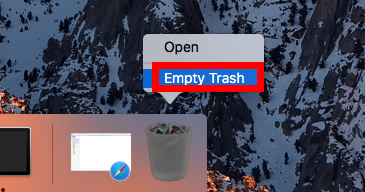
Warning: Better to back up the Library document before remove the trace of Norton Security in case you have deleted the wrong files.
How to Uninstall Norton Security with Automated Tool?
If the drag-and-drop cannot solve you trouble, or you think it’s not safe to delete the files in Library folder, then choose this useful third-party tool to completely uninstall Norton Security, with the help of it, you can easily remove unwanted apps in a few seconds with a couple of clicks.
- Download it from here or the green button above;
- Step 1.After install OU in your computer, run it and select Norton Security in the list of installed applications, then click the “Run Analysis” button;
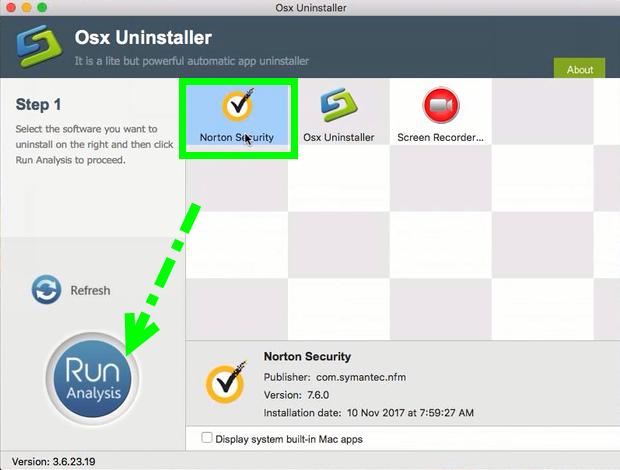
- Step 2.Then, the tool is just analysis fast the target app Norton Security as fast as you think, a few seconds later, click the button Complete Uninstall when all the related folders and flies appeared in the list;
- Step 3, last but not least, the tool will easily delete all the related folders and flies scanned in Step 2, now congratulation to you, Norton Security is gone from the list. Back to Step 1 to check whether it was gone or not by clicking Refresh button.
- Click Uninstall to continue the auto process removing, next type the password of your computer and hit enter, wait for a second to finish removal.

Congratulations, now Norton Security has gone both from the list and your iMac, learn more detailed steps in the bellow video tutorial:
Which one the best to uninstall?
I think you have the answer now which one you should choose to fast &fully uninstall Norton Security for Mac, if you have any question about removal guides, leave a comment bellow. See you in next one!
For more removal guides:


 $29.95/lifetime