Can’t Uninstall Macs Fan Control? Here’s A Solution
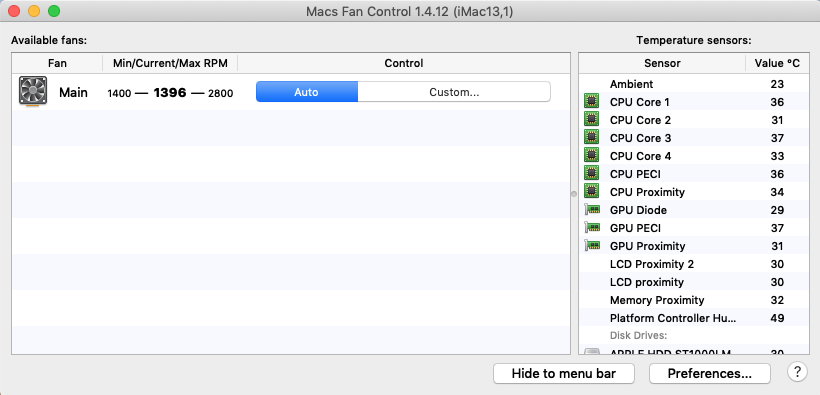
Macs Fan Control is a software tool that helps users to monitor and control the fans of their Mac computers. It can be easily installed on macOS, but when you want to uninstall Macs Fan Control, problems may occur, like, the app cannot be moved to Trash, or some files pertaining to Macs Fan Control still remain on the system.
If a complete, clean uninstall is what you desire, here are three steps you need to carry out: killing the app – deleting the app – removing app leftovers. We summarize four questions asked frequently on the Internet, and offers the solutions to figure them out.
Question 1: what should you do before the uninstall?
Typically, the most possible reason why users fail to trash an app is that the app is still active. If you encounter an error message saying that the app cannot be trashed, make sure to right click on the app icon that appears in the Dock and choose Quit option.
If the app does not appear in Dock, take either of the options to shut it down:
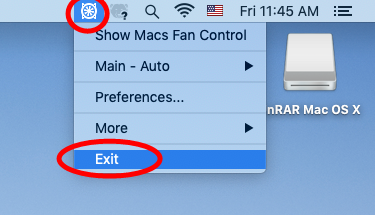
(1) Locate the app icon in the menu bar, click on it and choose Quit [app name];
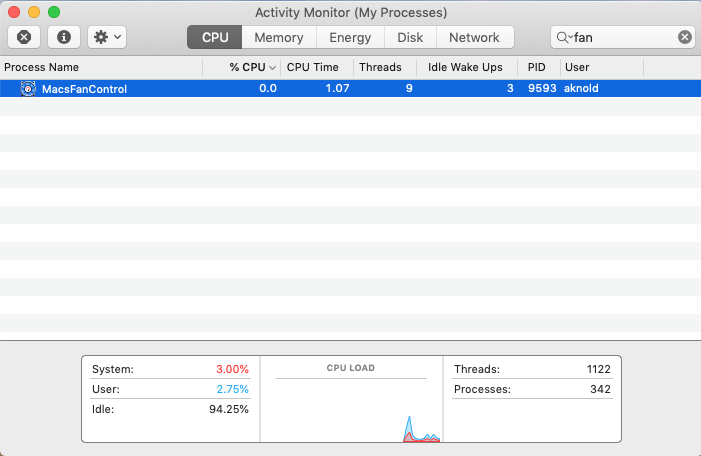
(2) Launch Activity Monitor in Dock, type the app name in the search box, select the process, click X button on the upper left corner, and click Quit in the pop-up dialog;
(3) Press Command – Option – ESC(Escape) to bring up the Force Quit Applications window, select the app you want to stop running, and click Force Quit button
Question 2: how to uninstall Macs Fan Control for Mac?
Like other third-party apps, Macs Fan Control can be easily removed by the basic trash-to-uninstall method. Here’s how to delete it from Applications folder and Trash:
- Click Finder in Dock, and click Applications from the sidebar to access to the folder
- Locate Macs Fan Control, right click the icon and choose Move to Trash. Alternatively, you can drag the app icon toward the Trash and drop it into the Trash
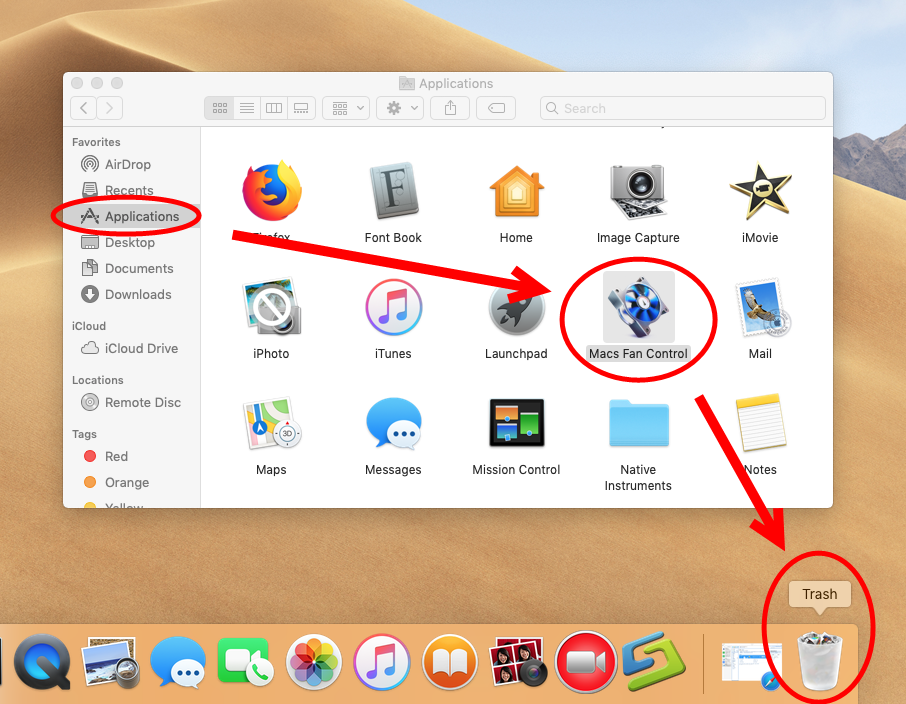
- Choose Empty Trash from the Finder menu (to delete anything thrown into Trash)
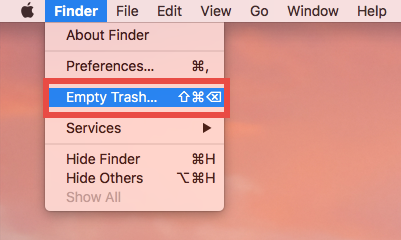
Note that the act of emptying the Trash is irrevocable, so make sure everything in Trash is no longer needed before you empty the Trash. To avoid the risk of mistakenly deleting other files, we suggest you to delete Macs Fan Control alone in the Trash.
- To do so, right click on Macs Fan Control in the Trash, choose Delete Permanently from the menu list, and click Delete button in the pop-up confirmation dialog.
Meanwhile, there are two alternative ways to manually delete a third-party app:
(1) If the app comes with a dedicated uninstaller or contains an uninstall script:
- Locate and open up the app installation file in Finder
- Double click Uninstall icon and follow onscreen prompts to complete the removal
(2) If you install the app via Mac App Store, you can uninstall it via Launchpad:
- Head to Launchpad from the Dock, through Spotlight, or by gesture shortcut
- Locate the app, then press and hold the app icon until it starts to jiggle
- Cick the X icon on the upper left corner of the icon, and click Delete button
Now, we proceed to tackle the incomplete uninstall issue in the following discussion.
Question 3: how to do after deleting Macs Fan Control?
Most third-party apps will create and store a few files/folders outside the app package. Those components will not disappear along with the uninstallation of the app. Macs Fan Control is not an exception.
Here are the steps to locate Macs Fan Control components on your system:
- In an active Finder window, choose Go > Go to Folder from the Menu bar
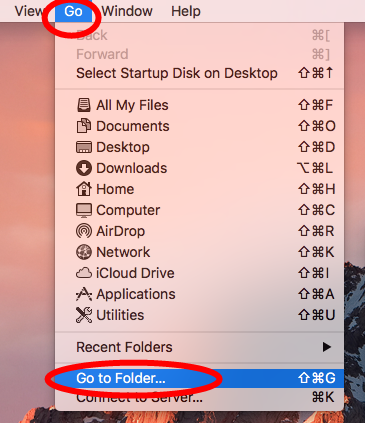
- Type ~/Library in the box, and hit Enter key to access to the hidden folder

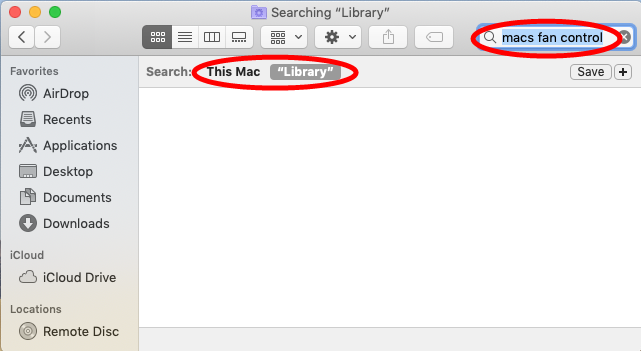
- Click Search in the upper right corner of the window, type Macs Fan Control (or Crystalidea) in the search bar, and click Library under the search box
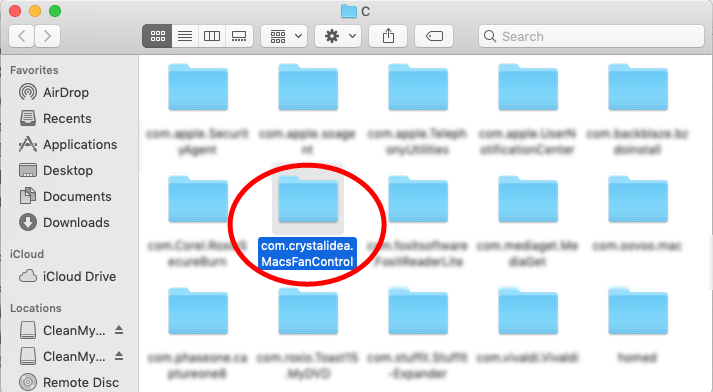
- Identify the items that contain the keyword in the search result, then control-select all related items, right click on any of them, and choose Move to Trash
- Again, search for and delete Macs Fan Control-related items in the /Library folder
Once you’ve thrown all items pertaining to Macs Fan Control into Trash, you can empty the Trash to wipe out Macs Fan Control traces. Still, note that the emptying Trash action is irrevocable, so don’t rush to do this act if you are not certain about it.
Here are the directories that may contain the components of Macs Fan Control:
~/Library/Caches, ~/Library/Preferences, ~/Library/Application Support, ~/Library/Saved Application State, ~/Library/LaunchAgents, ~/Library/LaunchDaemons, ~/Library/PreferencePanes, ~/Library/StartupItems
Looking for an one-stop solution to uninstall Macs Fan Control or any other unwanted apps/plugins/files? In that case you’d better to adopt a handy removal tool.
Question 4: can I uninstall Macs Fan Control without hassle?
As a handy but professional remover for Mac, Osx Uninstaller is featured with user-friendly interface, quick response and streamlined process. This tool allows you to quickly locate every piece of a target app and remove them within a few blinks.
This clip shows the streamlined, intuitive process of uninstalling Macs Fan Control:
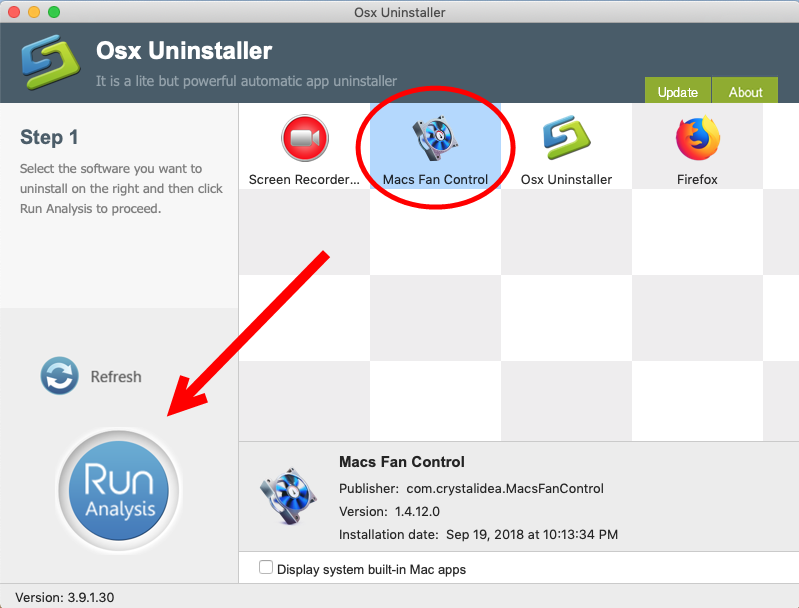
Step 1. Deactivate Macs Fan Control if it is active, and then launch Osx Uninstaller.
Step 2. Select Macs Fan Control, and click Run Analysis to start the scanning.
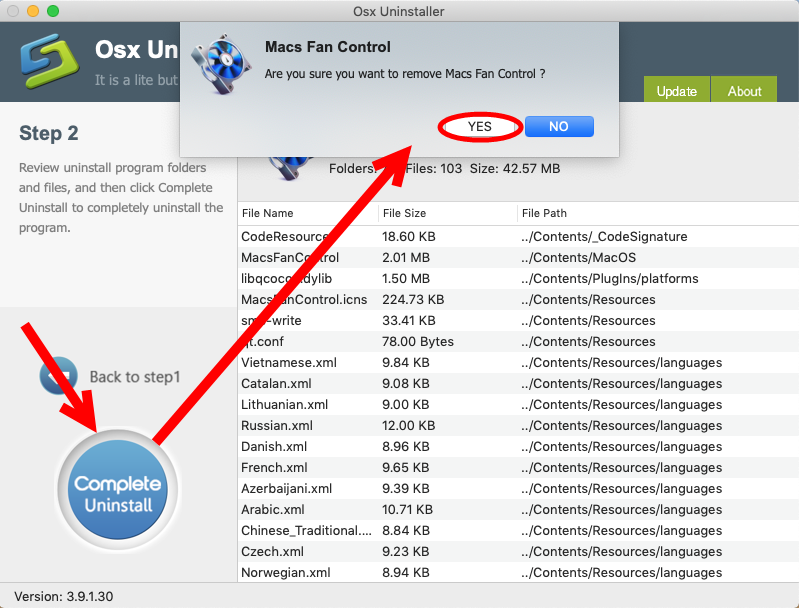
Step 3. Click Complete Uninstall, and click Yes in the confirmation dialog.
Step 4: Click the Back to Interface button to display currently installed apps.
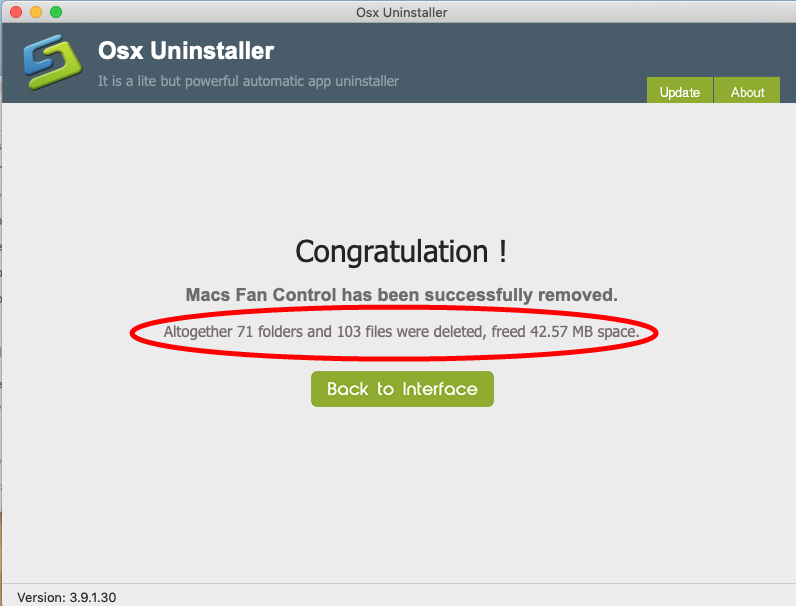
Compared with the manual method we listed above, the use of Osx Uninstaller is undoubtedly more time-saving and efficient. Users don’t need to access to the Applications, Trash and other hidden system folders to uninstall Macs Fan Control, as Osx Uninstaller combines the removal of app and its leftovers together in an interface.
To get this uninstaller, you can click the Download button above to get the installation file, and then drag this app to the /Applications folder to complete the installation. However, note that Osx Uninstaller, as a paid software, requires a valid license key to work smoothly. Hesitate whether you should pay for Osx Uninstaller? The vendor offers in-time tech support when you are in trouble, and even promises a full refund if this app fails to your issues. Why not give it a try under these attracting conditions?


 $29.95/lifetime