How to Uninstall Kaspersky Internet Security for Mac
Cannot uninstall Kaspersky Internet Security thoroughly? Have no clue how to get rid of Kaspersky leftovers on your Mac? This removal tutorial will help you out.
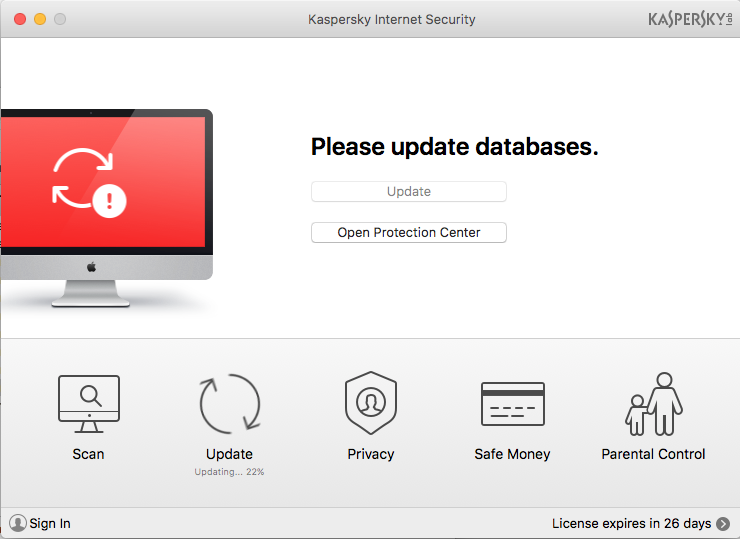
As a product of the old-brand security company, Kaspersky Internet Security for Mac excels in many independent lab tests. It offers many useful features like malware protection, privacy protection, secure browsing, parental controls, etc. However, some Mac users may get lost in how to properly uninstall Kaspersky Internet Security, as simply dragging its icon to the Trash does not actually help remove this app.
The rest of this post discusses four crucial questions that are commonly asked by users who need to remove Kaspersky Internet Security for Mac. Read on please.
Q1: What to Do before Uninstalling Kaspersky Products?
Prior to the standard uninstall, you are supposed to first quit the target app and any background process pertaining to it. Here are three options to exit out of an app:
1. Right click on its icon on the Dock, and choose the Quit option;
2. Click the app icon (if exists) in the Menu Bar, and choose Quit [app name];
3. Launch Activity Monitor, select the app and its process(es) in the Disk tab, click the “X” button on the upper left corner, and click Quite button in the pop-up dialog.
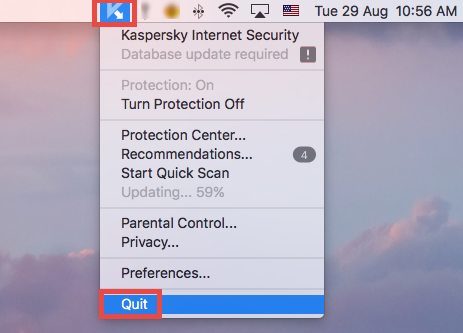
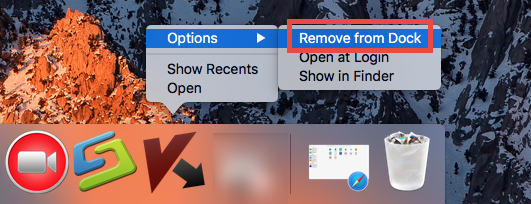
If the target app cannot be quit normally (especially some antivirus/ security/malware software), you can reboot your Mac into Safe Mode to stop the automatic launch. If the app icon remains in the Dock, right click on it and choose Remove from Dock.
After that, you can properly uninstall Kaspersky Internet Security by the steps below.
Q2: How to Correctly Uninstall Kaspersky Internet Security?
Typically most apps can be easily uninstalled by the drag-and-drop way. But if you are dealing with antivirus/security software, the most recommended uninstalling way is to run a dedicated uninstall tool, instead of just deleting it to the Trash. Anyway, there are three available options offered for you to uninstall Kaspersky Internet Security.
(1)Run the built-in uninstaller
If you still keep Kaspersky installation file, the best way is to utilize the uninstall tool.
- Open up the installation file you used to install Kaspersky Internet Security.
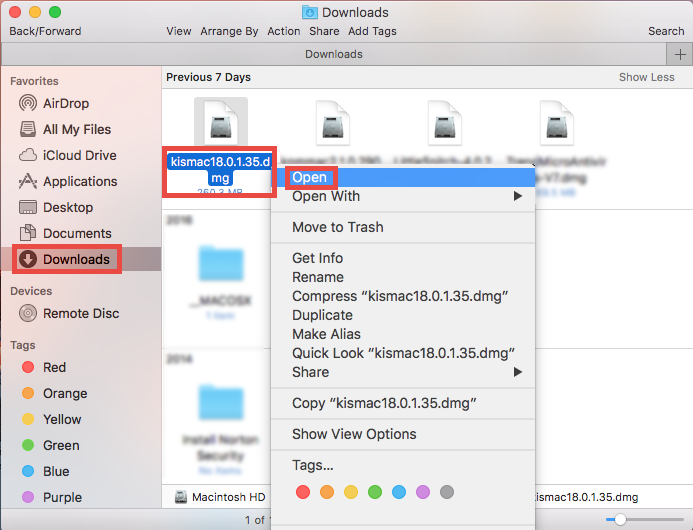
- Double click to run the tool labeled Uninstall Kaspersky Internet Security.
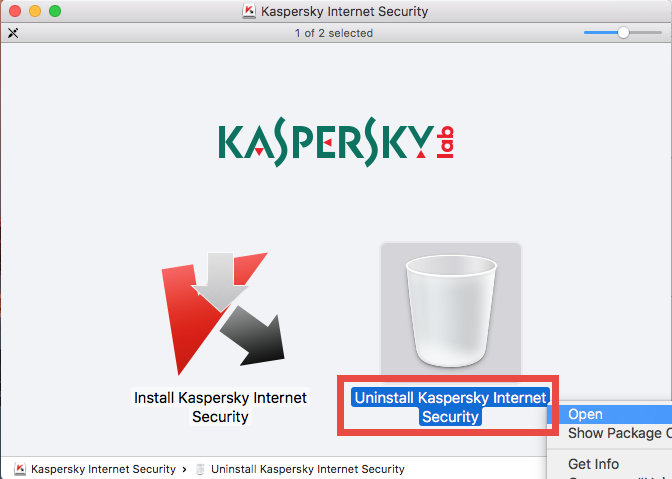
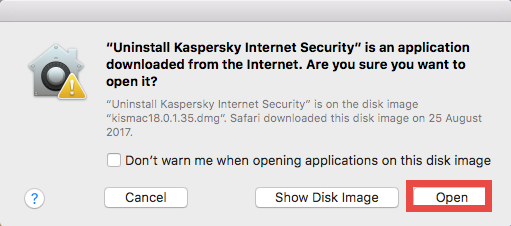
- Click Open when prompted, and click Uninstall button in the window.
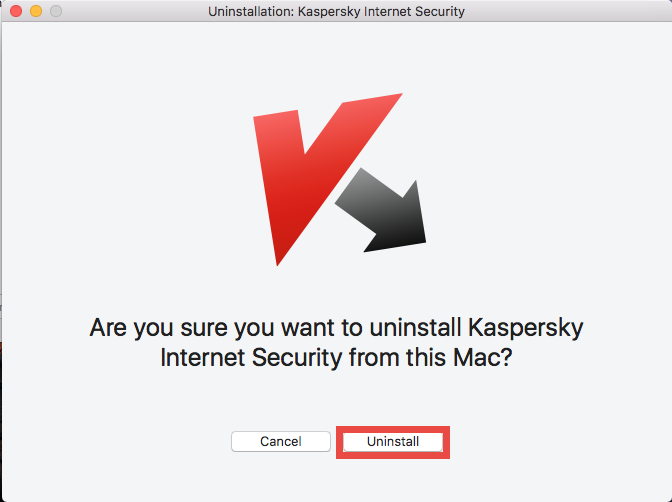
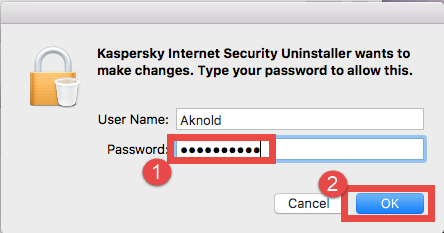
- Enter your current admin password and click OK to allow this change.
- While the uninstall is complete, click Quit to exit out of the wizard.
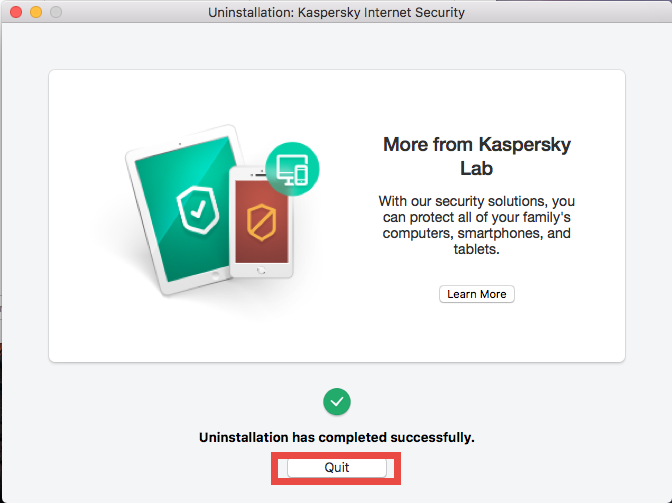
(2)Uninstall Kaspersky in Launchpad
If you install Kaspersky software via the Mac App Store, you can adopt this option:
- Click Launchpad icon in Dock, and search for Kaspersky Internet Security there.

- Hold down the icon until it begins to jiggle and show X on the upper left corner.
- Click the X icon and then click Delete in the pop-up confirmation dialog.

Once you click the X icon, the app will be instantly removed from your Mac.
(3)Delete Kaspersky by trashing it
Here are the regular step to remove an app from Mac:
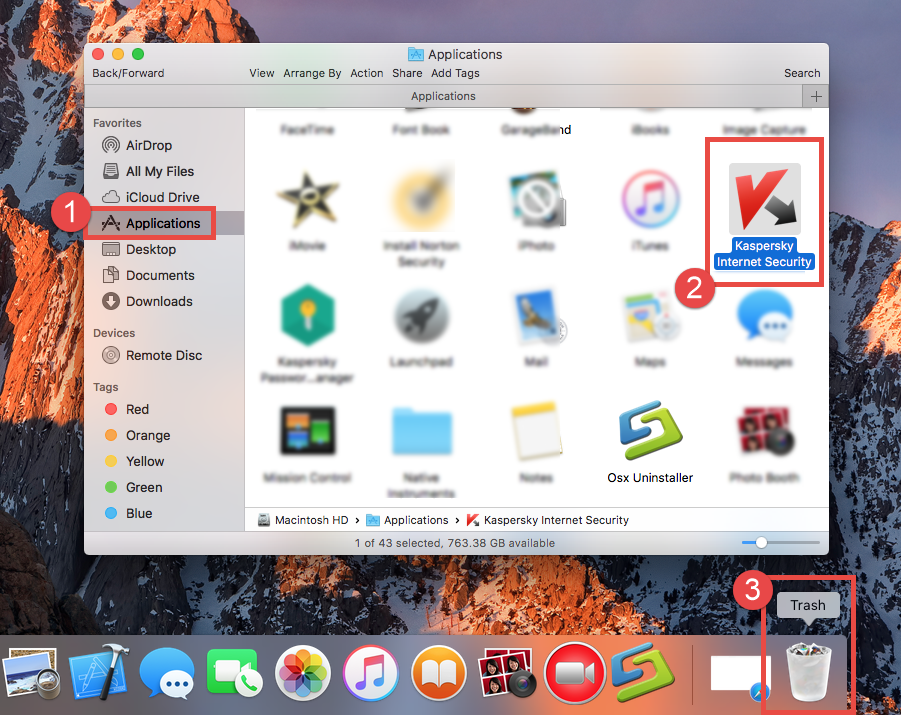
- Launch Finder, head to the /Applications folder, and locate the target app there.
- Right click on the app icon and choose Move to Trash option.
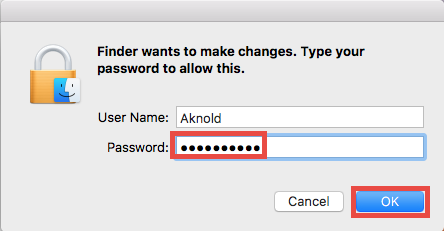
- Enter your administrator password when prompted in a dialog.
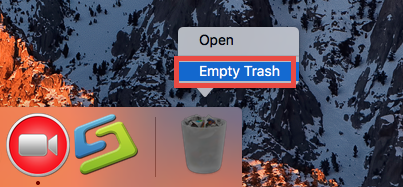
- Click Finder menu and choose Empty Trash option from the drop-down menu.
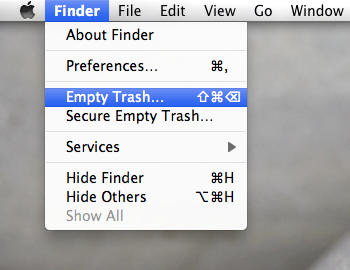
Warning: Be careful when you decide to empty the Trash. It will instantly remove all the files you’ve thrown into the Trash, and this operation is irrevocable.
Q3: How to Totally Delete Kaspersky Leftovers?
Now Kaspersky Internet Security should be successfully removed from your Mac, yet some of its traces still linger on the system and occupy some disk space. Many users do ignore this issue, and that’s why they fail to get rid of Kaspersky products.
To clear out all items pertaining to Kaspersky from Mac, do the followings:
- Open the Finder, click Go in the Menu bar, and choose Go to Folder.
- Type /Library in the Go to Folder box, and hit Enter key to access to it.
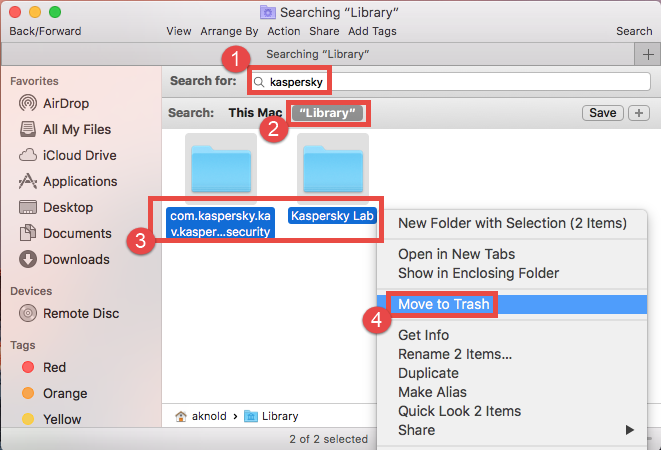
- Type the name of target app or its vendor in Search Bar, and click on Library.
- Identify the matched items in the search result, and remove them to the Trash.
- Again, type the path of the current user’s Library Folder: ~/Library, and hit Enter.
- Search and delete the items that contains the keyword Kaspersky in the directory.
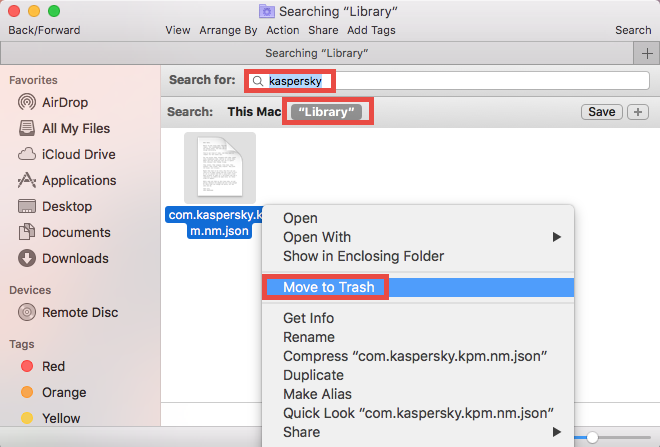
Once you detect all related items and move them to Trash, empty the Trash to permanently get rid of Kaspersky. Not sure if you have detected all Kaspersky traces? Chances are that you have spent much time yet still miss out some ambiguous files. As manual deletion is time-wasting, low-efficient and risk-taking, we strongly suggest you to take an all-in-one solution to avoid possible trouble. Continue reading.
Q4: Can I Remove Kaspersky Internet Security Painlessly?
Featured with intuitive interface and powerful engine, Osx Uninstaller is capable of deleting any unwanted, problematic, stubborn and malicious apps within a few clicks. If you still cannot uninstall Kaspersky Internet Security by aforementioned steps, Osx Uninstaller is the best available option to help you tackle various removal tasks.
Here are the simple steps you need to do when using this tool to uninstall an app:
Step 1. Quit Kaspersky Internet Security, and then launch Osx Uninstaller,
Step 2. Select Kaspersky Internet Security, and click Run Analysis.
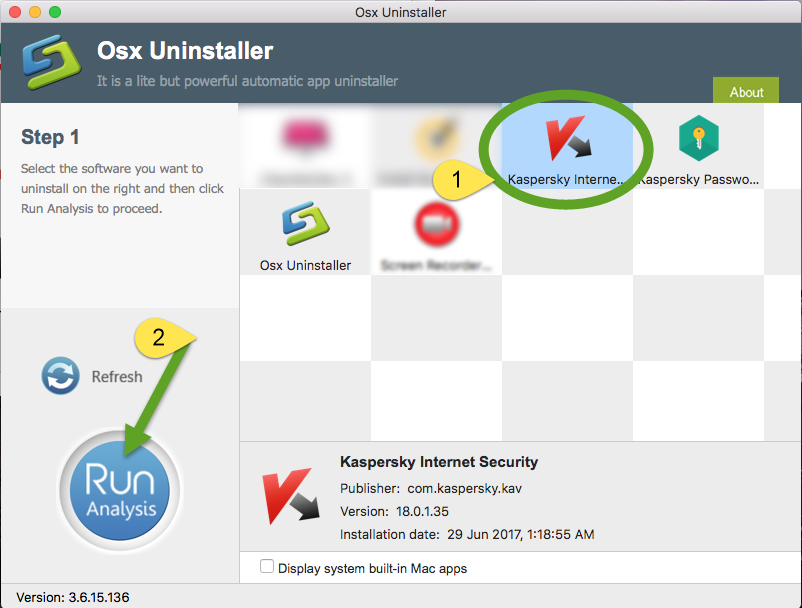
Step 3. Click Complete Uninstall button, and click Yes in the dialog.
Step 4: Follow the onscreen prompts to complete the uninstallation.
Step 5. Click the Back to Interface button to re-scan your Mac.
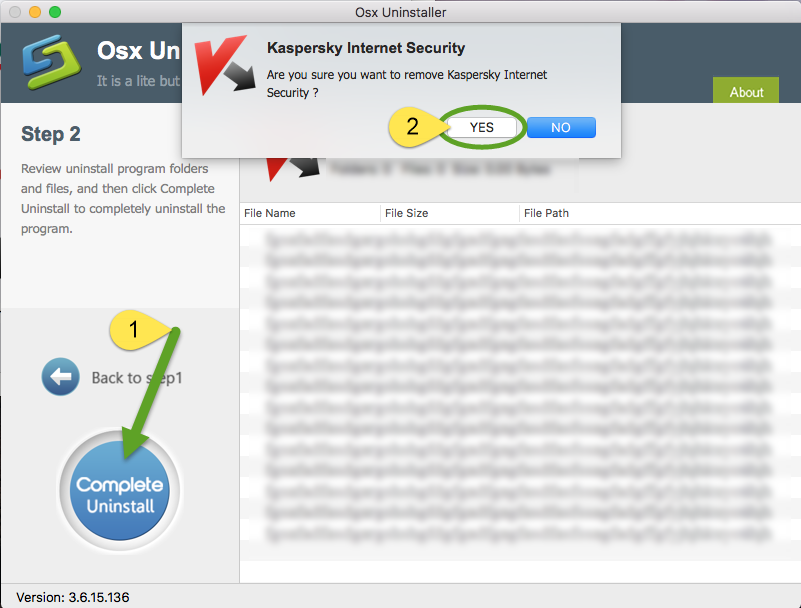
Now you can quit Osx Uninstaller and check if Kaspersky Internet Security has gone from your Mac. The whole uninstalling process may even last less than one minute.
Summary: In this post we list several options to help uninstall Kaspersky Internet Security, and each of them has their own advantages. The manual option has no cost and works for most apps that are installed normally, yet it does not guarantee 100% removal effect. On the contrary, Osx Unisntaller functions more prominent especially in uninstalling corrupted, stubborn or malicious apps. Though priced, this tool is rather intuitive, handy, and most importantly, quite suitable for inexperienced users.
Any question or suggestion about this post? We’ll be glad to see your comments.


 $29.95/lifetime