How to Uninstall Google Drive (Backup and Sync) for Mac
Have no idea how to properly uninstall Google Drive (now known as Backup and Sync from Google) from your Mac? Cannot successfully delete Google Drive or some of its components? Read through this post to get the answers to these issues.
First of all, disconnect your Google account and quit Google Drive…
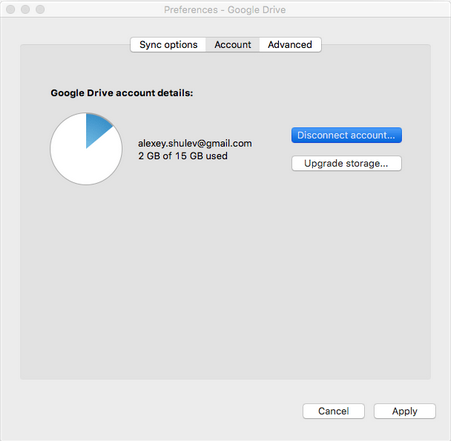
Before uninstalling Google Drive, you should first disconnect your account to stop syncing completely. To do so, open up Google Drive, head to the Google Drive > Preferences from the top bar, and choose Disconnect Account in the Preferences pane.
Then you can quit Google Drive by selecting Google Drive > Quit Google Drive from the top bar. Additionally you can launch Activity Monitor to see if any process related to Google Drive is running on the background, and quit the process there.
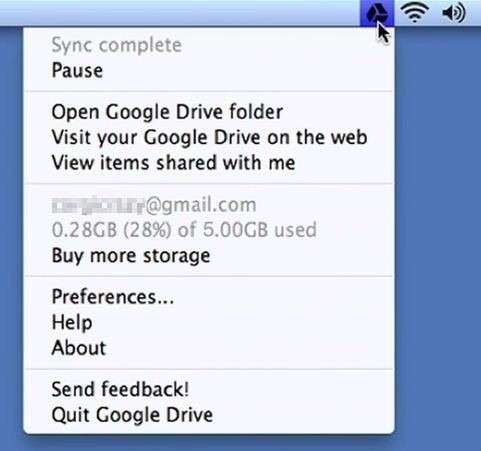
If the app stays in Dock, right click it and choose Options > Remove from Dock.
Now you can start the uninstall. Generally you can uninstall an app by trashing it in /Applications, but if you prefer an one-stop solution, try the following option first.
Is There A Shortcut to Uninstall Google Drive within Clicks?
You can easily remove Google Drive and any other apps with a lightweight yet professional uninstaller designed for Mac. Optimized for the latest macOS High Sierra, Osx Uninstaller features an intuitive interface, streamlined process and clean uninstall result. All you need to do is to click, click and click. Here are the details:
- Step 1. Download Osx Uninstaller, install it, and run this tool in Launchpad.
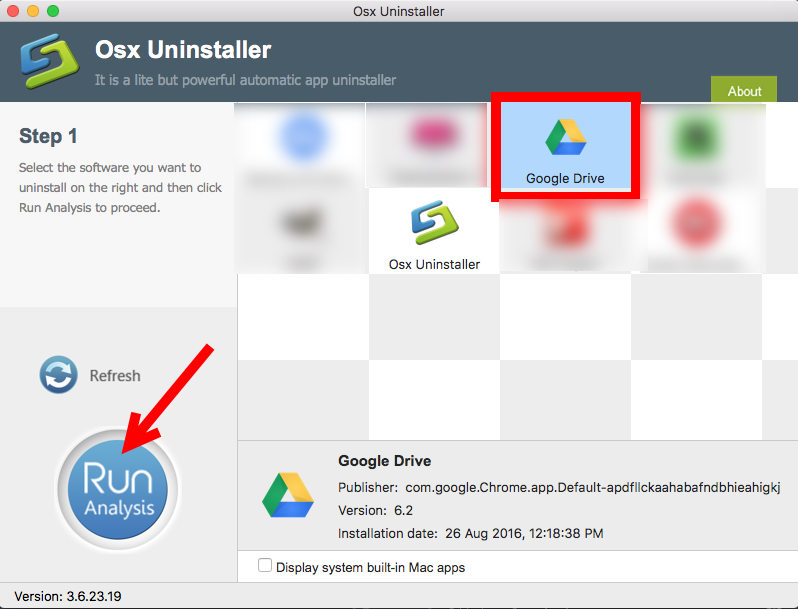
- Step 2. Select Google Drive icon that appears, and click Run Analysis button.
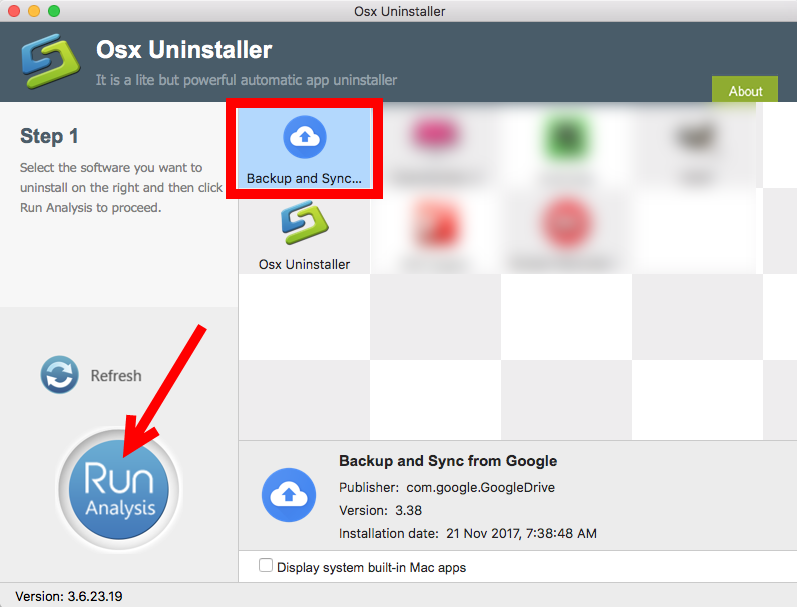
- Step 3. Click Complete Uninstall, and then click Yes to execute the deletion.
- Step 4. Click Back to Interface to re-scan your Mac for currently installed apps.
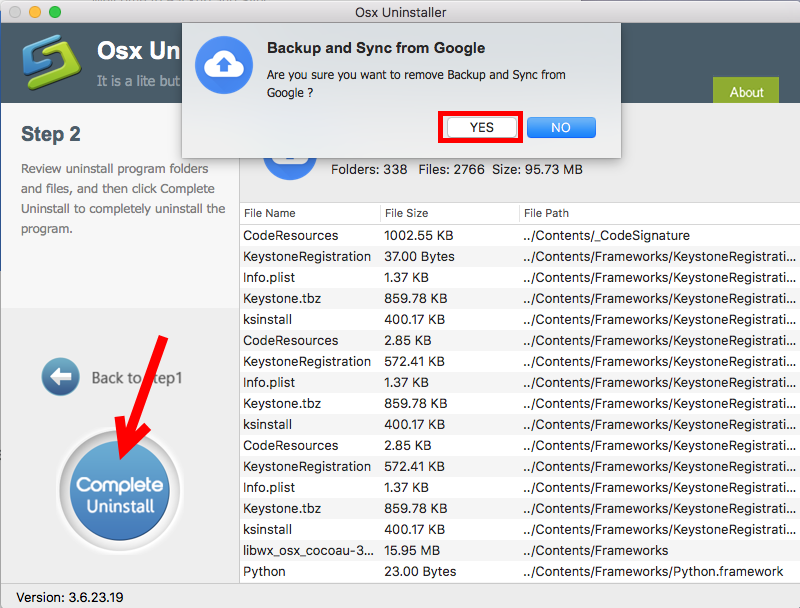
How to Quickly Uninstall Google Drive in Seconds
See? You need to take about one minute to get rid of all components of Google Drive. But note that if Google Drive has been corrupted, you are suggested to install this app to cover the damaged files, and then run Osx Uninstaller to perform a clean uninstall.
How to Manually Remove Google Drive from My Mac?
Would like to delete Google Drive without 3dr party tool? That could be quite easy if you know the tricks. Follow the steps below to get rid of Google Drive the app itself.
- Launch the Finder and click Applications on the sidebar to access to the folder.
- Search for Google Drive, (1) right click on it and choose Move to Trash.
- If prompted, enter the current admin account password to allow this change.
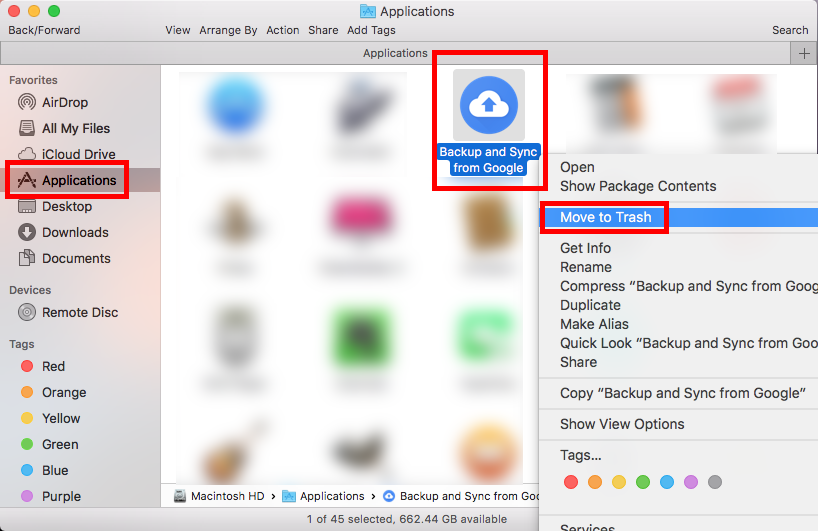
Meanwhile, you can trash an app by these ways: (2) drag the app into the Trash in Dock and drop it there; (3) select the app, and choose Move to Trash from File menu. The trash-to-delete method works for most apps in all versions of macOS/Mac OS X.
Now the app has gone from the /Applications folder, and you can execute the uninstall by permanently deleting the app in the Trash. So continue with the two steps below:
- Right click the Trash icon in the dock, choose Empty Trash, and click Empty Trash again in the pop-up dialog. Alternatively, choose Empty Trash under the Finder menu.
- In any case you cannot empty the Trash, reboot your Mac and try it again.
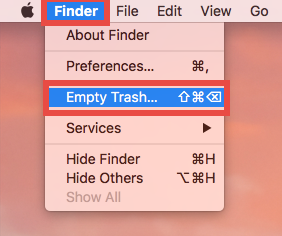
Warning: The act of emptying the Trash is irrevocable, and everything dropped in the Trash will be deleted instantly and permanently. So before you empty the Trash, make sure you haven’t mistakenly thrown anything useful into the Trash.
Alternative: uninstall Google Drive via Launchpad
If you have installed Google Drive through Mac App Store, you can take this way:
- Open Launchpad, and type Google Drive in the search box at the top.
- Hold on Google Drivewith your mouse until the icon begins to wiggle and show X. Alternative, you can press and hold ALT key until all apps start to jiggle.
- Tap the X in the left top corner, and then click Delete in the pop-up dialog.
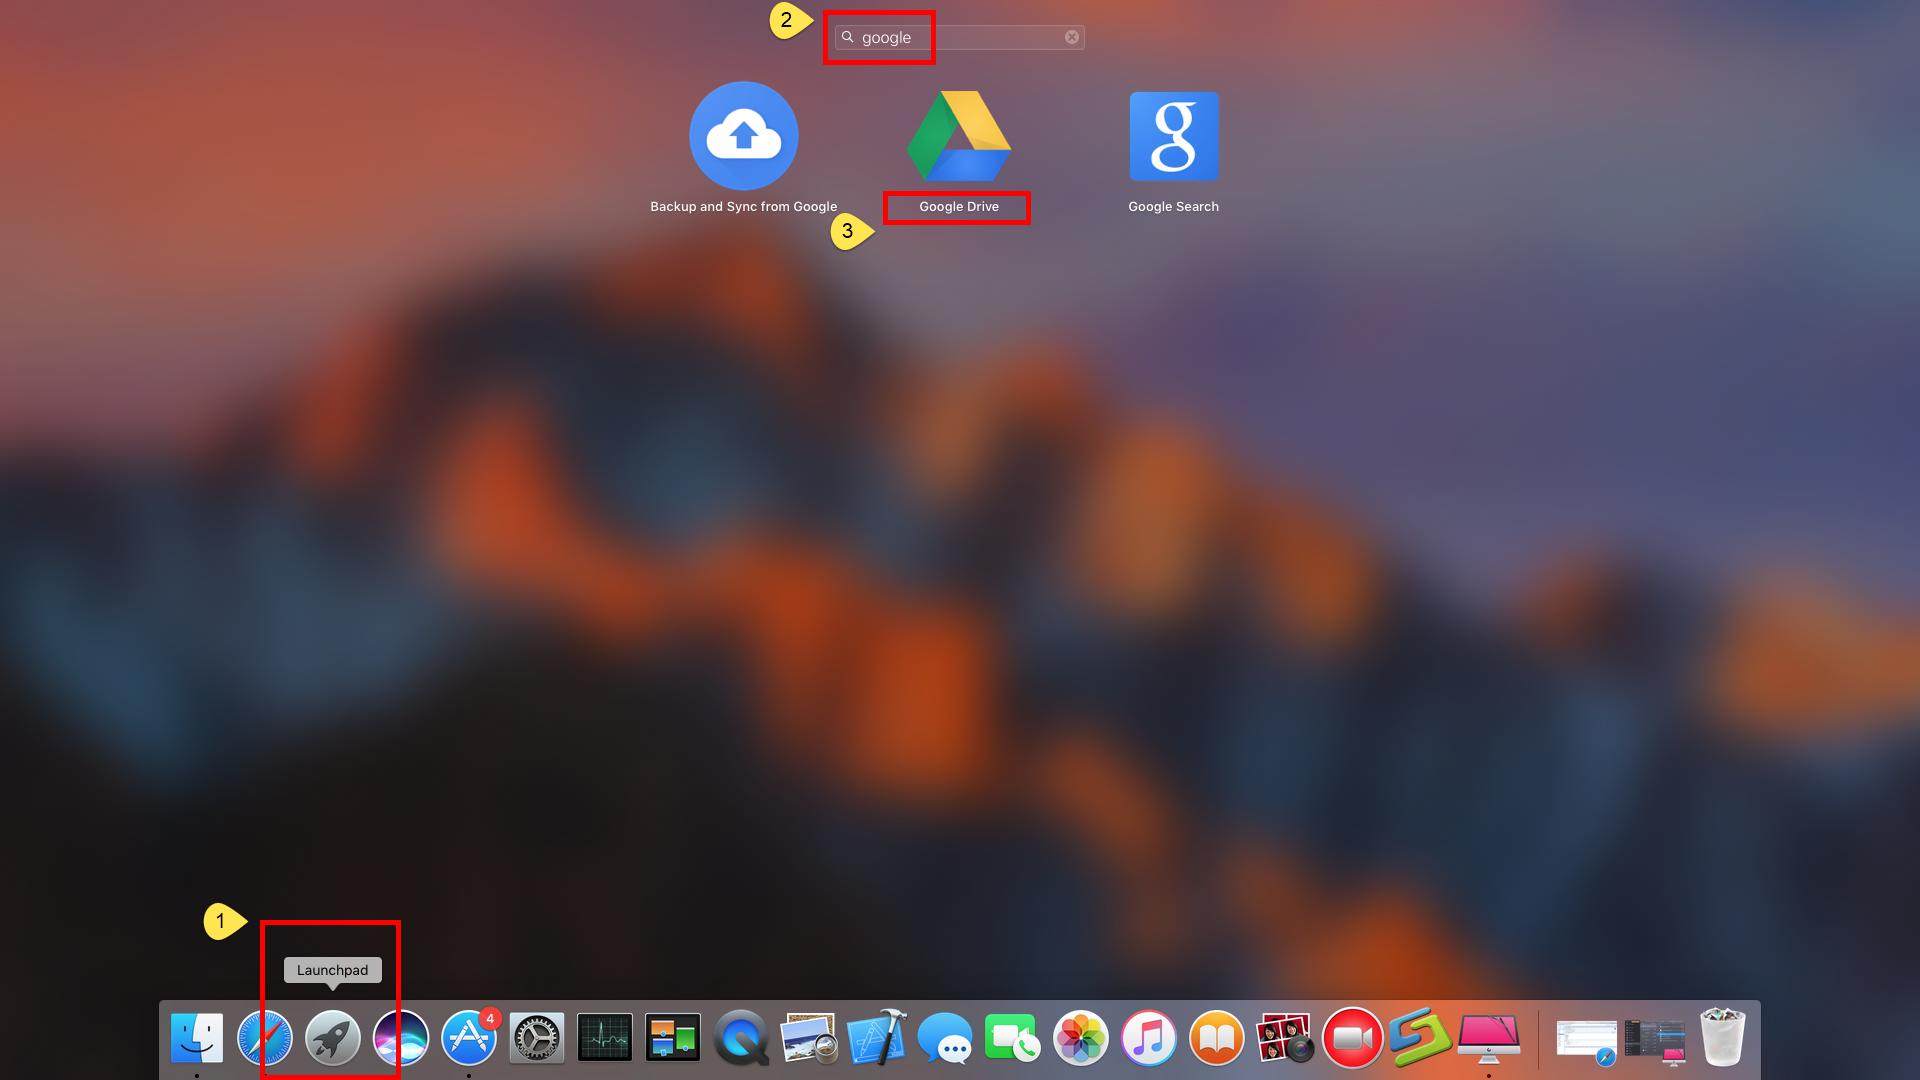
Now you should go ahead with deleting Google Drive-related remnants on your Mac.
Tip: utilize Search feature to delete app leftovers
Incomplete uninstall is one of the issues that upset Mac users. To truly remove Google Drive without trace left, you can manually detect its components remaining on the system directories, or run Osx Uninstaller to handle the job effortlessly.
Follow the instructions below to remove items belonging to Google Drive:
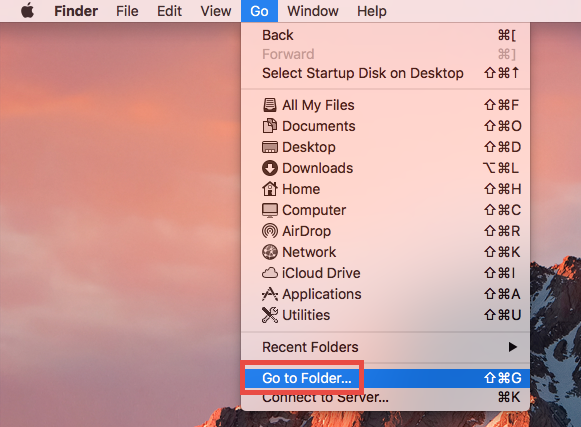
- Open up Finder, click the Go from the Menu Bar, choose the entry: |Go to Folder.
- Enter the following path: ~/Library and hit Enter key to open up the folder.

- Type Google Drive in the search box, and click ‘Library’ below the bar.
- Identify the matched items, right click on them and choose Move to Trash.
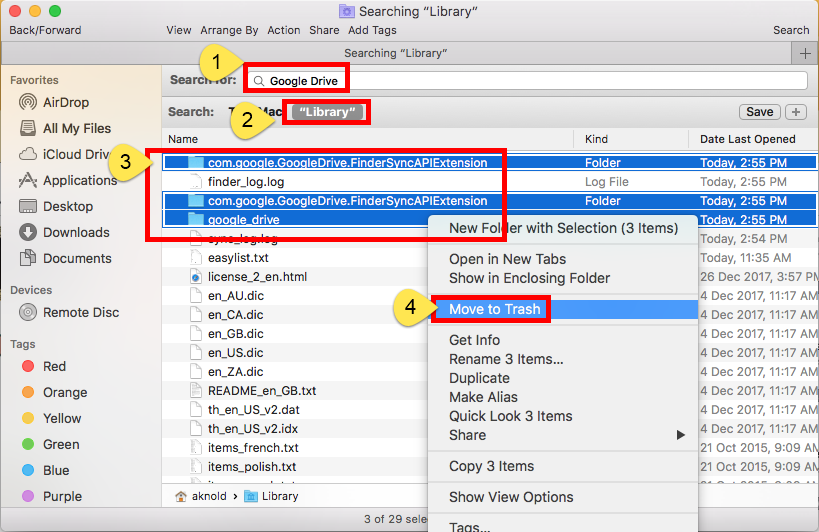
- Repeat the steps to detect and delete related component in the Library folder.
- Empty the Trash again to permanently get rid of those junk files and folders.
Generally, you can look for Google Drive components in these folders:
~/Library/Caches,
~/Library/Preferences,
~/Library/ApplicationSupport,
~/Library/Saved Applications State,
~/Library/LaunchAgents,
~/Library/LaunchDaemons,
~/Library/PreferencePanes,
~/Library/StartupItems
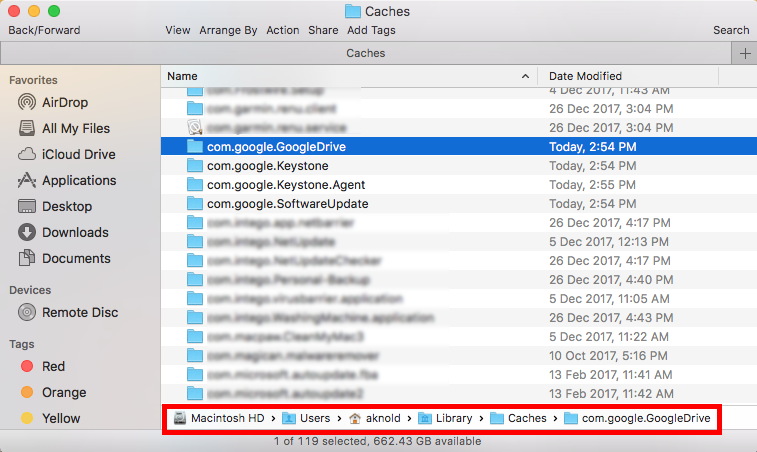
Warming: you should be very cautious when deleting app vestiges in these directories. Only delete the items that contains Google Drive. If other apps or system files are deleted mistakenly, those affected apps or even the system could not work normally.
So that’s how you can uninstall Google Drive and remove its stubborn components from your Mac. In most cases the manual method works for 3rd party apps installed properly, but if it fails you, you can turn to Osx Uninstaller for assistance.
Any comment or suggestion about this post? Welcome to share it with us here.


 $29.95/lifetime