How Can I Completely Uninstall Drive Genius for Mac?
“I had installed a trial version of Drive Genius. Now I want to delete it.
I go to Applications list, it is not there. I search its name in SpotLight, it is not there either. But it keeps attaching its self to the menu bar at the top.
How can I completely uninstall Drive Genius?”

What is Drive Genius?
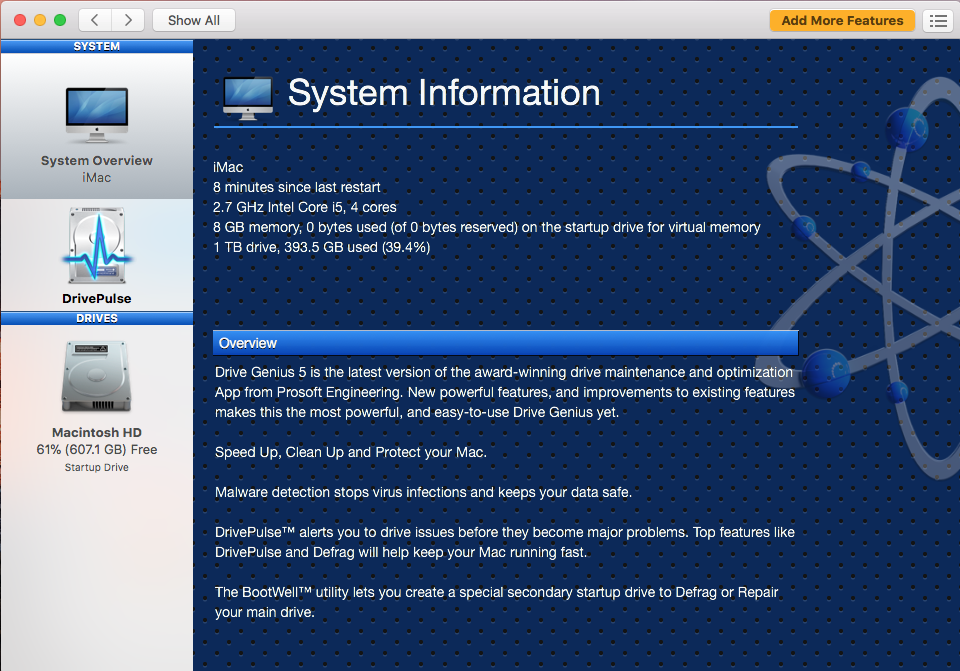
Drive Genius is a software package for maintaining a hard drive and benchmarking its performance. The collection of tools offered by Drive Genius allows Mac users to engage in effective preventative measures necessary to extend the longevity of a storage device. The panoply of preventative tasks that the software allows performing ranges from defragmentation to error correction.
Is Drive Genius Safe on a Mac?
If after asking “How can I effectively detect and repair a host of hard drive errors?”, you are directed toward Drive Genius, it is necessary to establish whether the use of the app is not associated with safety threats. After downloading the app and scanning it with a popular Mac antivirus, no malicious code has been detected. In fact, the utility has a malware scanning tool that will help to keep your Mac safe. The scanning is extremely thorough, which is essential for removing both well-known and new virus strains.
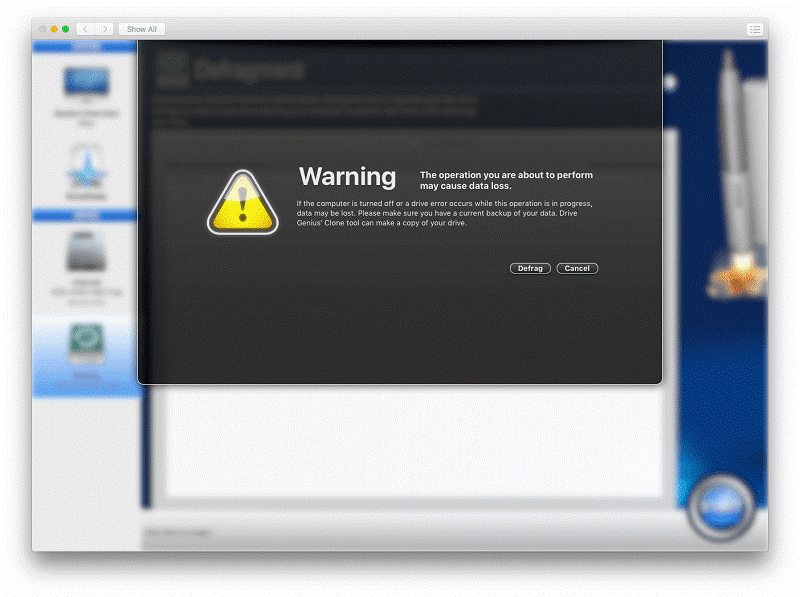
It should be borne in mind, however, that if a user interrupts the execution of some Drive Genius functions such as defragmentation, they could damage their files and even lose some data. To make the use of the utility safer, its developers have ensured that a user is presented with a warning message whenever care must be taken.
How to Uninstall Drive Genius safely?
The complete uninstallation of Drive Genius presupposes the removal of self-contained files needed to run the app and traces that it leaves behind. Prior to deleting the app, it is recommended to make use of its virus scanning functionality to erase malicious software from your drive. Therefore, there is a fast way to uninstall Drive Genius from macOS and Mac OS X.
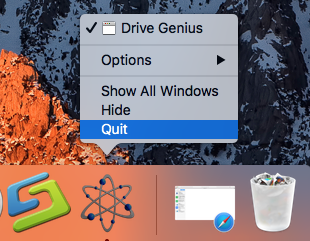
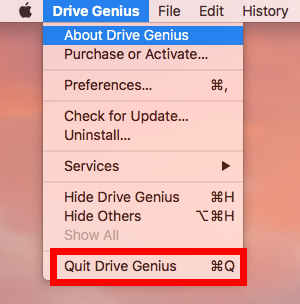
What needs to be done first is to terminate the app processes:
- Right click on the Drive Genius icon on the Dock, then choose Quit;
- Click the target’s setup on the top left corner, and choose Quit Drive Genius (Commend+ Q).
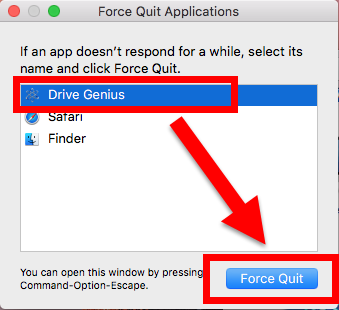
- Quit Drive Genius or force quit it by pressing the Cmd+Opt+Esc combination;
- In a pop-up window, select the app and click on the Force Quit button;
- Open the Utilities folder and launch the Activity Monitor;
- Click on the All Processes tab and select processes associated with the app;
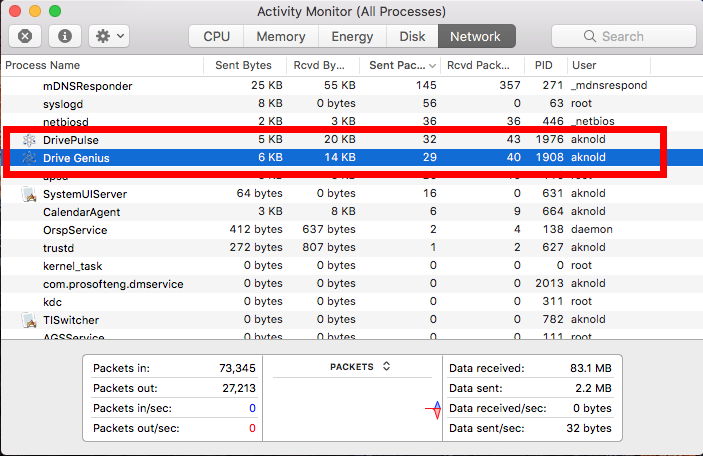
- Click on the Quit Process icon;
- In a pop-up window, click on the Quit button to confirm the action.
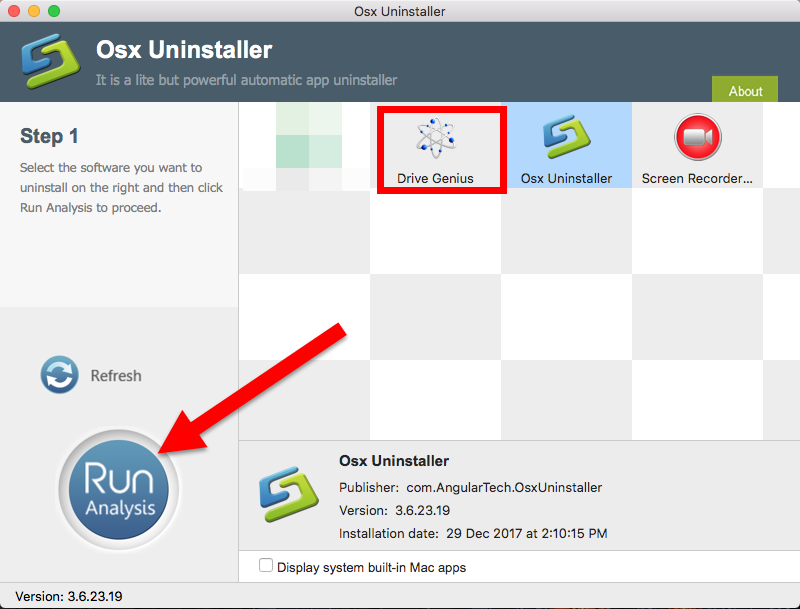
Next, launch Osx Uninstaller to quickly & safely uninstall Drive Genius for Mac, follow the simple instruction here to do that without any trouble:
- Step 1. Select Drive Genius what you need to remove in the list, easily hit Run analysis button;
- Step 2. Then, the uninstaller will analysis the target app as fast as in a few seconds later, click the button “Complete Uninstall” when all the related folders and flies appeared in the list;
- Step 3. The tool will easily delete all the related folders and flies scanned in Step 2, now press Back to Step 1 and click Refresh, Drive Genius are gone from the list.
How to Uninstall Drive Genius manually?
Also we have other way to uninstall Drive Genius for Mac in manual process, but it’s quite complicated and annoying, you’d better take care of all steps during the removal. After terminate the target app processes, to do this:
- Log in to your Mac as an administrator;
- Open the Applications folder;
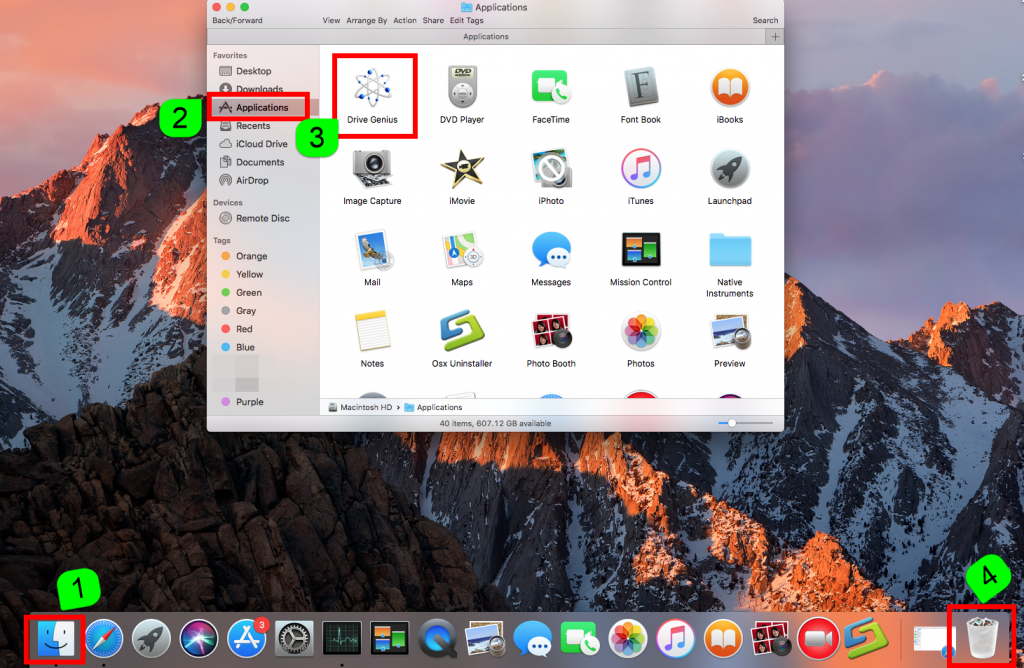
- Locate Drive Genius and either manually move it to the Trash or click on the File tab and select the Move to Trash option;
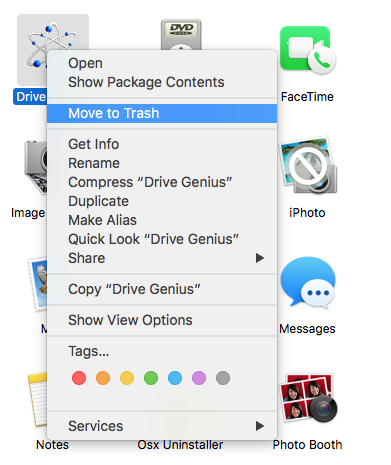
- Empty the Trash.
The final phase of the uninstallation process is the removal of the app’s traces. It can be done by following these steps:
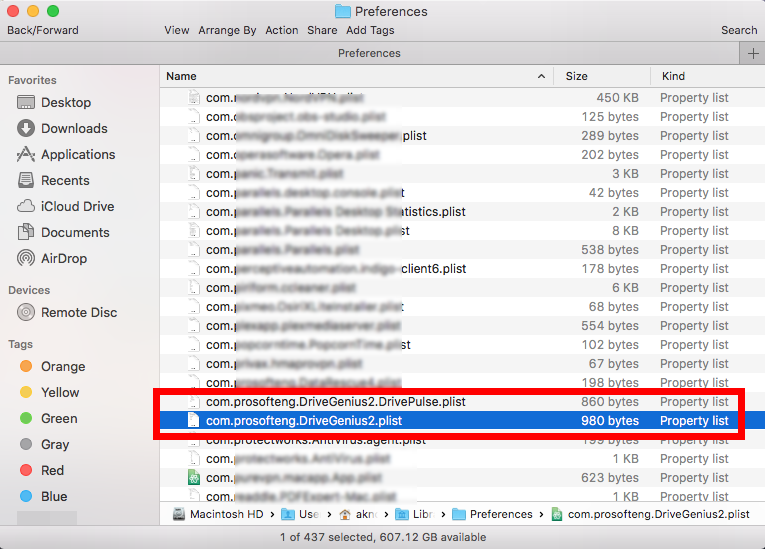
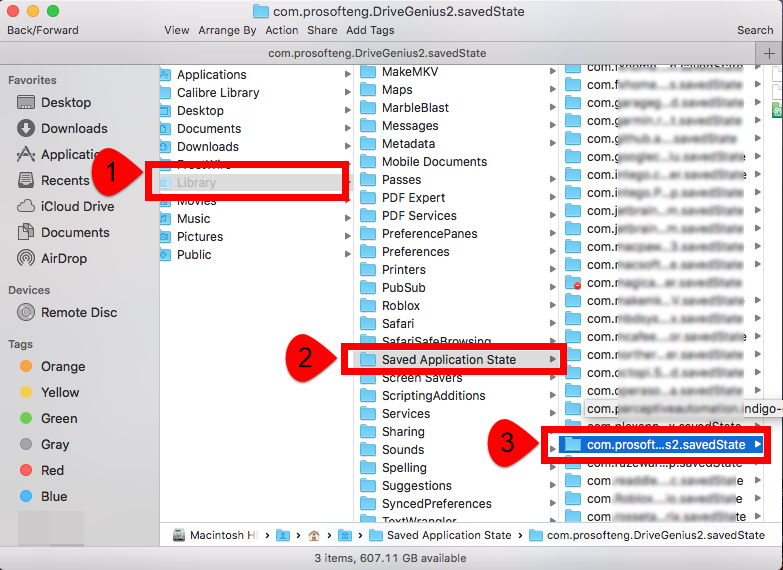
- Open the Finder and select the Go to Folder option from the Go menu;
- Enter this path: ~/Library
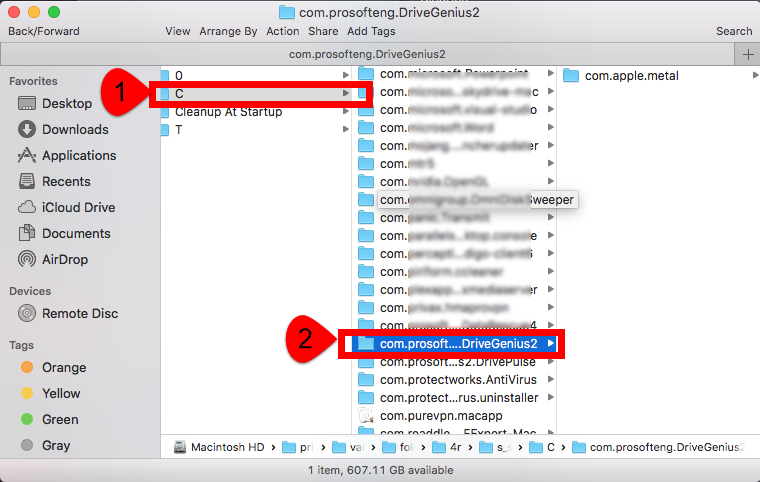
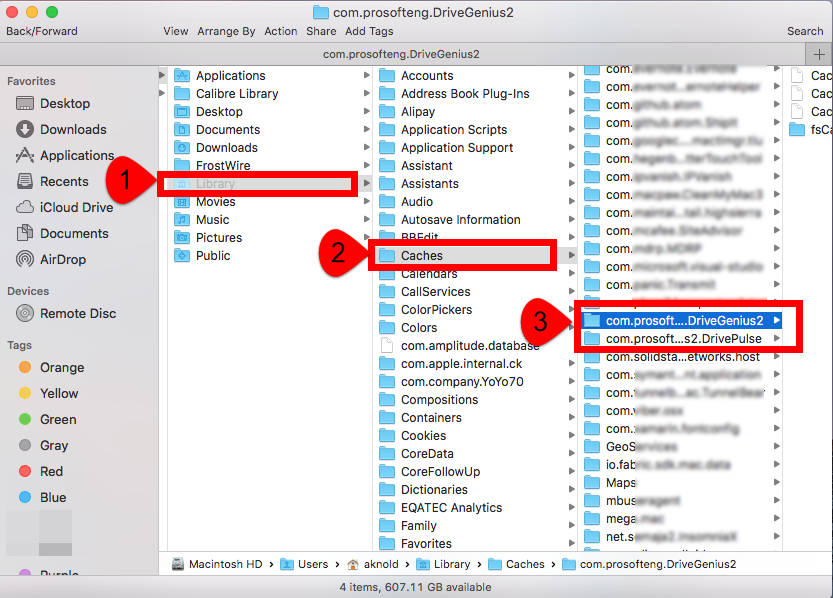
- Search for any files containing either Drive Genius or Prosoft in their name in these locations:
/Library/Preferences/
/Library/Application Support/
/Library/Caches/
/Library/Cookies
/Library/Logs
/Library/Saved Application State
/Library/C
- Delete all app-related files and folders;
- Empty the Trash.
After the final phase of the manual uninstallation process, if you find this problem:
“I tried removing every trace of Drive Genius including in:
- /Library/Application Support/DriveGenius (folder)
- /Applications/Drive Genius 3.app (icon)
- /Users/Library/Application Support/DriveGenius (folder)
- /Users/Library/Preferences/com.prosofteng.DriveGenius2.plist (file)
- /Users/Library/Preferences/com.prosofteng.DGAgent.plist (file)
- ~/Library/LaunchDaemons/com.prosofteng.DriveGenius.locum
- ~/Library/PrivilegedHelperTools/com.prosofteng.DriveGenius.locum
I even downloaded and installed the OSX 10.6.8 Combo Updater.
But, the every-ten-seconds” events are still happening.
How can I get rid of this thing — whether or not it is the cause of the failure to go to sleep?
If this problem keeps happening in the removal, then you should try Osx Uninstaller to safely and completely uninstall Drive Genius for you, which it works 100 % to delete all leftovers in hard drive of your Mac.
 $29.95/lifetime