Uninstall BlueStacks on Mac – Mac Removal Guide
BlueStacks is a free desktop Android emulator that allows users to download and run Android apps and games on Mac OS. Wanna uninstall BlueStacks from your Mac? Dragging BlueStacks to the Trash will remove the most of the app, not the entire thing. To fully uninstall BlueStacks, you also need to remove all the files associated with it.
Here are some symptoms you may experience when trying to uninstall BlueStacks manually: the app cannot be dragged to the Trash; uninstall request is rejected; some of the files/folders created during the installation still linger around the system……

Have no idea how to deal with these issues? Look for the proper way to get rid of BlueStacks? Take it easy. In this post we provide several approaches you can take to remove BlueStacks. Now let’s get started on uninstalling BlueStacks on Mac.
Easily Uninstall BlueStacks within Clicks
First of all we would like to introduce the most effective and time-saving way to remove Mac apps, namely, utilizing a specialized uninstaller. Osx Uninstaller is designed to help Mac users remove unneeded, problematic or malicious apps with minimal effort. You can easily wipe off all the traces of BlueStacks in 3 simple steps.
1. Download Osx Uninstaller and install this tool to the Application folder.
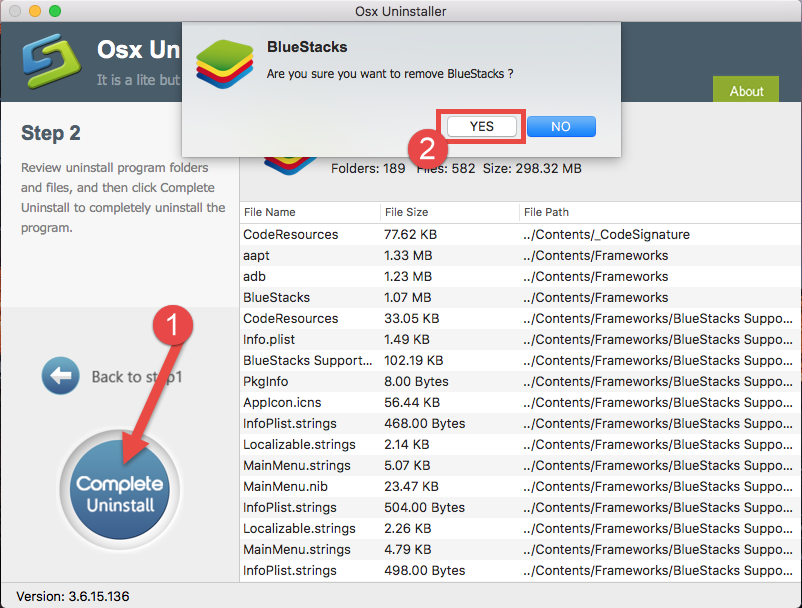
2. Launch Osx Uninstaller, select BlueStacks icon and click Run Analysis button.

3. Review related files and folders, click Complete Uninstall button, and click Yes in the pop-up dialog box to fully remove all components of BlueStacks.
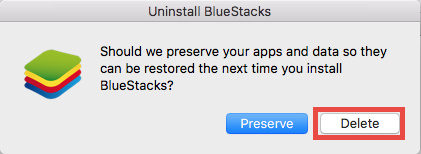
4. Later on, you will be prompted by the following dialong. You can click Delete button to remove all related items, or click Preserve button to keep them on your Mac.
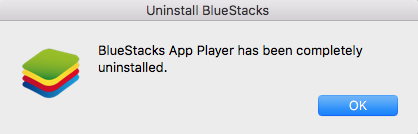
That’s all it takes to remove BlueStacks by using Osx Uninstaller. All the components can be scanned out and removed within a few simple clicks. You don’t bother to hunt for the remnants of BlueStacks, and there will be no hassles too. Osx Uninstaller makes it incredible easy to uninstall Mac apps, including BlueStacks.
Uninstalling apps on Mac OS X is much easier than on Windows. But what else you should do apart from dragging BlueStacks to the Trash? As is said before, a simple drag-to-delete move may not be able to remove all the components of the app you wanna trash. To fully uninstall BlueStacks, follow the detailed instructions below.
Regular Steps to Uninstall BlueStacks on Mac
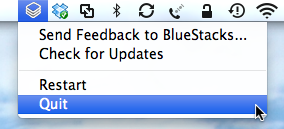
Prior to the uninstall, log in to your administrative account (this is the very first thing you should do). Then make sure BlueStacks is not running (even on the background). To quite BlueStacks, you can click its icon in the Menu bar and choose Quit option.
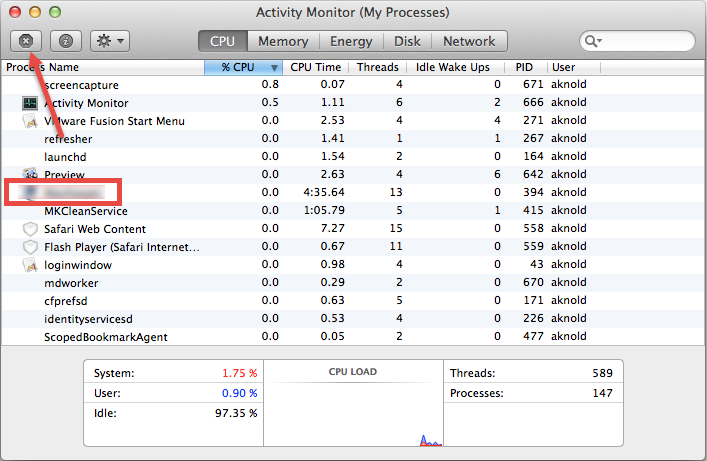
Besides, you can also terminate all its process(es) by doing the followings:
- Open Launchpad, and click Activity Monitor from the Utilities folder.
- Select related process(es), and click “X” button on the upper left corner.
- If prompted “Are you sure you want to quite this process”, click Quit button.
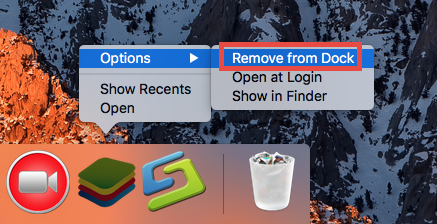
If the icon remains, right click on it and choose Options > Remove from Dock.
Now continue to uninstall BlueStacks by trashing it:
This drag-to-delete method works in all versions of Mac OS X. Most apps can be smoothly uninstalled in that way, but it is not applicable to built-in Mac apps.
- Open the Finder, and click Applications in the sidebar.
- Scroll through to locate BlueStacks in the folder, and drag its icon to the Trash in the dock. Alternatively, you can right click the app and click Move to Trash.
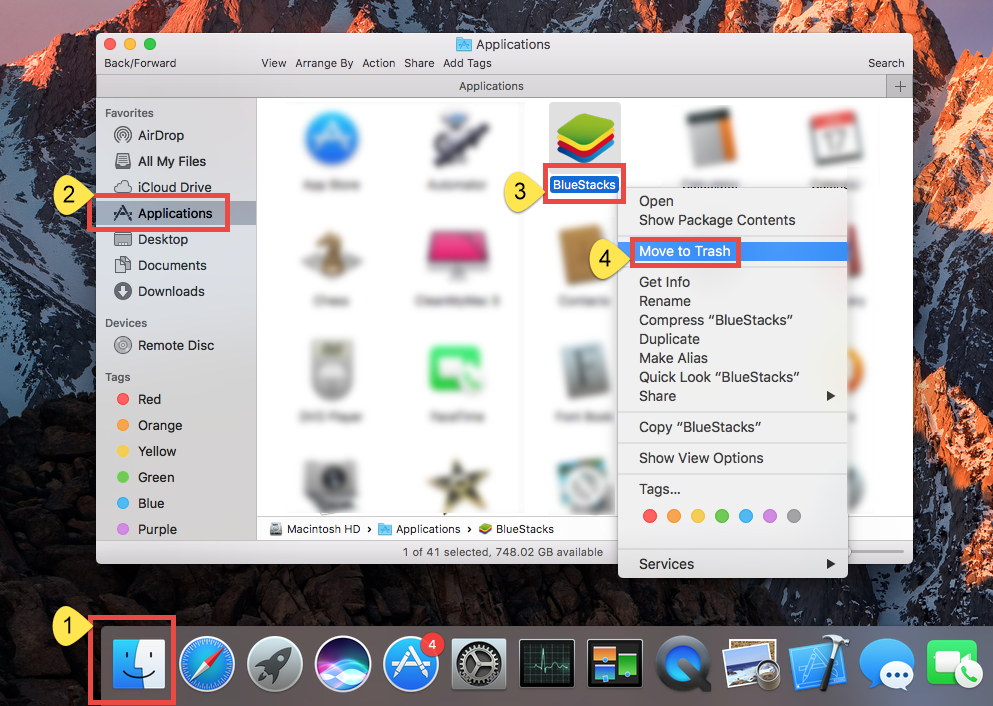
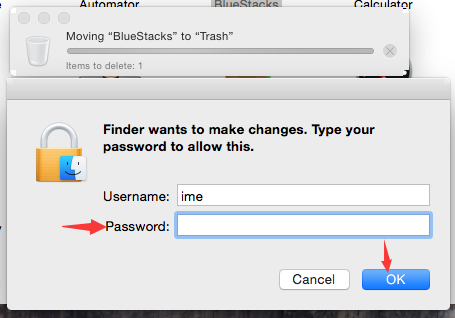
- Type your password to confirm the uninstallation of BlueStacks if prompted.
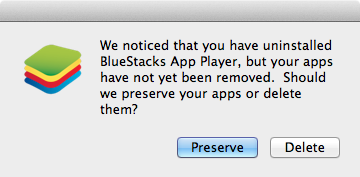
- When the dialog pops up asking“Should we preserve your apps or delete them”, click Delete to purge your user data, or click Preserve to keep it for future use.
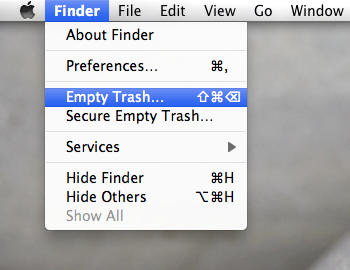
- Ctrl + click the Trash icon and select Empty Trash to delete BlueStacks permanently.
If you cannot move an app to the Trash or empty the Trash, try holding the Option key as you choose Empty Trash from the Finder menu, or reboot your Mac to try it again. Warming: emptying the Trash will instantly remove BlueStacks alone with other files you’ve thrown into the Trash, and this act is irrevocable. Any time you change your mind before emptying the Trash, you can restore the deleted files or apps by right clicking the item in the Trash and choosing Put Back option.
For the app installed via Mac App Store:
If you install an app through the App Store, and your system is OS X lion or later, you can take this method too: go to Launchpad and uninstall BlueStacks there.
- Open Launchpad, and input the app name in the search box on the top.

- Click and hold the app icon with your mouse until it starts to wiggle.
- Click the “X” that appears on the left upper corner of app icon.

Once you click the X icon, the uninstall will be handled immediately, and there is no need to empty the Trash afterwards. If there is no “X” icon on the left upper corner of the app icon, that means the app cannot be uninstalled by this way.
For the app that has a dedicated uninstaller:
You may have noticed that some Mac apps come with their own dedicated uninstaller. Those apps either install additional software to provide extended functions, or place library files and associated application dependencies elsewhere in OS X. For that kind of software, you’d better run the built-in uninstaller to fully remove it from OS X.
Additional Steps to Delete BlueStacks Vestiges
Most OS X application are self-contained packages that can be easily uninstalled, but there are many exceptions too. Removing an app from the Applications folder does not mean you can totally get rid of all its components. Application vestiges may not do much harm to your system but do take up a certain disk space. You had better go to check and remove those associated files left behind after the uninstall of BlueStacks.
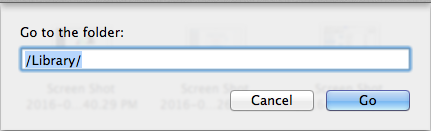
- Open the Finder, click Go in the Menu bar, and select the entry Go to Folder…
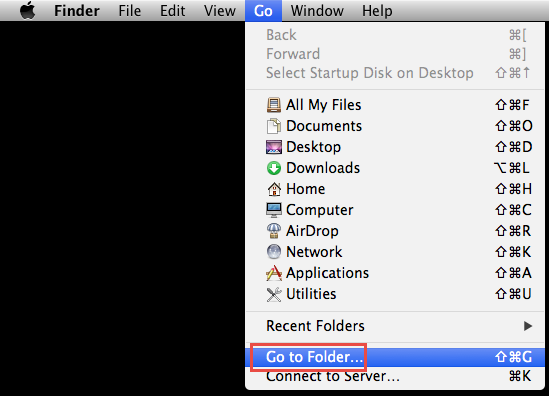
- Type the path of the Application Support folder: /Library and then hit Enter key.
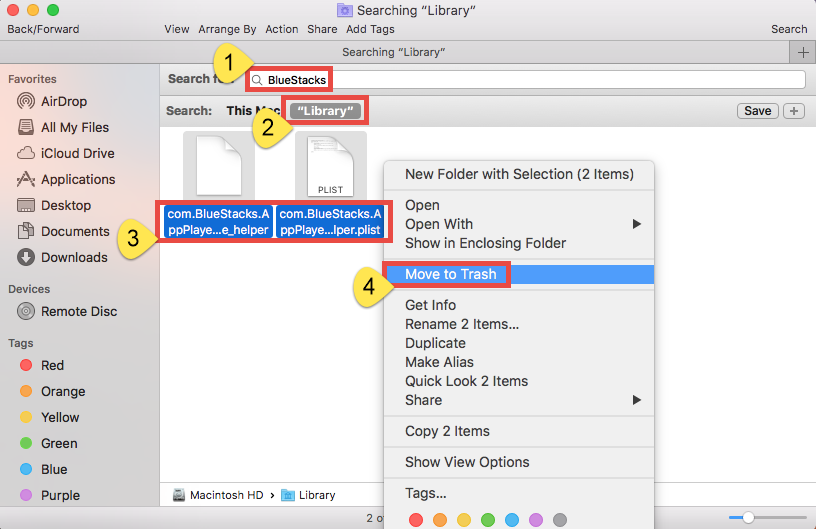
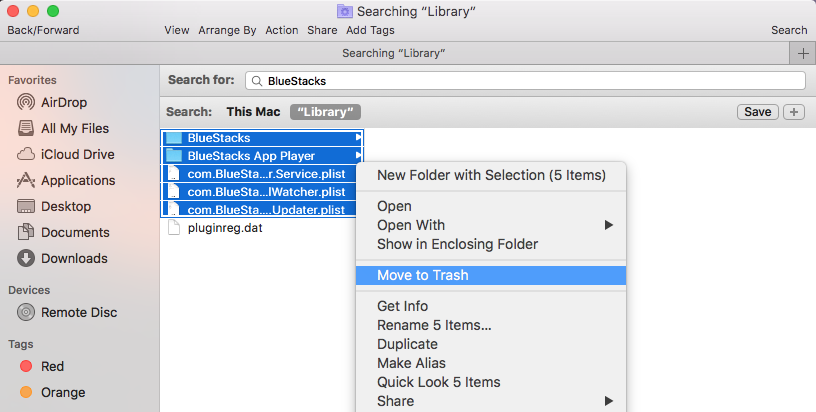
- Search for the files or folders which contains the name of BlueStacks or the vendor in the following locations: /Library, /Library/Caches, /Library/Preferences, /Library/Application Support, /Library/LaunchAgents, /Library/LaunchDaemons, /Library/PreferencePanes, /Library/StartupItems
- Right click the matched files or folders, and select Move to Trash option.
- Type the path of User Library inside Home Folder: ~/Library and then hit Enter key.
- Identify and delete the matched files or folders in the same set of folders.
- Empty the Trash to delete µTorrent leftovers permanently.
That’s it. Now BlueStacks alone with its vestiges should be wiped off from your OS X. But here’s the thing you might need to know: in some cases the manual removal method may still fail to thoroughly remove the app you wanna delete. The best way to get rid of any unwanted app without wasting time is to utilize an advanced, powerful and reliable uninstaller, which knows exactly how to work effectively and where to clean up on your Mac. If you ever encounter any problem in tackling removing BlueStacks, try Osx Uninstaller to resolve your issues within a few clicks.
Stay with us to know more about how-to-uninstall guides for your Mac.
 $29.95/lifetime