How to Easily Uninstall Xmarks from Your Mac
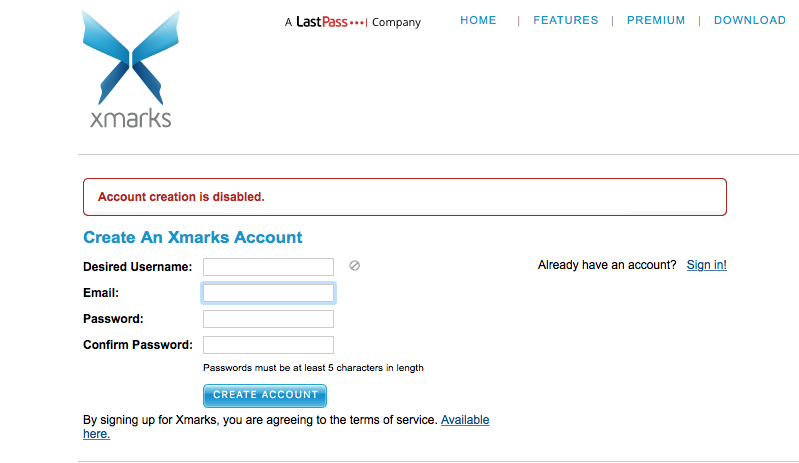
Xmarks (formerly known as Foxmarks) is a free browser add-on that can back up and sync bookmarks between popular web browsers like Safari, Chrome and Firefox. “How do I get rid of Xmarks?” That is one of the threads posted in the Apple Communities. The question sender wondered how to uninstall Xmarks from both his browser and System Preferences. Well, uninstalling Xmarks is a simple process but it is still a bit different from uninstalling other third-party apps. Do you really know how to uninstall Xmarks right?
In this page we will show you the manual steps to properly uninstall Xmarks, and offer a time-saving and hassle-free solution to help you remove any unwanted Mac app in clicks.
Uninstall Step 1. Quit the browser that is using Xmarks
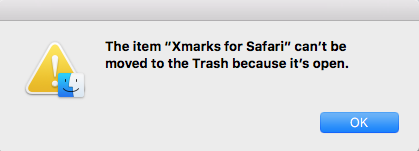
Here’s a little tip you should not miss out: before uninstalling an active app, make sure to deactivate this app and all its associated process. If the app appears in the Dock, firstly right click its icon in Dock and choose Quit. And then do the followings to check and kill any running process pertaining to the target application:
- Open up Activity Monitor from Dock, via Launchpad or in Finder.
- Type the app name in the Search box, and select the process pertaining to the app.
- Click the X icon on the upper left corner, and click (Force) Quit in pop-up dialog.

In today’s case, you just need to quit the active browser that is installed with the Xmarks extension, and then you can proceed with a smooth, manual uninstall.
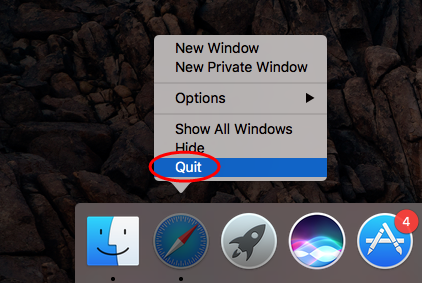
Uninstall Step 2. Delete Xmarks (two available options)
If you want to remove Xmarks from one specific browser like Firefox or Chrome, head to the Extensions tab in the browser Settings pane, and click Remove button next to the item titled Xmarks to perform the deletion. But if you are dealing with the Xmarks for Safari app, you have to do more than simply deleting an extension.
>> Run the dedicated uninstaller in Xmarks installation file
- Locate the installation package for Xmarks if you still keep it on your Mac.
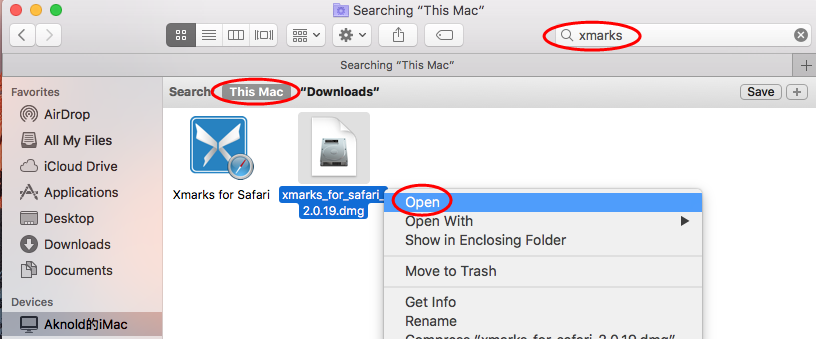
- Double click on the Xmarks.dmg file to display the content.
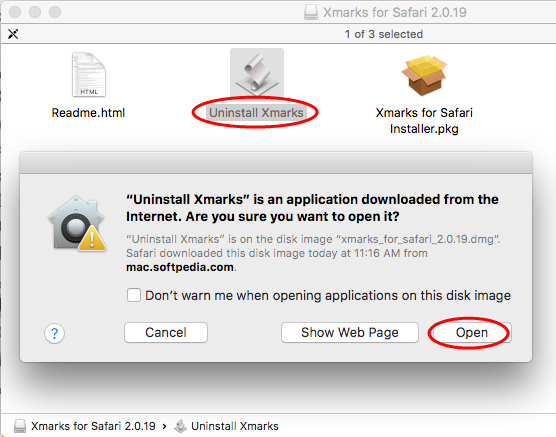
- Double click on the Uninstall Xmarks, and click Open button.
- Click OK to uninstall Xmarks, and then OK again to exit out of the wizard.


>> Remove Xmarks in /Applications and System Preferences
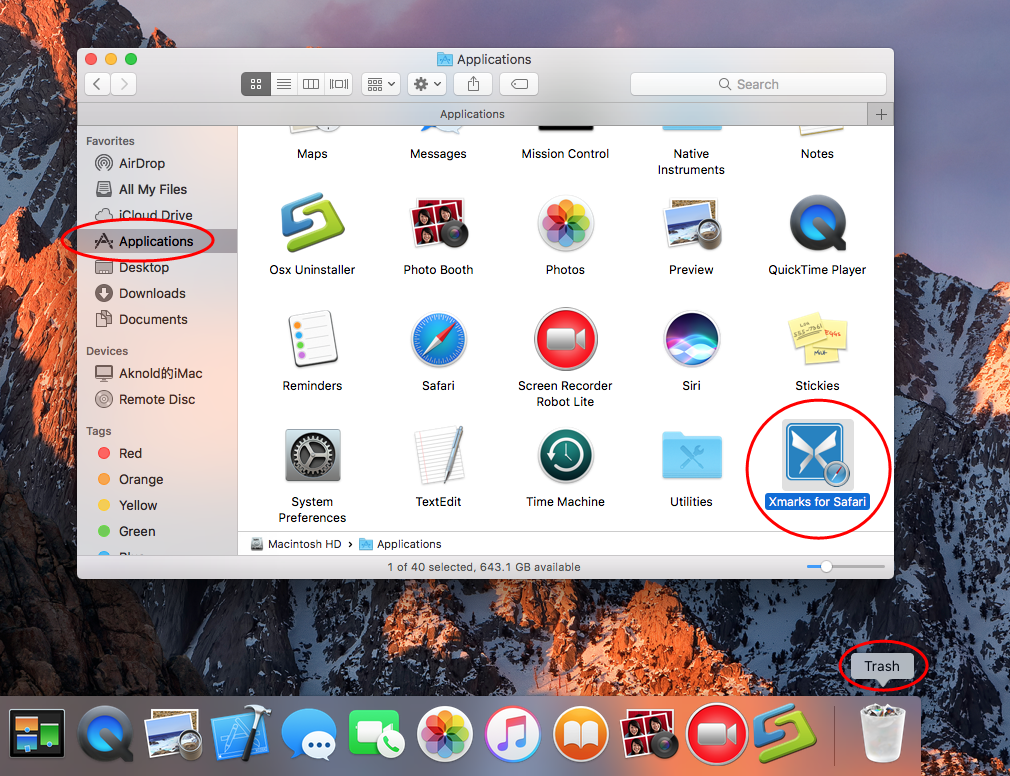
- Open up Finder, and head to the /Applications folder from the sidebar.
- Select Xmarks, drag its icon to the Trash in Dock, and drop it inside.
- Choose Finder from the menu bar, and choose Empty Trash option.
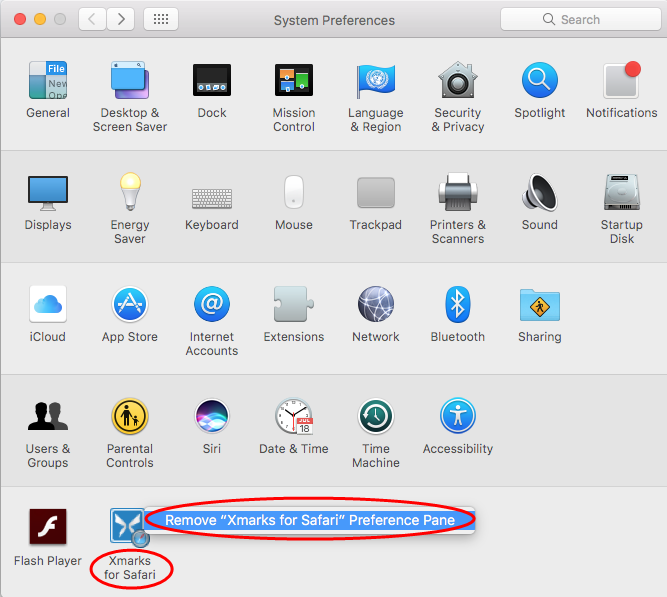
- Head to the Apple icon in the Menu bar, and choose System Preferences.
- As the System Preferences pane opens, locate the Xmarks at the bottom.
- Right click on it and choose Remove Xmarks for Safari Preference Pane.
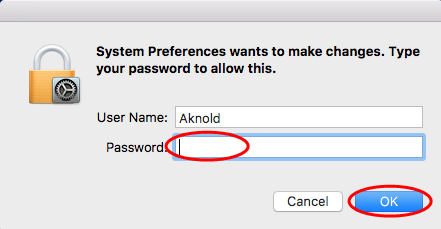
- Type your admin password in pop-up dialog and click OK to allow the change.
So that’s how you can remove Xmarks from the browser, /Applications folder and System Preferences. To make sure all its components are gone, continue the next step.
Uninstall Step 3. Remove Xmarks Leftovers
How can you quickly identify if any other files belonging to Xmarks remain on the system? Here we share a trick for you to hunt down all Xmarks-related items.
- Open the Finder, head to the Go menu in Menu Bar, and choose Go to Folder.
- Type ~/Library in the box that appears, and hit Enter key to open up the folder.
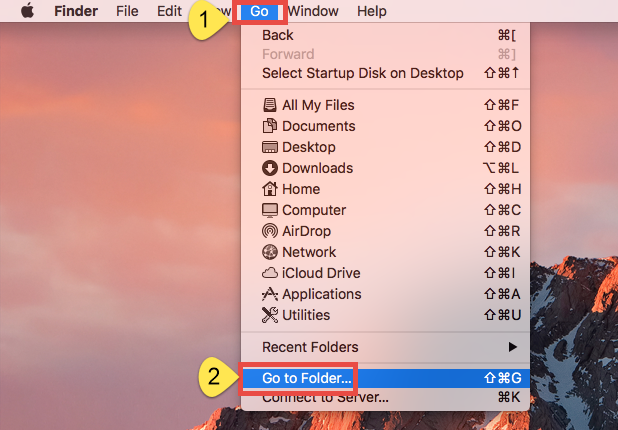

Search for the items whose names contain Xmarks (or LastPass) in the locations:
~/Library/Caches/, ~/Library/Preferences/, ~/Library/PreferencePanes/, ~/Library/ApplicationSupport/, ~/Library/LaunchAgents/, ~/Library/LaunchDaemons/, ~/Library/StartupItems/
Warning: Don’t rush to delete any file if you are not sure whether it belongs to Xmarks. Mistakenly deleting unrelated items could affect other apps or even the system. To locate Xmarks leftovers precisely, use the Search feature in Finder:
- In ~/Library, click Search in upper right corner, and type Xmarks in search bar.
- Click “Library” under the bar to show the result in the specific folder.
- Select the matched items in the search result, and delete them to the Trash.
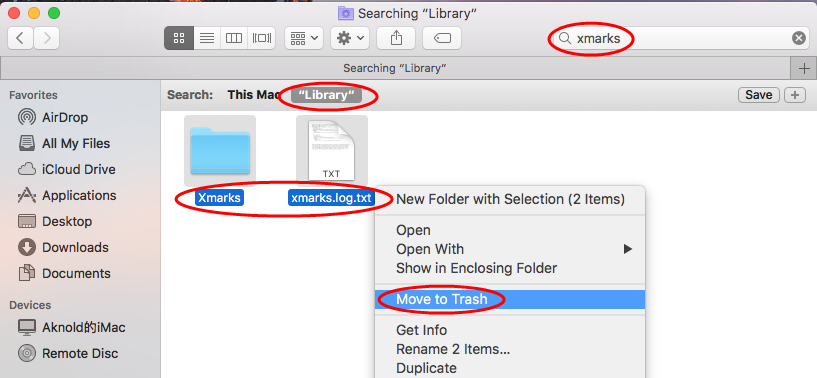
- After that, repeat the steps to delete Xmarks leftovers stored in Library folder.
- Finally, empty the Trash to permanently get rid of all Xmarks traces.
So far you should have successfully uninstalled Xmarks and removed its components from macOS/Mac OS X. Mac novices may feel a little sophisticated to complete all the manual uninstall steps. Well, if you want to avoid those tedious, laborious work, the one-stop solution demonstrated below may be more suitable for you.
Recommended Solution: Remove Xmarks by Osx Uninstaller
Wondering what Osx Uninstaller can do for you? To be brief, the handy, reliable tool could help you to delete all components of target app within a few clicks. If you encounter issues when trying to uninstall Xmarks, try if Osx Uninstaller could help.
This clip shows how Osx Uninstaller works to quickly remove Xmarks for Mac:
Follow the simple steps to thoroughly remove all traces of Xmarks from your Mac:
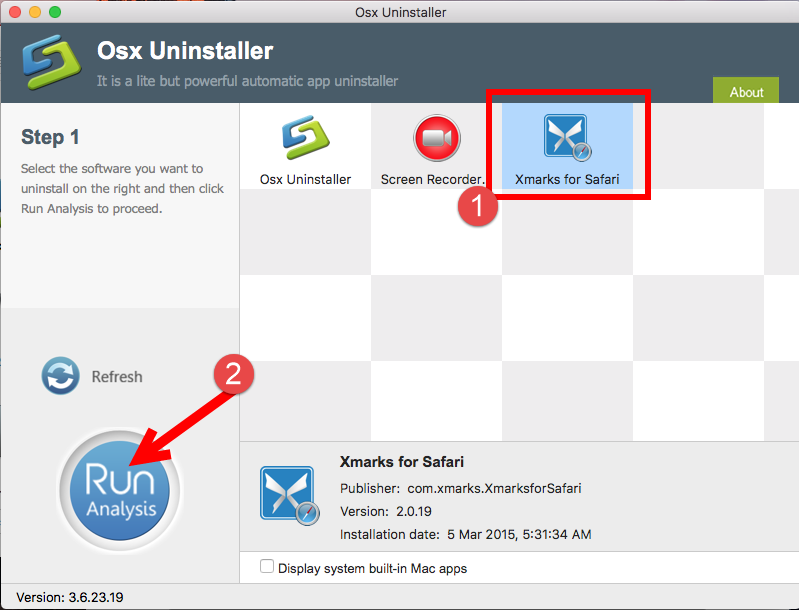
- Launch Osx Uninstaller, select Xmarks and click Run Analysis button.
- Click Complete Uninstall, and then click Yes to execute the uninstall.
- Click on Back to Interface button to re-scan currently installed apps.
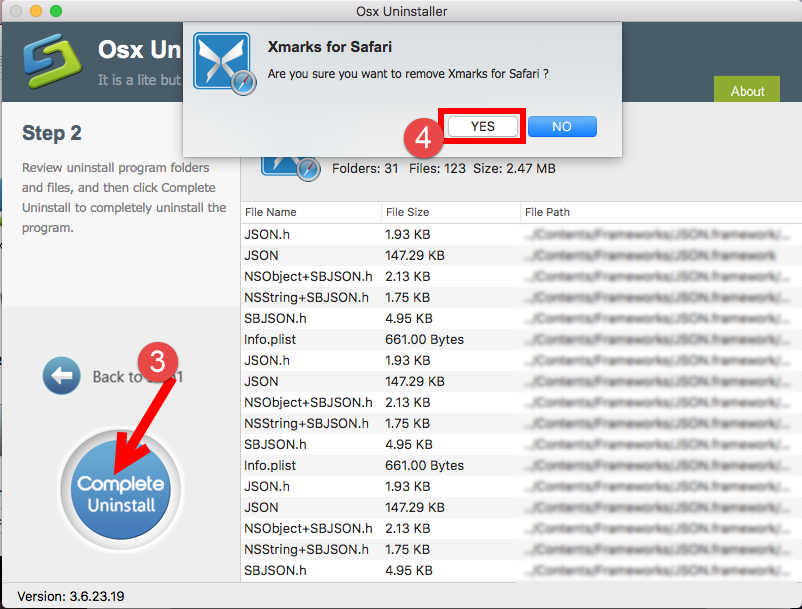
See? The whole process may even last less than thirty seconds to complete. With this app, Mac users can be spared from manual, complicated uninstall operations, but it should be pointed out that Osx Uninstaller requires a valid license to function well.
In this tutorial we list the proper approaches to uninstall Xmarks from Mac computer. And the tricks also work for removing most third party Mac apps. We hope you can achieve a clean, satisfactory uninstall, and you are welcome to leave any suggestion or share opinion here. Our technical team are ready to assist you with uninstall issues.


 $29.95/lifetime