How to Fully Uninstall VueScan on Mac (Two Options)
VueScan is a free scanning software that can works with most scanners to produce high-quality scans. Besides, it is a lite, handy tool to help you connect to the old scanner that does not include compatible driver for more modern versions of Mac operating system. Yet, if you have an alternative to replace this software, or you have some problems when using it, you may consider to uninstall VueScan for Mac.
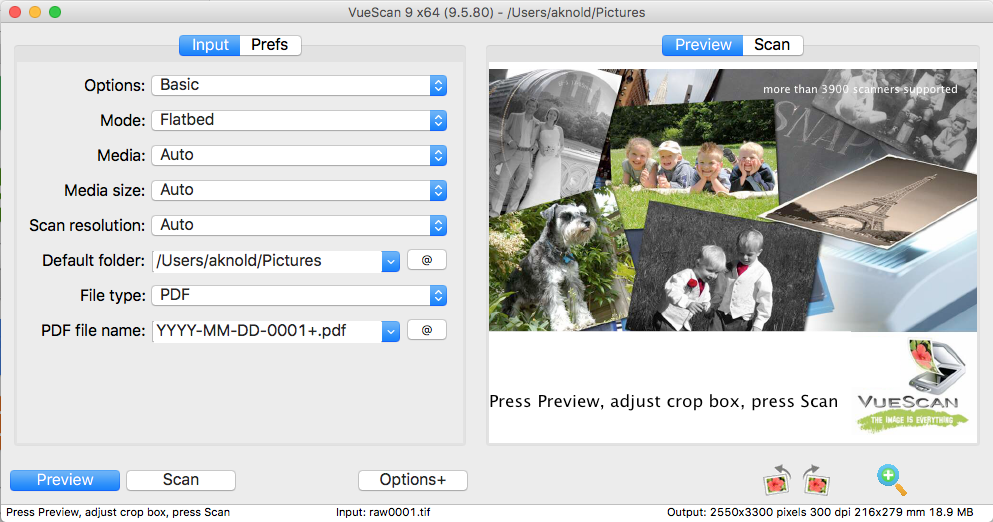
Here are potential troubles you may meet during the removal of VueScan:
- VueScan cannot be terminated normally/its background process keeps active;
- VueScan cannot be removed from the Applications folder for unknown reason;
- App notifications show up even you have performed a standard uninstallation;
- Some components scattered around the system cannot be thoroughly deleted…
If that’s what you are faced with, read through this post to learn how to effectively remove VueScan for Mac. Two solutions are listed below to guide you through uninstalling VueScan. Choose the preferred one to conduct a thorough deletion.
Regular Steps to Uninstall VueScan on Mac
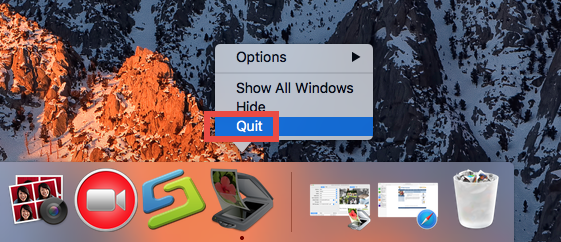
To properly uninstall an app you should first make sure it is not activated for the moment. If VueScan is currently running or keep active in the background, quit related processes before the uninstall starts. Here’s how you can exit out of an app:
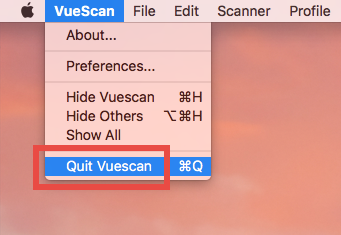
(1) In the app interface, choose [app name] > Quit from the Menu Bar;
(2) Right click on the app icon on the Dock, and then choose the Quit option;
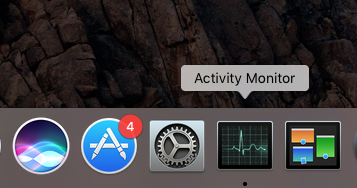
(3) Open up Activity Monitor, select the process with the name of the app in the list, then click the “X” button on the upper left corner, and click Quite button in the pop-up dialog. If the app fails to quit, then try Force Quite in the pop-up dialog.

As VueScan stops running, perform the steps below to delete the app itself:
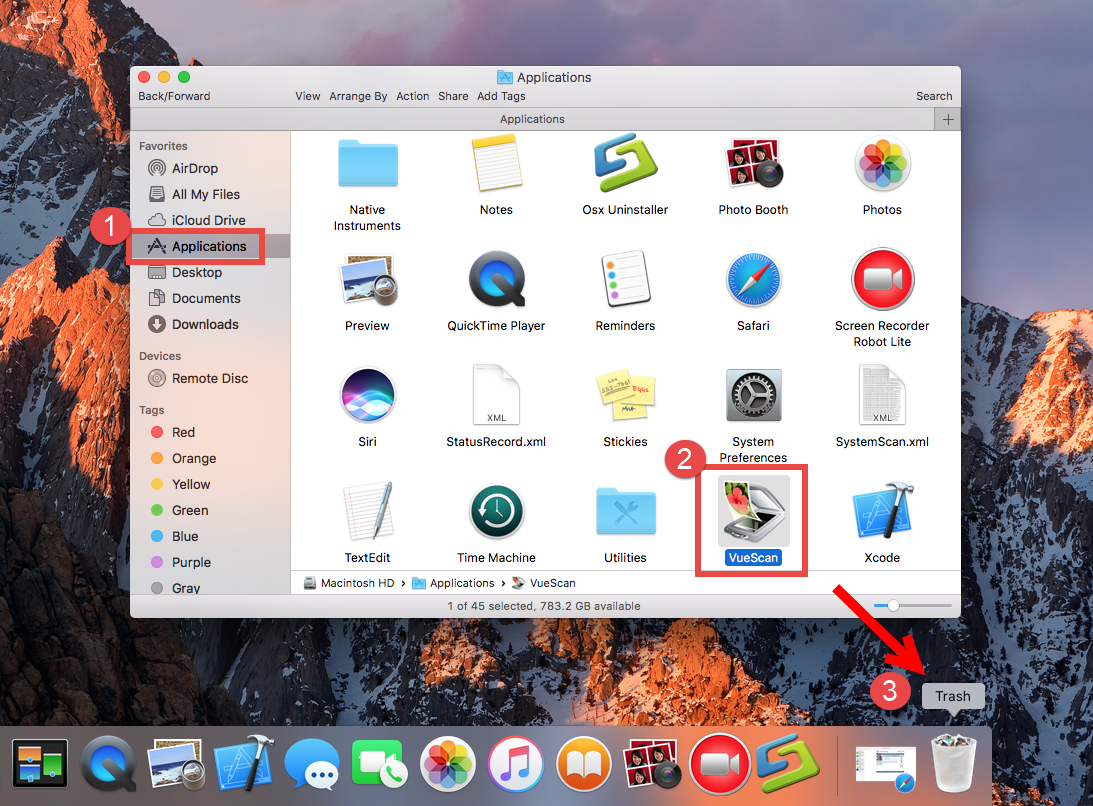
- Launch Finder, and click Applications in the sidebar to open up the folder.
- Locate and select VueScan, then drag the icon to the Trash and drop it there.
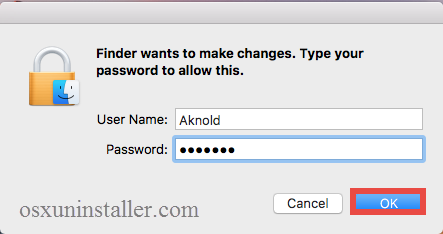
- When prompted, type your administrator account password to allow this change.
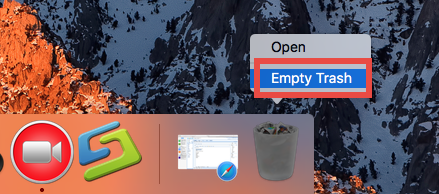
- Right click on Trash icon, choose Empty Trash, and click Empty Trash again.
Notice: Be cautious when you perform the last step. Emptying the Trash will instantly remove all the files you’ve thrown into the Trash, and this operation is irrevocable. Make sure you have not deleted anything wrong over there. Before emptying the Trash, you can restore the item by right clicking on it and choosing Put Back option.
Besides, you can trash an app by (1) right click on it and choose Move to Trash option, or (2) select the app, and head to File menu > Move to Trash option. As soon as you empty the Trash, the uninstallation of VueScan will be carried out immediately.
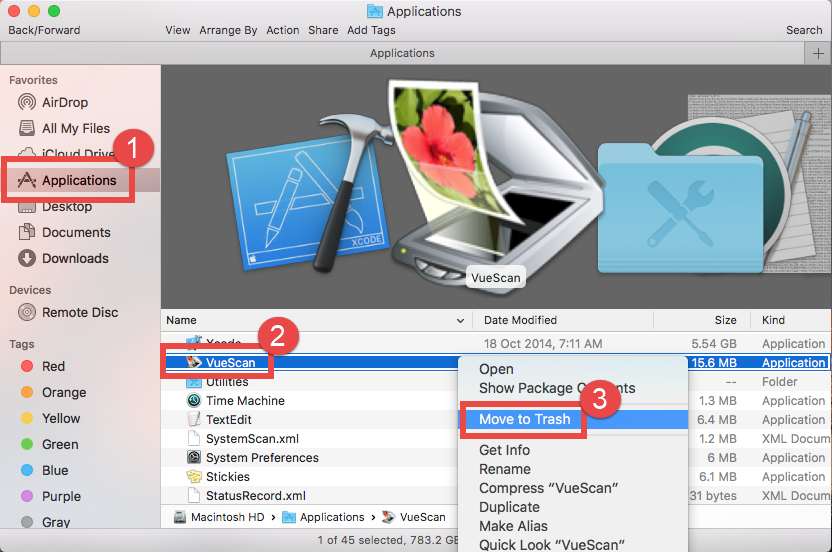
The trash-to-uninstall method works in all versions of Mac OS X, though it may not applicable to some Mac built-in apps or well-integrated apps like antivirus software.
Extra Steps to Remove VueScan Traces
If you choose the regular solution to uninstall VueScan, you will need to do extra job after the deletion of the app. VueScan itself has gone from your Mac, yet some of its associated files may still remain in the system. If you want to entirely get rid of VueScan, take the following steps to delete the invalid items pertaining to VueScan:
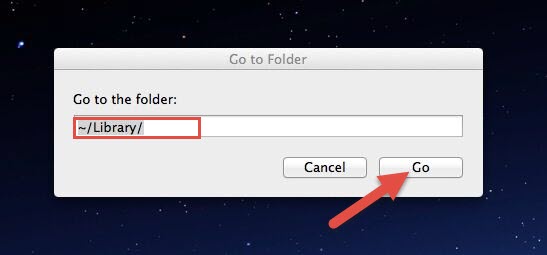
- Open the Finder, click Go in the Menu bar, and select the entry Go to Folder…
- Type the path /Library in Go to the Folder box, and hit Enter key to open it.
- Search for the items with the name of VueScan in the locations: /Library, /Library/Caches,/Library/Preferences,/Library/ApplicationSupport,/Library/LaunchAgents,/Library/LaunchDaemons,/Library/PreferencePanes,/Library/StartupItems
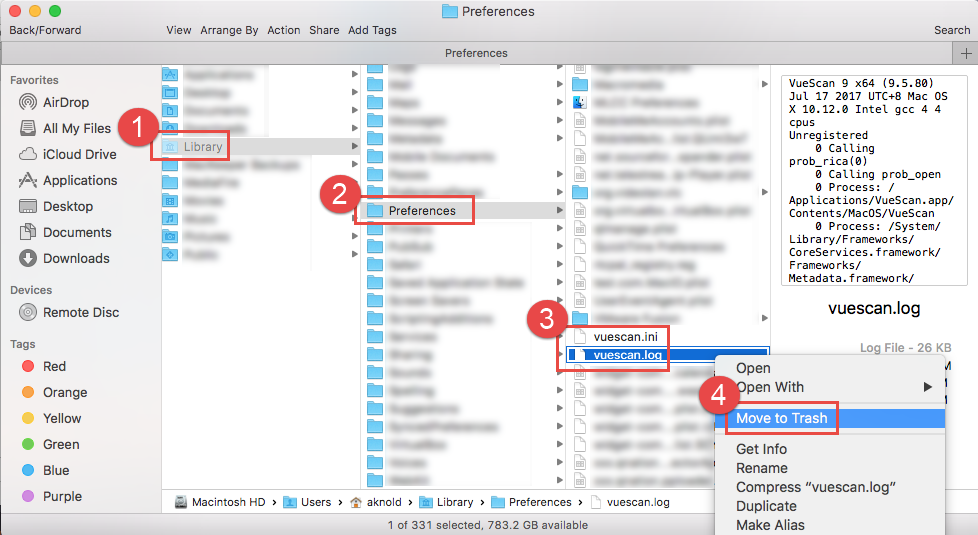
If you are a Mac novice, we do not suggest you to perform the deletion by your own, because any mis-operation might trigger problems on other apps or even affect system files. An automated uninstaller may be a better choice for inexperienced users. Or instead, you can utilize the Search feature in Finder to help locate related components.
- Type the path of the current user’s Library Folder: ~/Library, and hit Enter key.
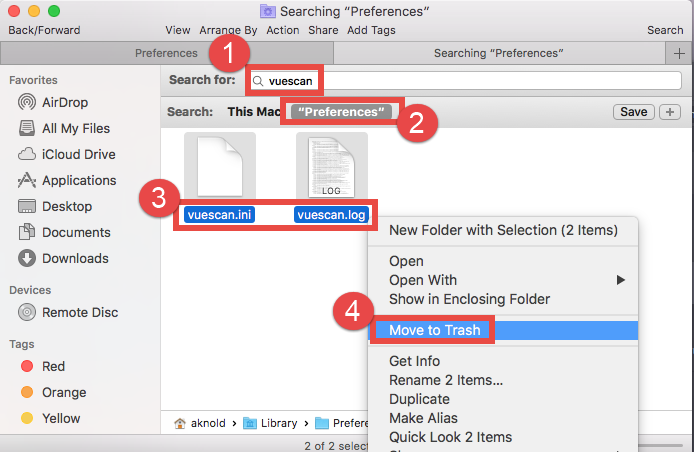
- Type the name of target app or its vendor in Search Bar, and click on “Library”.
- Identify the matched items in search results, and remove them to the Trash.
- Finally, empty the Trash to delete VueScan leftovers permanently.
Some of you may think that deletion of app leftovers is a little low-efficient and risk-taking. The truth is, some files or folders pertaining to the app do not even have the name of VueScan, so you may fail to find them out by aforementioned steps.
Not sure if you have detected all VueScan files for your Mac? If you wanna save some troubles in uninstalling VueScan, take a quick look at the second solution below.
A Recommended Solution to Delete VueScan
Seeking for an all-in-one approach to deal with VueScan removal? Why not try an automated uninstaller? Featured with an intuitive interface and powerful engine, Osx Uninstaller functions as a reliable and handy tool designed for all-level users to uninstall any unwanted, problematic, stubborn and malicious apps without hassle. The testing result shows this tool can remove all VueScan components within a few clicks.
Watch the video clip to know how it works to fully uninstall VueScan on Mac.
Here are the simple steps for using Osx Uninstaller to remove VueScan.
- Step 1. Download Osx Uninstaller and install it to the Application folder.
- Step 2. Launch Osx Uninstaller, select VueScan and click Run Analysis.
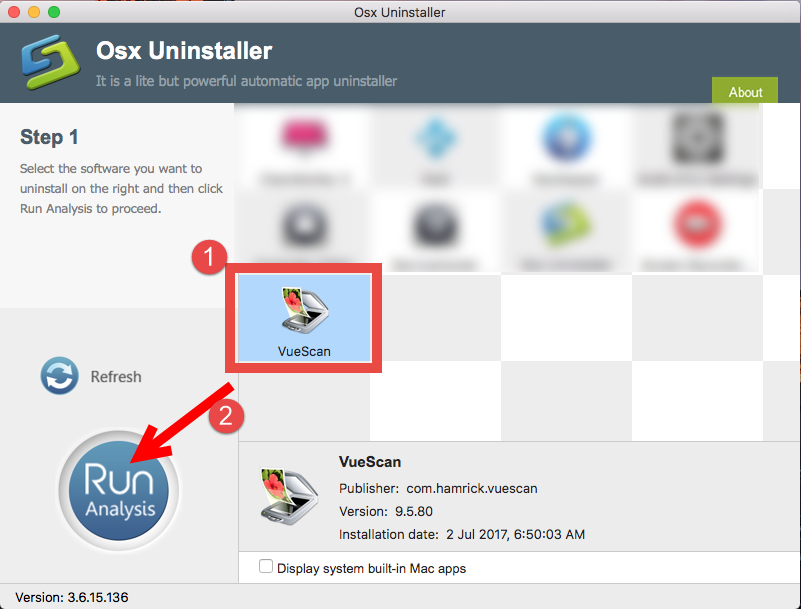
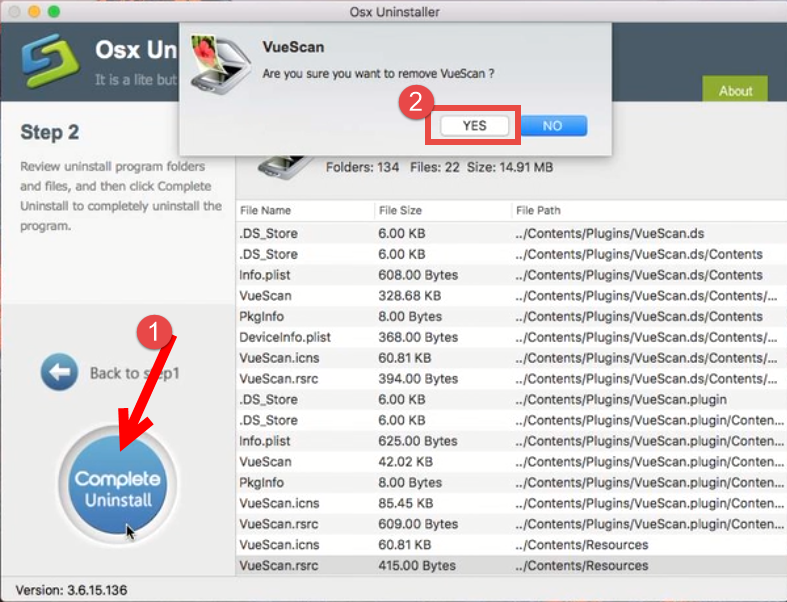
- Step 3. Review related files and folders, click Complete Uninstall button, and click Yes in the pop-up dialog to fully remove all components of VueScan.
- Step 4. Click on Back to Interface button to re-scan currently installed apps.
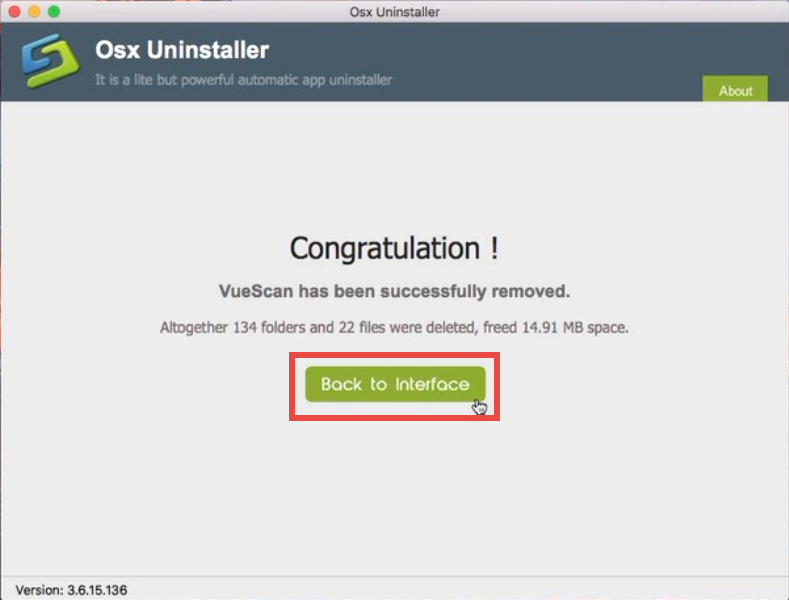
As you can see, VueScan have gone from the interface, which means you have entirely got rid of this app. The thorough removal completes in the few blinks of time.
To conclude, this post shares two solutions to help Mac users uninstall VueScan. Both of them works for most cases and have their own advantages. Which one do you prefer to use to delete unwanted app on Mac? Welcome to share your ideas with us.


 $29.95/lifetime