Take Simple Clicks to Uninstall Snes9x on Mac
Snes9x is a portable, open-sourced, freeware Super Nintendo Entertainment System (SNES) emulator, and the only SNES emulator on Mac platform. It allows you to play most games designed for the SNES and Super Famicom Nintendo game systems on your Mac computer. However, even the latest version (v1.53) may not be fully compatible with all macOS/Mac OS X systems. If you have run into problems when trying to uninstall Snes9x, read this removal guide to know how to do it right.
Here are some problems that may upset you when uninstalling Snes9x:
- Snes9x cannot be quit from the Dock, or related process is still active;
- Snes9x cannot be dragged to the Trash, or it cannot be deleted in Trash;
- Snes9x leaves some components after you perform a standard uninstallation…
Hereby we provide two mainly approaches to guide you through the thorough uninstallation of Snes9x. You can either follow the manual steps to delete the emulator, or more conveniently, run an dedicated uninstaller to handle the task effortlessly.
Conventional Steps to Uninstall Snes9x for Mac
Before you perform a standard uninstall, make sure to quit the target app, so that error message won’t pop up to interrupt the uninstall. If Snes9x is currently running or it process keeps active in the background, you can deactivate it by the options below.
(1) In the app interface, choose Snes9x> Quit Snes9x from the Menu Bar;
(2) Right click on the app icon on the Dock, and then choose the Quit option;
(3) Open up Activity Monitor, select the process with the name of the app in the list, then click the “X” button on the upper left corner, and click Quite button in the pop-up dialog. If the app fails to quit, then try Force Quite in the pop-up dialog.
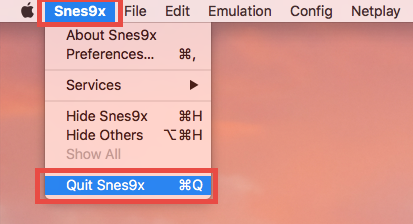
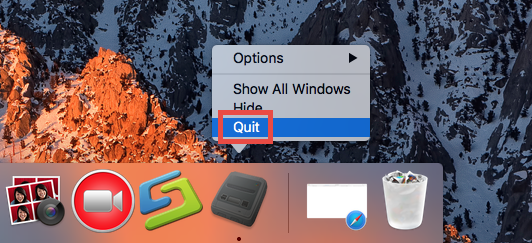
As you quit Snes9x, follow the simple steps below to delete the app itself:
- Launch Finder, and click Applications in the sidebar to open up the folder.
- Locate and select Snes9x, then drag the icon to the Trash and drop it there.
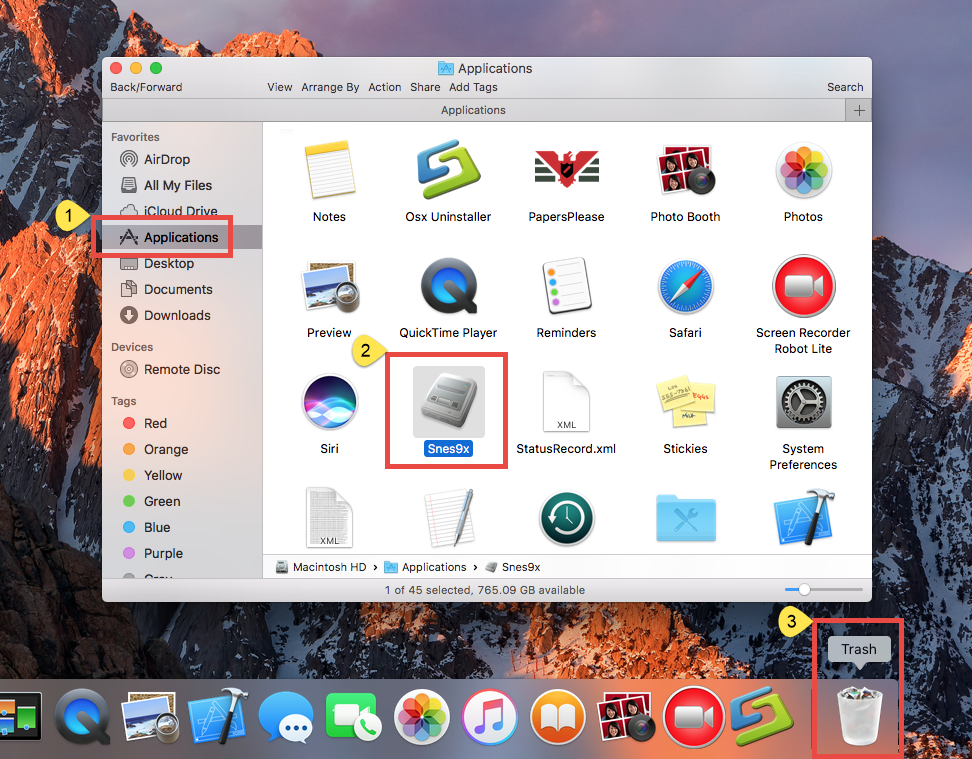
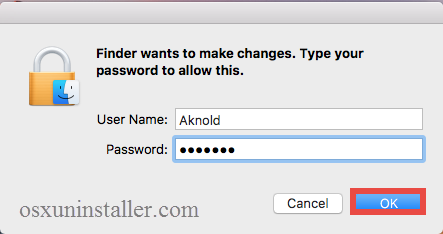
- If prompted, type your administrator account password to allow this change.
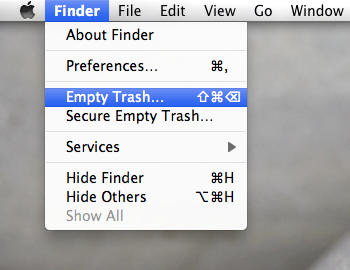
- Right click on Trash icon, choose Empty Trash, and click Empty Trash again.
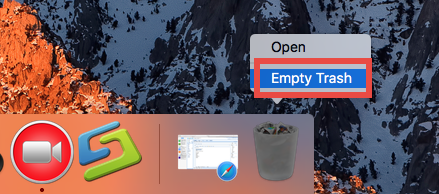
Notice: Be cautious when you perform the last step. Emptying the Trash will instantly remove all the files you’ve thrown into the Trash, and this operation is irrevocable. Make sure you have not deleted anything wrong over there. Before emptying the Trash, you can restore the item by right clicking on it and choosing Put Back option.
Besides, you can trash an app by (1) right click on it and choose Move to Trash option, or (2) select the app, and head to File menu > Move to Trash option. As soon as you empty the Trash, the uninstallation of Snes9x will be carried out immediately.
The trash-to-uninstall method works in all versions of Mac OS X, though it may not applicable to some Mac built-in apps or well-integrated apps like antivirus software.
Additional Steps to Delete Snes9x Leftovers
Most users think that they complete the uninstallation of Snes9x since the app has disappeared from sight. Yet, though Snes9x itself has gone from your Mac, some of its associated files may still remain in the system. If you want to know whether you have fully got rid of Snes9x, do some extra work to check out the uninstall result:
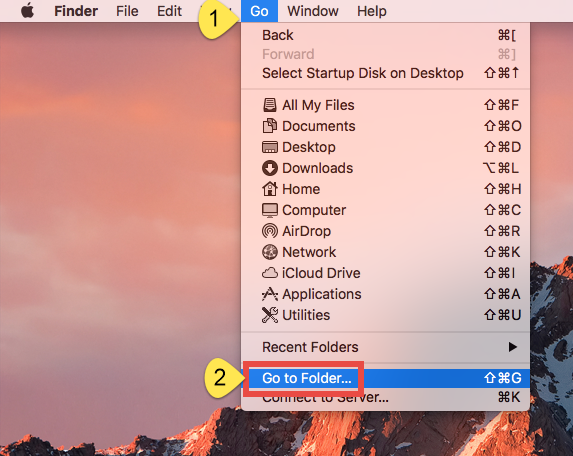
- Open the Finder, click Go in the Menu bar, and select the entry Go to Folder…
- Type the path /Library in Go to the Folder box, and hit Enter key to open it.

- Search for the items with the name of Snes9x in the locations: /Library, /Library/Caches,/Library/Preferences,/Library/ApplicationSupport,/Library/LaunchAgents,/Library/LaunchDaemons,/Library/PreferencePanes,/Library/StartupItems
If you are a Mac novice, we do not suggest you to perform the deletion by your own, because any mis-operation might trigger problems on other apps or even affect system files. An automated uninstaller may be a better choice for inexperienced users. Or instead, you can utilize the Search feature in Finder to help locate related components.
- Type the path of the current user’s Library Folder: ~/Library, and hit Enter key.
- Type the name of target app or its vendor in Search Bar, and click on “Library”.
- Identify the matched items in search results, and remove them to the Trash.
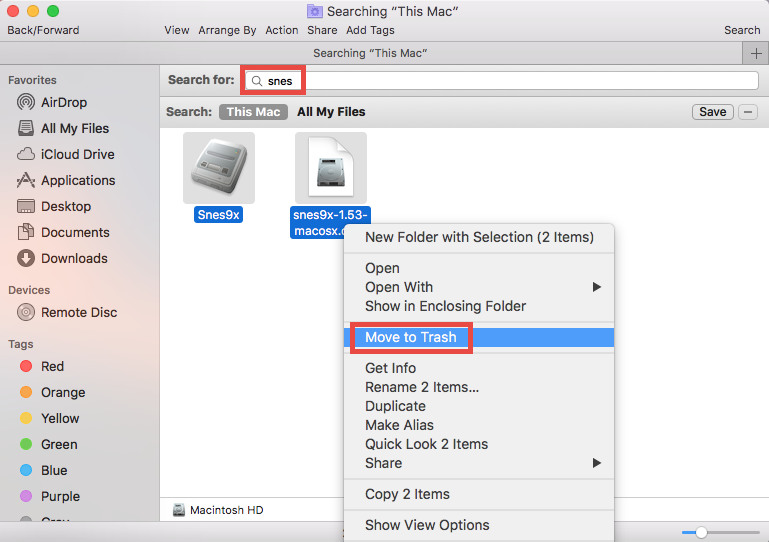
- Finally, empty the Trash to delete Snes9x leftovers permanently.
Many users neglect the fact that some files or folders pertaining to Snes9x do not even have the name of Snes9x, and that explains why you may still fail to find them out by aforementioned steps. For those who prefer to save trouble or time in the uninstallation of Snes9x, it is a better choice to take the next removal solution.
All-in-One Solution to Remove Snes9x on Mac
Wondering if there is a shortcut you can follow to remove Snes9x? Well, have you considered using an dedicated uninstaller? Featured with an intuitive interface and powerful engine, Osx Uninstaller functions as a reliable and handy tool designed for all-level users to uninstall any unwanted, problematic, stubborn and malicious apps. Now watch the video clip to know how it works to fully delete Snes9x for Mac.
See? To uninstall Snes9x with Osx Uninstaller you can just take a few clicks like that.
- Step 1. Download Osx Uninstaller and install it to the /Application folder.
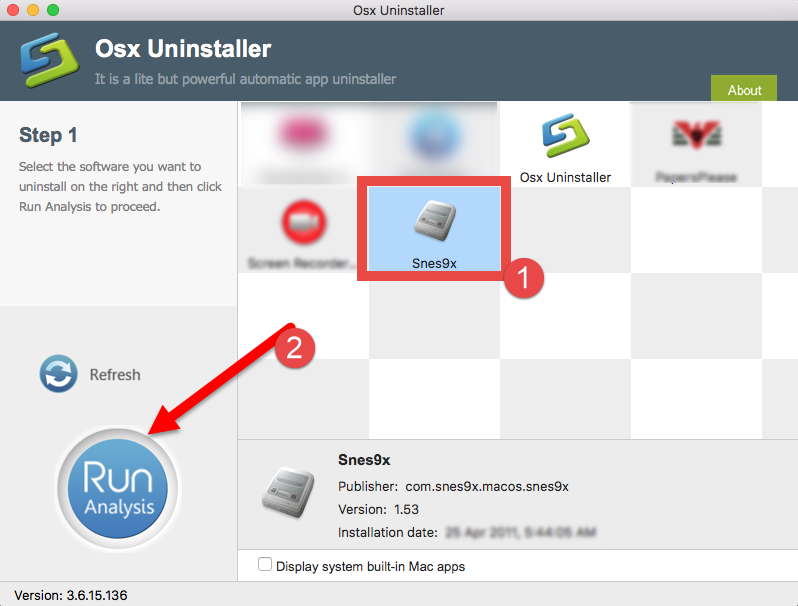
- Step 2. Launch Osx Uninstaller, select Snes9x and click Run Analysis.
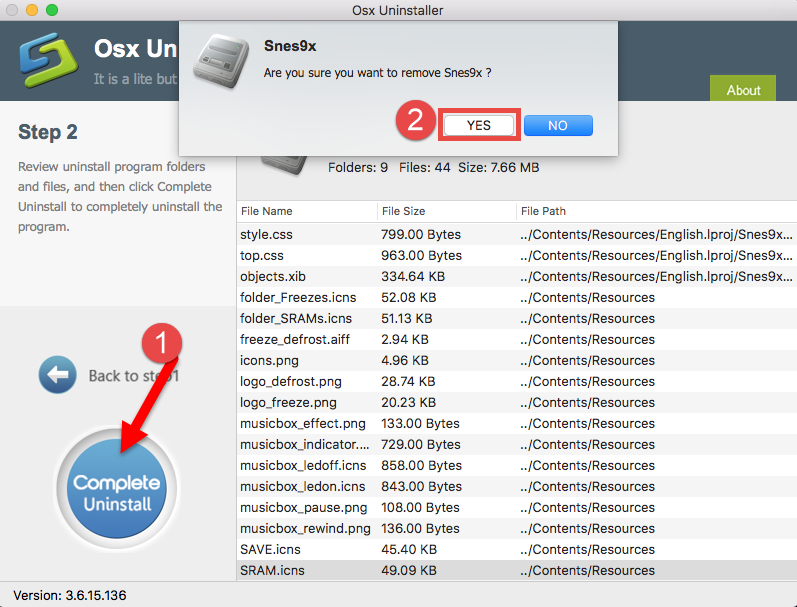
- Step 3. Click Complete Uninstall, and click Yes in the pop-up dialog.
- Step 4. Click on Back to Interface button to re-scan currently installed apps.
The half-automated uninstaller is more efficient and comprehensive in the uninstall task, compared with the manual approach which requires a little more time and skill. Which solution do you prefer to use to uninstall Snes9x? Does any of them help solve your uninstall issues? We’ll be glad if you could share your ideas with us here.


 $29.95/lifetime