How to Correctly Uninstall Dr.Web for OS X from Mac Computer
“I installed the trial version of Dr. Web from the ‘install Internet Security’ menu item. How do I uninstall it?” or some kind like asking “Afterwards, I checked around and I decided to uninstall it. But it will not go away, as it refuses to follow apples standard methods of deletion like drag and drop or holding until it wiggles.” Like many users ask, how to correctly uninstall &remove Dr.Web for OS X from a Mac computer? Today we are going to list the proper ways to fully& completely uninstall Dr.Web antivirus for Mac.

If you have questions like we mentioned above or if you are getting upset when trying to uninstall Dr.Web for OS X completely but didn’t work out at the end, then just read over this story, I think it will help you a lot.
What is Dr.Web for OS X?
Dr.Web for OS X is anti-virus application that is created for Mac OS X, it defends your Mac from all types of malicious programs—including those created specifically for OS X. With the growing popularity of OS X, malware tends to target specifically this operating system. Although Apple has always says their product is100 present safe and reliable in the world, and no default antivirus app is installed in its system, do you really feel safety when using Mac without any protection?
Try to Use These Methods to Uninstall Dr.Web for OS X
An uninstallation is probably as important for as antivirus protection for a Mac, install and buy an antivirus app seems easy to do for most users, but lots of them don’t know how to do to totally eliminate antivirus app. if you have problem with all kind of antivirus apps on Mac, then check these tutorials for better help. Now let’s start to uninstall Dr.Web for OS X step by step.
Way 1: Uninstall Dr.Web for OS X with Osx Uninstaller (Recommended)
First of all, I’d like to introduce an effective method that can quickly uninstall Dr.Web antivirus for Mac, just let you know that there is an uninstaller can perfectly solve this kind of removal problem.
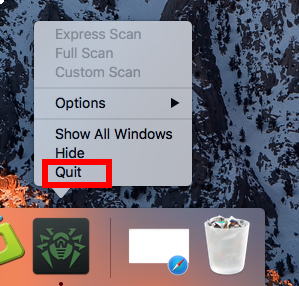
Before removal, quit the antivirus from running or working in the background:
- Option 1: Right click the target icon on Dock, and then choose Quit option;
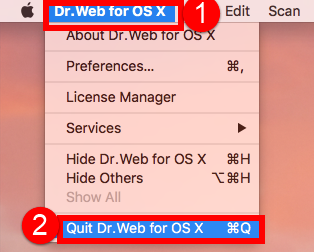
- Option 2:Click Dr.Web for OS X icon on the Manu bar near Apple icon, then choose Quit Dr.Web for OS X;
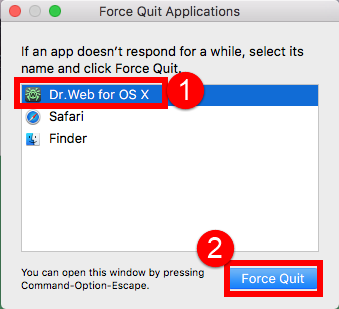
- Option 3: Or press keyboard shortcuts with Command-Option-Esc to launch Force Quit Application window, then choose Dr.Web for OS X and click “Force Quit“;
Alright, after make sure you have quit Dr.Web for OS X, then begin your removal tuor, even exit a program has more than one options, not to say uninstall Dr.Web antivirus, if you have different ways to eliminate it, just leave a message.
Make sure you have downloaded Osx Uninstaller and installed it with register code, just ensure everything goes smoothly.
First spend a few minutes to fully scan the video of how to completely uninstall &remove Dr.Web for OS X from Mac as bellow:
Take a look in the video, you’ll find there are only three simple steps to fully uninstall Dr.Web for OS X from Mac in the whole process operations:
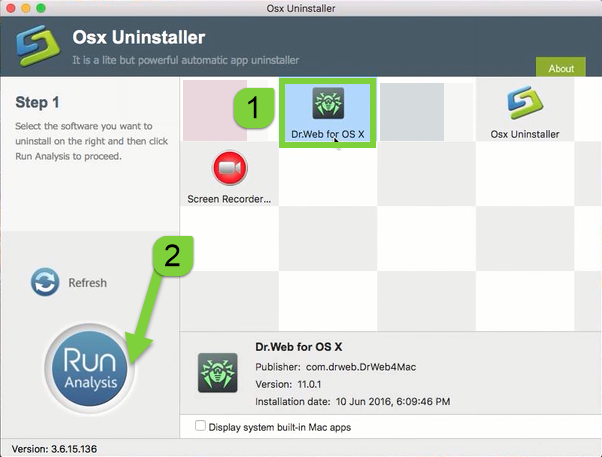
Step 1: Run the uninstaller, and select the Dr.Web for OS X icon in the interface then click button Run Analyze;
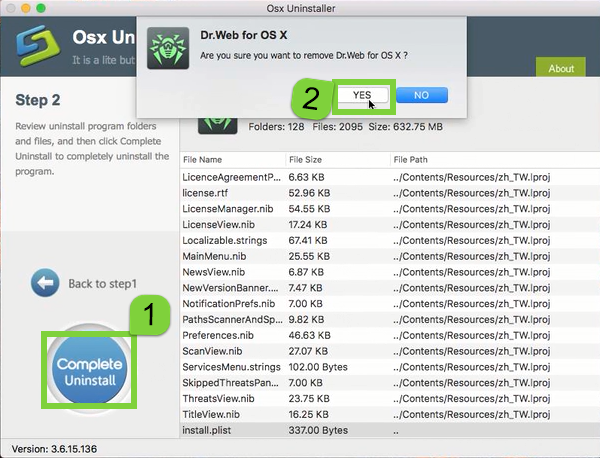
Step 2: Easily click on button Complete Uninstall to conduct the regular removal. Then click Yes to delete all leftovers scanned;
Step 3: Congratulations, you have just removed Dr.Web for OS X successfully as easy as you think.
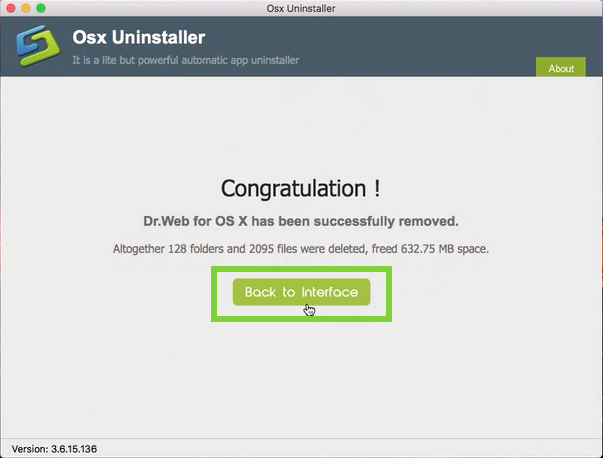
Note: The annoying associated files or folders were scanned and deleted in Step 2, and deleted in Step 3. Altogether 128 folders and 2095 files were deleted, freed 632.75 MB space.
Way 2: Remove Dr.Web for OS X with Manual Approach (Most Common)
The second method today we are going to list is about using the most common and typical approach to finally uninstall Dr.Web for OS X, you want to learn more just keep on reading.
To do so, you need to:
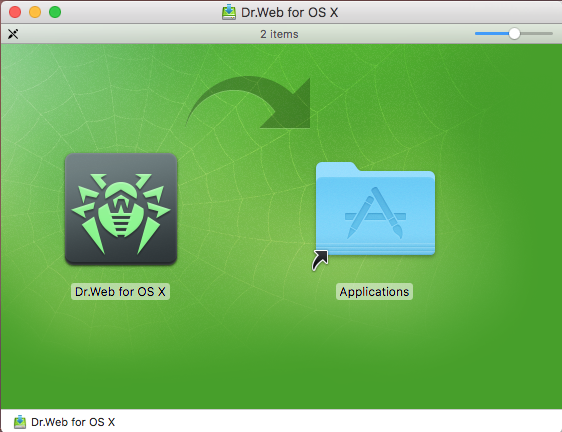
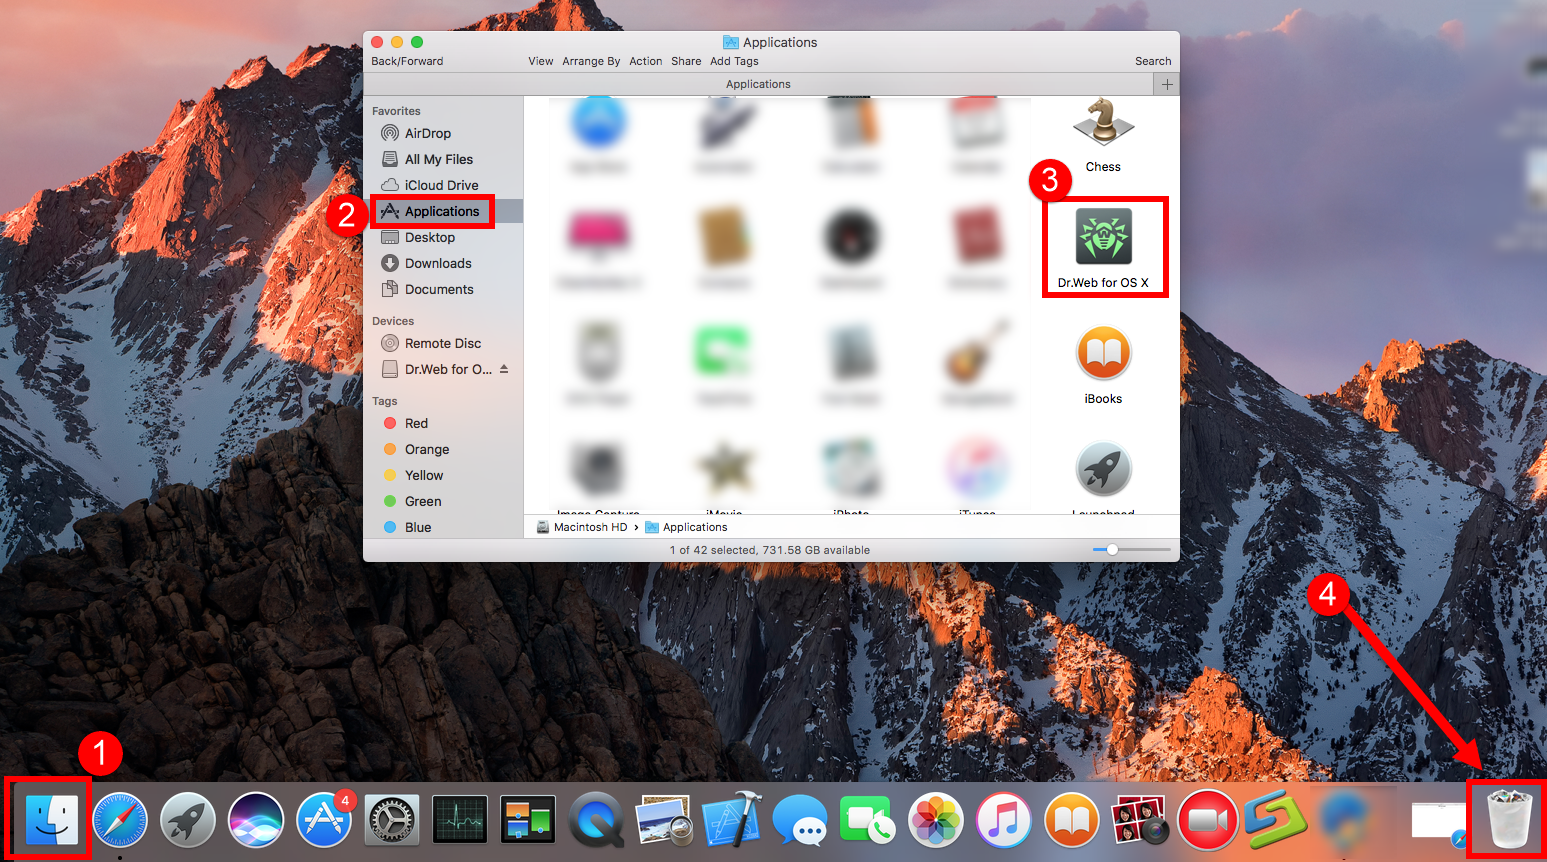
Open Finder > Applications > Drag it into Trash by sliding, or right click to choose Move to Trash;
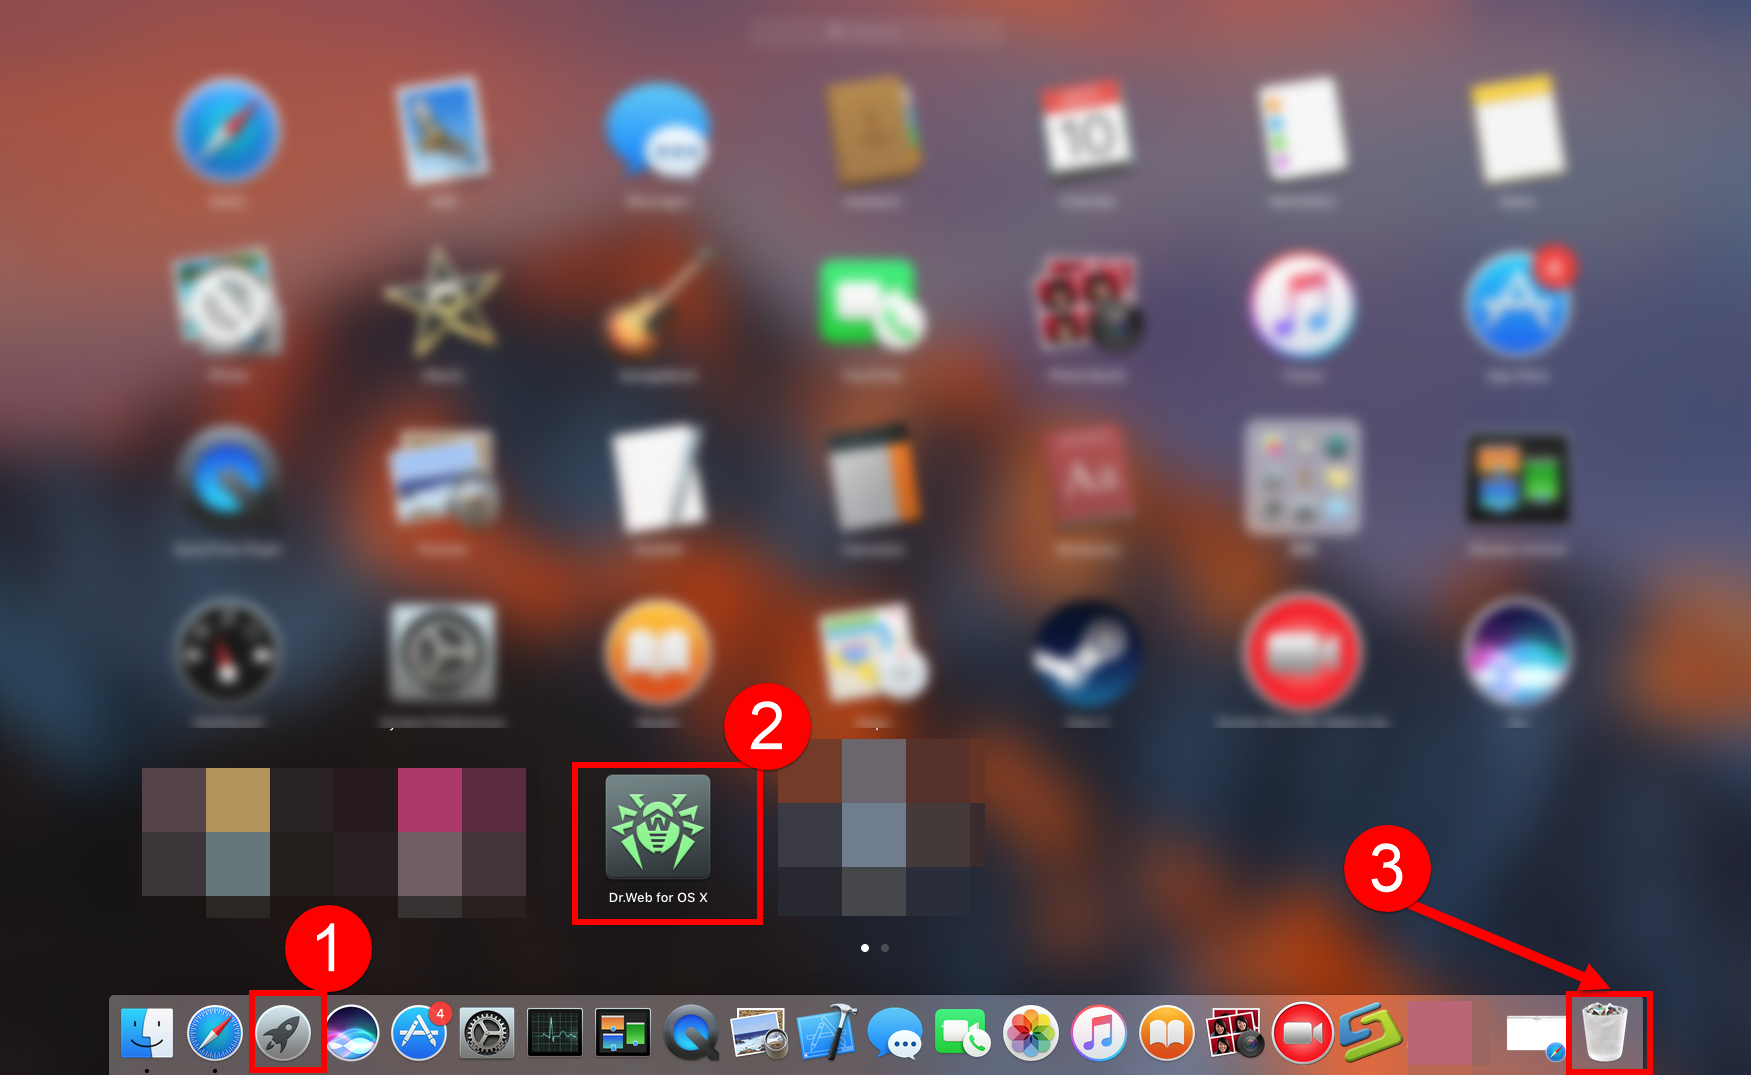
Or Open Launchpad, click icon and hold in a while until it starts to wiggle>>Then click the “X” that appears on the left upper corner.
These are the most basic operations to uninstall app in macOS, however, it becomes more difficult in nest part to eliminate its leftovers.
- Open “Finder”
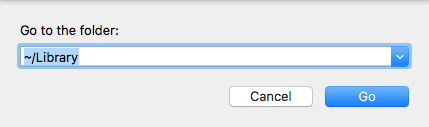
- Go to Menu Bar, and select Go > Go to Folder…
- Type “~/library/” in the box, hit Go
- Type the name of Dr.Web in the search box of ~/Library
- Delete all the select targets then.
- Or search the files in the name of Dr.Web in the most usual folders like Application Support,
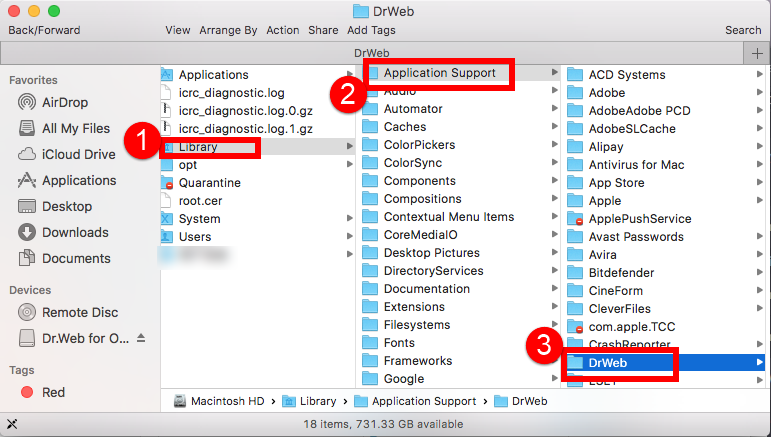
- Caches

- and Preference
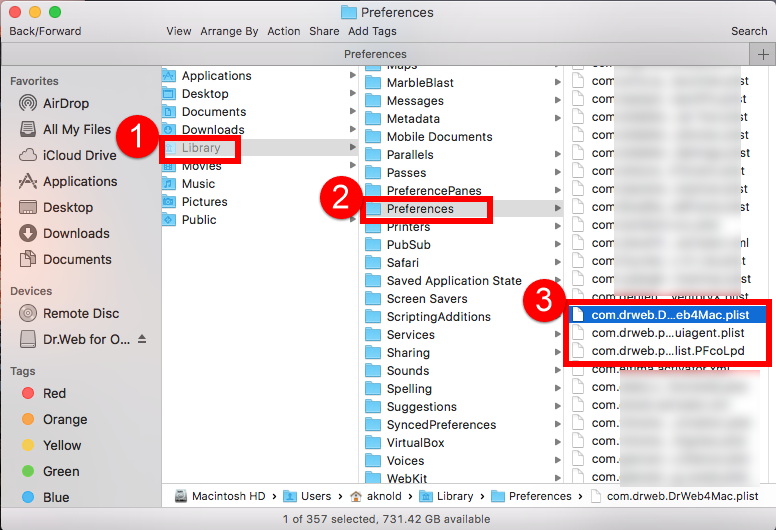
- Once they showed right-click to delete all of them
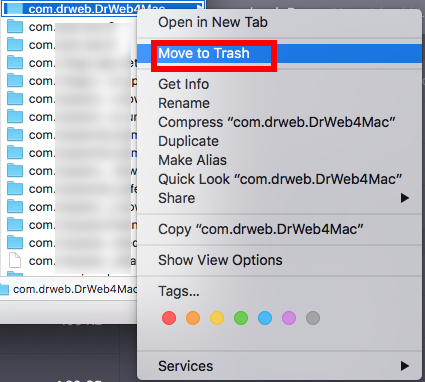
- Finally, right-click Trash, choose Empty the Trash to confirm your whole removal.
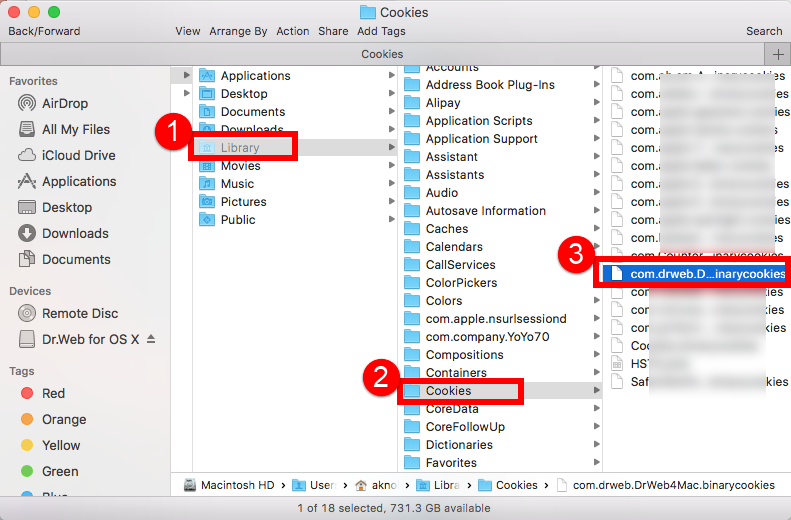
Be careful, some other files might be hided in these folders: ~/Libary/Cookies
or ~/Libary/LuanchDaemons:
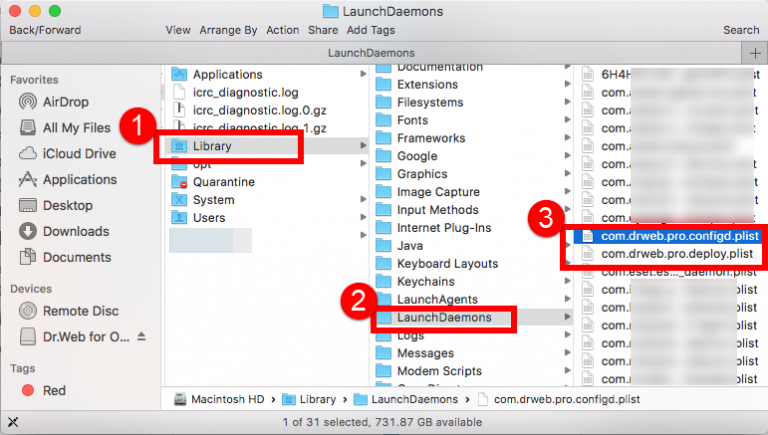
or ~Library/C:

This is why many users complained they couldn’t uninstall Dr.Web for OS X from Mac cleanly at the end, they found more leftovers even they had done in Library all it needed as it asked, while comparing with Way 1, the automatic steps seems useful and faster to get rid of Dr.Web antivirus.
In short, just choose the proper method that most fit the result you need, weather you do, make sure it won’t hurt your computer but do the removal thoroughly. Any question about uninstall Dr.Web for OS X, welcome to leave a comment bellow.
 $29.95/lifetime