Simple Steps to Fully Uninstall Disk Inventory X on Mac
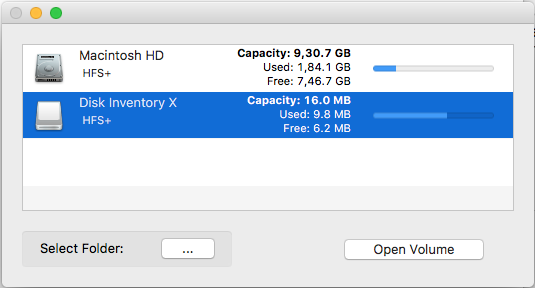
Disk Inventory X is a free disk utility for Mac OS X 10.3 and later. It allows users to view disk usage and the sizes of items in each volume. The current version is 1.0 and the recent update was released in 2006. If you are looking for a newer tool to check out your drives, there are many alternatives like DaisyDisk or OmniDiskSweeper.
Run into issues when trying to uninstall Disk Inventory X from your Mac? Have no clue how to hunt down the app components? In this tutorial we will guide you through the detailed steps to thoroughly uninstall Disk Inventory X without any trouble.

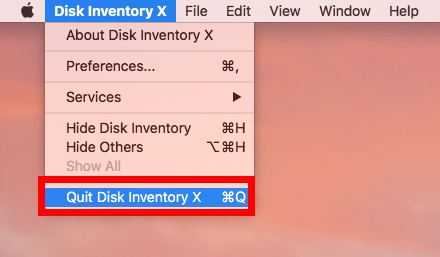
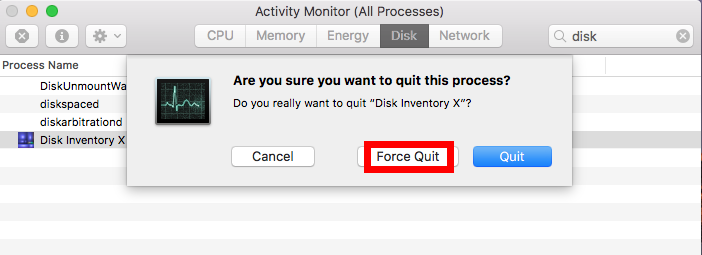
Pre-uninstallation: Before you try to uninstall an app, don’t forget to quit the process if it is currently running. To quite an active app, you can either right click its icon on the Dock and choose Quite, or head to the [app name] in the Menu bar and choose Quit [app name]. Besides, if you fail to quit an app, or there is a related process running on the background, you can utilize the Activity Monitor to (force) quit it.
- Open up Activity Monitor from the Dock, Applications/Utilities folder or Spotlight.
- Select the process with the name of Disk Inventory X, click on (X), and hit Quit.
After that, you can begin with the standard uninstall. There are mainly two approaches to uninstall unwanted apps on macOS/Mac OS X: (1) run an effective, dedicated uninstaller to deal with the removal task painlessly, or (2) carry out conventional method to manually remove Disk Inventory X from your Mac.
Option 1: Use Osx Uninstaller to Remove Disk Inventory X
If you want to save time/trouble in uninstalling Disk Inventory X, you are highly recommended to utilize an all-in-one tool, namely Osx Uninstaller for Mac. Among numerous tools that support to uninstall Mac applications, Osx Uninstaller stands out as a professional, reliable and handy utility. It is designed to help all-level users to uninstall any unwanted, problematic, stubborn and malicious apps within clicks.
To uninstall Disk Inventory X with the help of Osx Uninstaller, you just need to:
- Step 1. Download Osx Uninstaller and drag its icon to the Application folder.
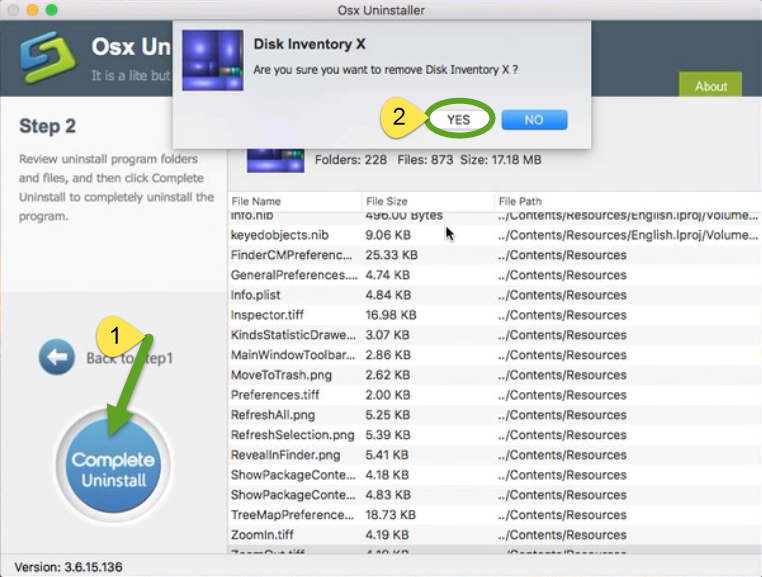
- Step 2. Run Osx Uninstaller, select Disk Inventory X and click on Run Analysis.

- Step 3. As all the items pertaining to Disk Inventory X are scanned out and listed, tap Complete Uninstall, and then click Yes to conduct a thorough removal.
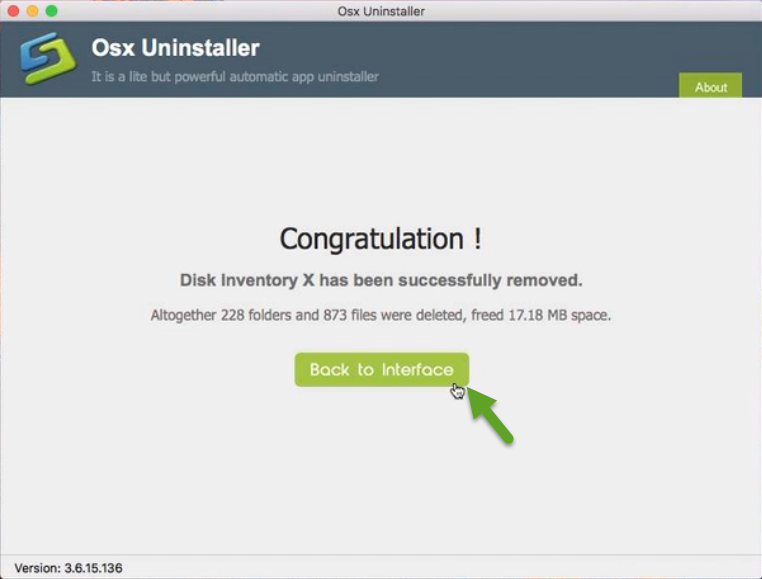
- Step 4. Click on Back to Interface to re-scan your Mac for currently installed apps.
How to Easily Uninstall Disk Inventory X in Clicks
You can see how fast and easy it could be to delete Disk Inventory X with no trace left behind. The whole removal process may last less than one minute to complete. And both Mac novices and experienced users can benefit from this handy tool.
If you happen to have uninstall issues, why not consider to give Osx Uninstaller a try?
Option 2: Manually Delete Disk Inventory X from macOS
Decide not to use Osx Uninstaller to remove Disk Inventory X? Then you can follow the manual instructions below to avoid potential mistake and ensure a clean uninstall.
To begin with, you are supposed to sign in as an administrator on your Mac, or you will be prompted to provide the administrator password during the uninstallation.
1. Uninstall Disk Inventory X
As mentioned before, you should quit the app before uninstalling it, otherwise error message might pop up to interrupt the process, or incomplete uninstall happens. After that, take the commonly-used method to uninstall Disk Inventory X:
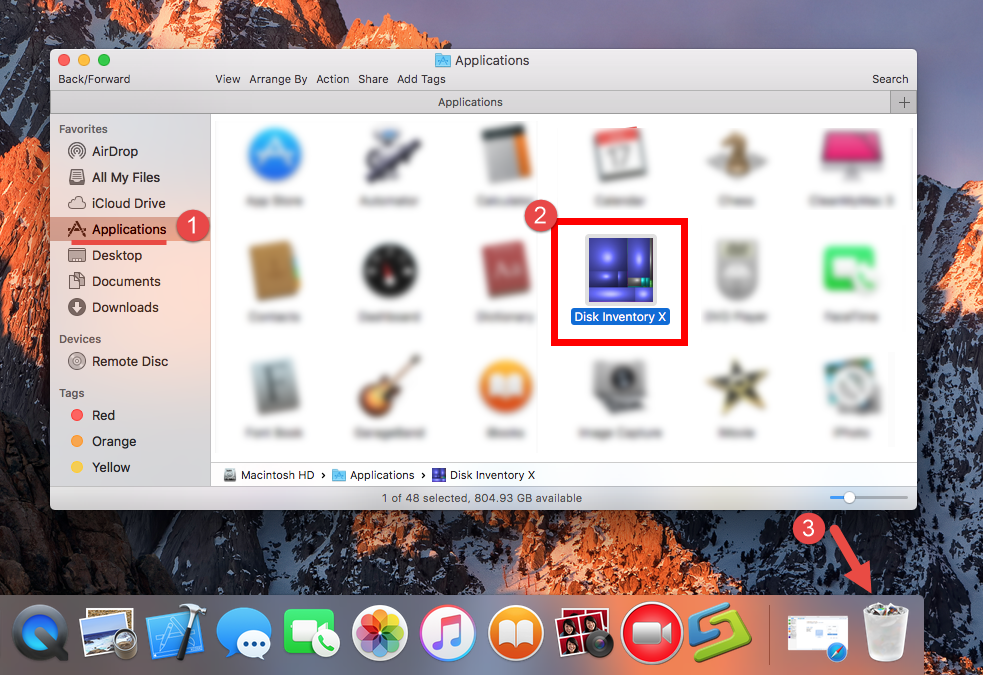
- Open the Finder and head to the Applications folder from the left panel.
- Select the Disk Inventory X icon and drag it with your mouse to the Trash.
- If prompted, enter your account password to execute this change.
The drag-to-delete method works for almost all apps in all versions of Mac OS X. You can also move the app to Trash by these options: (1) right click on the app and choose Move to Trash option; (2) select the app, and go to File > Move to Trash.
Generally the app will be removed instantly from sight and appear in the Trash. You will need to empty the Trash to perform the uninstall (we will talk about it later). If you cannot move the app to the Trash, reboot your Mac and then uninstall it again.
For the applications that are installed from the Mac App Store, you can also take this way:
- Search for the app you wanna delete in the Launchpad.
- Hold down the icon until it begins to show “X” on the upper left corner.
- Click the “X” icon and click Delete in the confirmation dialog.
If the app doesn’t have a delete button, then it cannot be uninstalled by this way.
2. Delete Disk Inventory X Leftovers
Though Disk Inventory X itself has gone from the Applications folder, some of its invalid files still remains in your system. To ensure clean removal and free up disk space, you’d better delete associated leftovers once and for all. Here’s how to do:
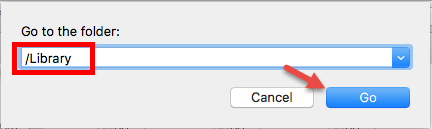
- Open the Finder, click the “Go” from the Menu Bar, choose the entry: |Go to Folder…, then enter the following path: /Library and hit Enter key to open it up.
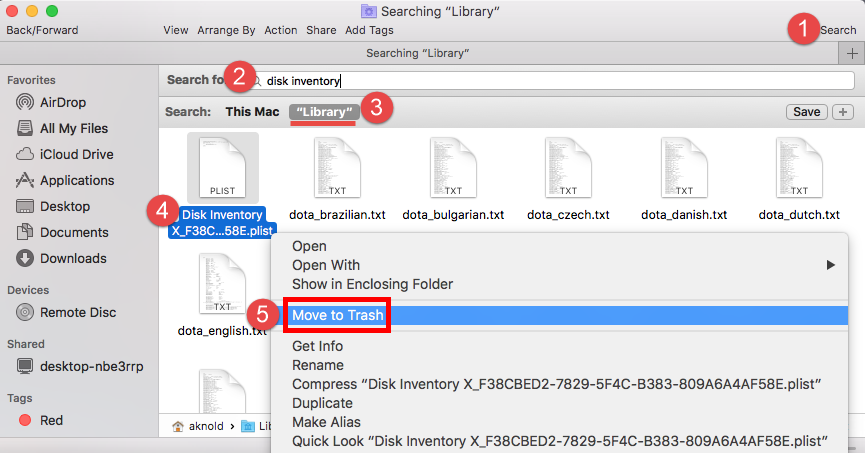
- Type Disk Inventory X in the search box, and click the Library in the Search: bar.
- Identify the matched items, right click on them all and choose Move to Trash.
- Repeat the steps to detect and delete (if any) component in the ~Library folder.
Note that novice users are not suggested to detect app leftovers by this way, and a professional uninstall helper seems to be a better option for them. If other app components are deleted mistakenly, affected app could not work normally. After all, some users may have difficulty in fully or properly trace down all app leftovers.
3. Empty the Trash with Caution
Once you delete Disk Inventory X and all its leftovers, you can empty the Trash to permanently get rid of this app. Important: the act of emptying the Trash is irrevocable, and everything dropped in the Trash will be deleted from the system immediately. So, make sure you haven’t mistakenly throw anything into the Trash.
- Right click on the Trash icon in the dock.
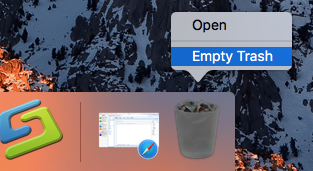
- Choose Empty Trash and click OK in the pop-up dialog.

- Alternatively, you can empty the Trash by choosing the Empty Trash under the Finder menu. In case you cannot empty the Trash, reboot your Mac and do it again.
- If you want to restore an items there, you can right click on the items in the Trash and choose Put Back option, on the condition that Trash is not emptied yet.
Thank you for reading this post [Simple Steps to Fully Uninstall Disk Inventory X on Mac]. We hope that could help you resolve the issue you encountered. If you come across any trouble in the removal task, Osx Uninstaller will be able to help you out.
Any comment or suggestion on this post? Welcome to share your thoughts with us.
 $29.95/lifetime