Effectively Uninstall VNC Server from Your Mac
RealVNC is a remote access software developer that provides a server (VNC Server) and client (VNC Viewer) application for the Virtual Network Computing (VNC) protocol to control another computer’s screen remotely. If you have downloaded and installed the VNC software on your Mac computer, but later found it is not the one you expect, you may uninstall VNC Server and VNC Viewer from the system.
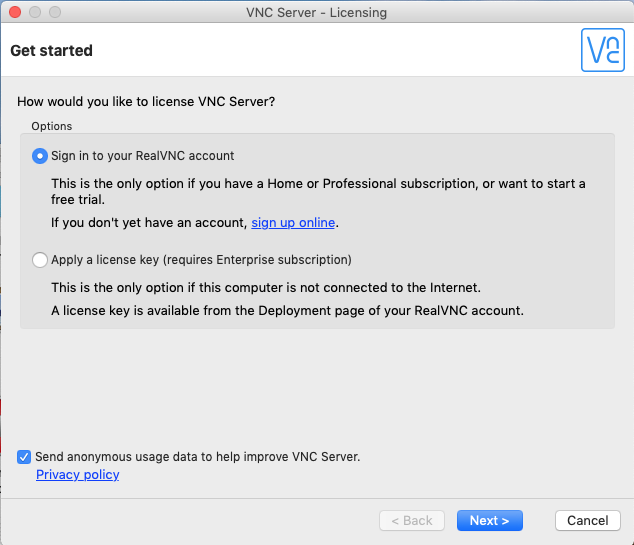
Here are two common issues that may occur when you try to uninstall VNC:
1. VNC cannot be uninstalled successfully (when it is in use)
2. Some RealVNC-related files remain in system after the uninstall
In this post we are gonna show you how to properly uninstall VNC from macOS system. To avoid any possible problems in this process, follow the steps strictly.
Preparation: quit VNC if it is active
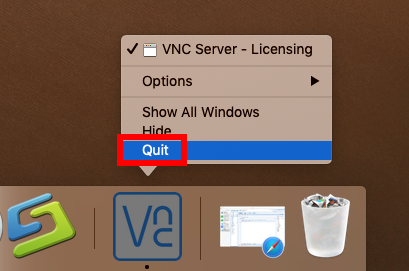
Why some users fail to delete an application? One possible reason is that the app is still running so the system cannot trash it. So before uninstalling the VNC, remember to check if it is active. If so, right click on the app icon in Dock, and then choose Quit.
There are two options to force quit an frozen app in macOS/Mac OS X:
(1)Launch Activity Monitor, type the app name in the search box, select any process pertaining to the target app, click X on the upper left corner, and click Quit button
(2)Press the Option – Command – Esc keystroke to bring up the Quit Applications window, then select the app in the list and click Force Quit button
If VNC icon still remain in Dock, right click on it and choose Options > Remove from Dock. Then you can uninstall VNC and delete its leftovers manually or automatically.
Three Available Ways to Uninstall VNC from Mac
Most third party apps can be uninstalled by deleting it from the Applications folder. Yet, if you decide to uninstall VNC by this way and think the job could be finished perfectly, you are wrong. A clean uninstall requires you to remove all its components.
Way 1: remove VNC by using Osx Uninstaller
As a lightweight yet powerful tool for Mac, Osx Uninstaller allows users to easily remove all components of target app within a few clicks. Here’s how to do:
- Launch Osx Uninstaller on your Mac after the installation and registration
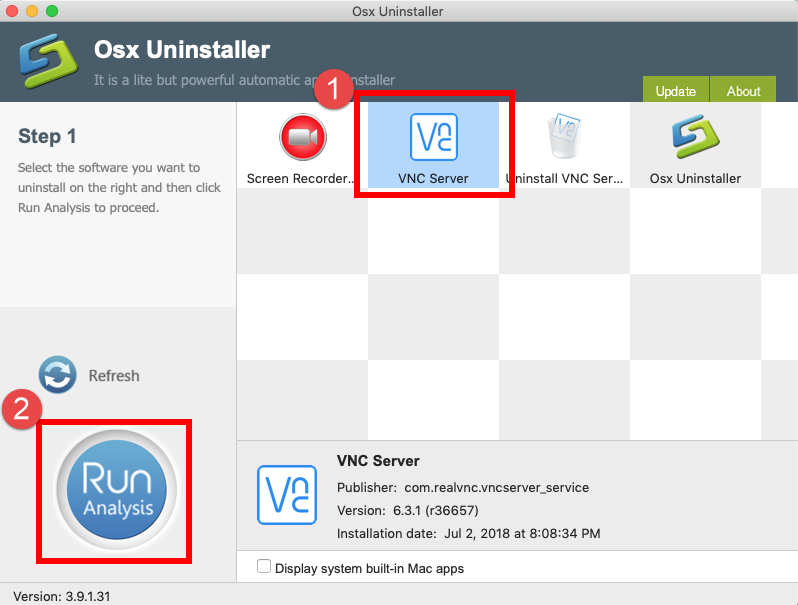
- Select VNC in the list and click Run Analysis to start the scanning
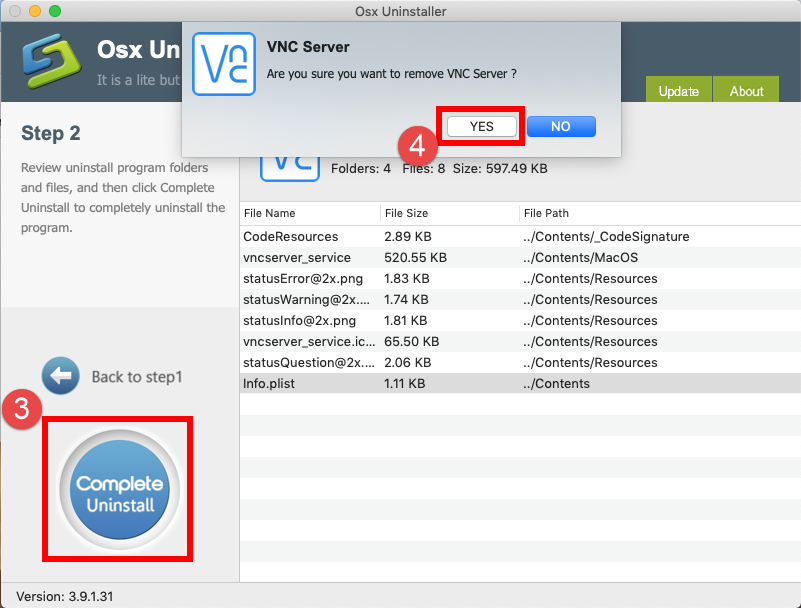
- Click the Complete Uninstall button, and click Yes in the pop-up dialog box
- Once the removal is complete, click Back to Interface to re-scan your Mac
By using this tool, you could easily get rid of VNC or any other unwanted apps. Want to try this handy tool? Note that Osx Uninstaller is a paid software, which means you will need to pay for a valid license before using it to remove unwanted apps.
If you don’t want to pay for it, take the manual steps to remove VNC for Mac.
Way 2: remove VNC Viewer by trashing it in Finder
Here are the conventional steps to delete VNC Viewer from macOS/Mac OS X:
- Open up Finder and click the Applications folder from the sidebar
- Locate VNC Viewer in the folder, right click on it and choose Move to Trash
- Head to Finder menu, choose Empty Trash, and click Empty Trash again
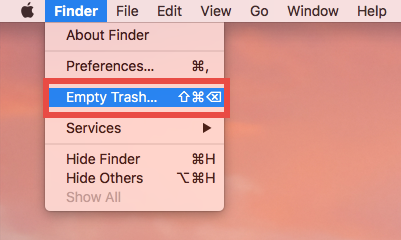
Warning: Emptying Trash is irrevocable, and everything in the Trash will be deleted from your Mac immediately. Before performing this act, go to check if all items in the Trash are no longer needed. If you wanna avoid any risk in this act, you can just delete the app individually in the Trash. To do so, locate and right click VNC in the Trash, choose Delete Immediately, and click Delete in the pop-up window.
Way 3: remove VNC by running uninstall command
Basically, this trash-to-uninstall method can be used to uninstall third party apps in all versions of macOS / Mac OS X. However, for the app that provides a dedicated uninstall tool in its folder, you are suggested to run the tool to complete the uninstall.
- In the /Applications folder, locate the RealVNC folder and open it up
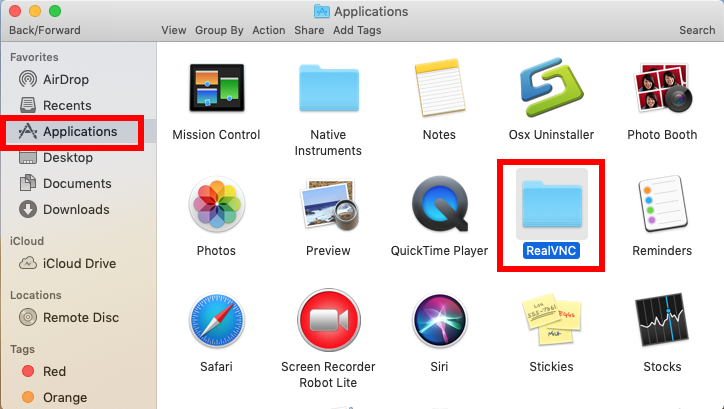
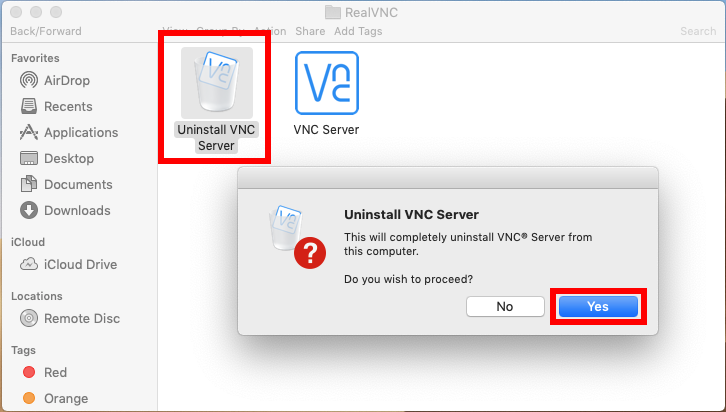
- Double click on Uninstall VNC Server and click Yes in the pop-up dialog
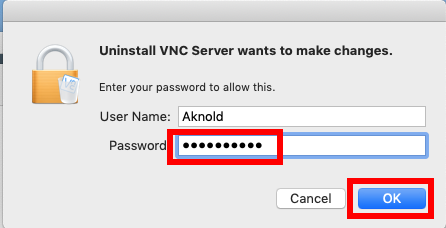
- When prompted, type your admin password and click OK button to allow the change
When the uninstall is completed, click OK button to quit Uninstall VNC Server
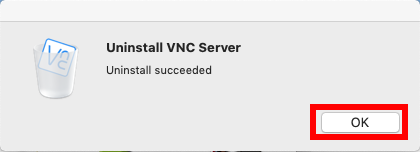
So that’s how to uninstall VNC software. Which option do you prefer to use?
Tip: delete VNC leftovers in system
As we mentioned before, VNC will create and store associated files (like preferences, extensions and account profiles) in multiple system directories. Those leftovers may not do harm to your system, but if you wish to remove all the traces and reclaim occupied disk space, you can take the following steps to hunt then down.
- In a Finder window, click Go from the Menu Bar, and choose Go to Folder
- Type ~/Library and hit Enter key to open it up, and then type VNC in the search box

Under ‘This Mac’, select the folders whose names contain the keyword, and delete them to the Trash (you will be required to enter the password to allow the deletion)
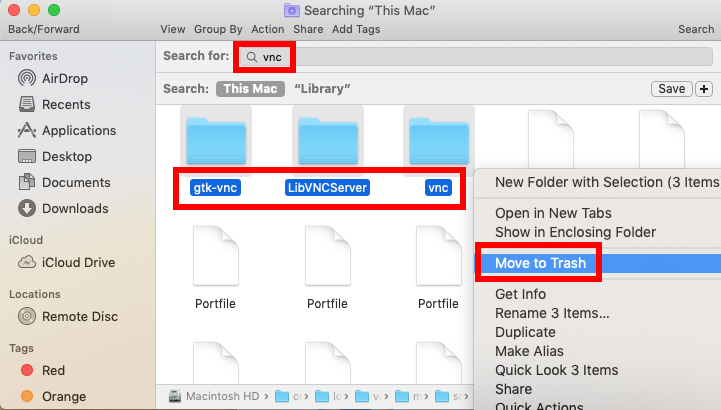
- Click ‘Library’ next to ‘This Mac’, and delete the VNC components if exist
- Continue to detect VNC leftovers in the top level Library (/Library)
- Empty the Trash to permanently delete all VNC components
Here are some directories that may contain RealVNC files:
/Library/Logs/vnc*.log
/Library/LaunchAgents/*realvnc*.plist
/Library/LaunchDaemons/*realvnc*.plist
~/Library/Logs/vnc
~/Library/Preferences/*realvnc*.plist
Warning: Again, once you delete items in Trash, the items cannot be restored (at least by normal means). Before permanently remove those related files in Trash, we strongly suggest you to reboot your Mac and use it for some days to see if any problem happens. If issues occur, go to check if you’ve mistakenly deleted anything.
To summarize, this tutorial offers three ways to uninstall VNC software for Mac and the search trick to locate and delete VNC-related items in hidden system folders. We hope your problems can be solved after taking the methods in this page.


 $29.95/lifetime