Completely Uninstall VMware Fusion for Mac? Get Help here
— “How do I completely uninstall VMware Fusion from my Mac?”
— “Can I remove VMware tools? Is it OK to delete them to the Trash?”
— “What to do when the uninstall ends up with error message?”
Do you have those doubts? If so, this post will show you the solutions to the issues.
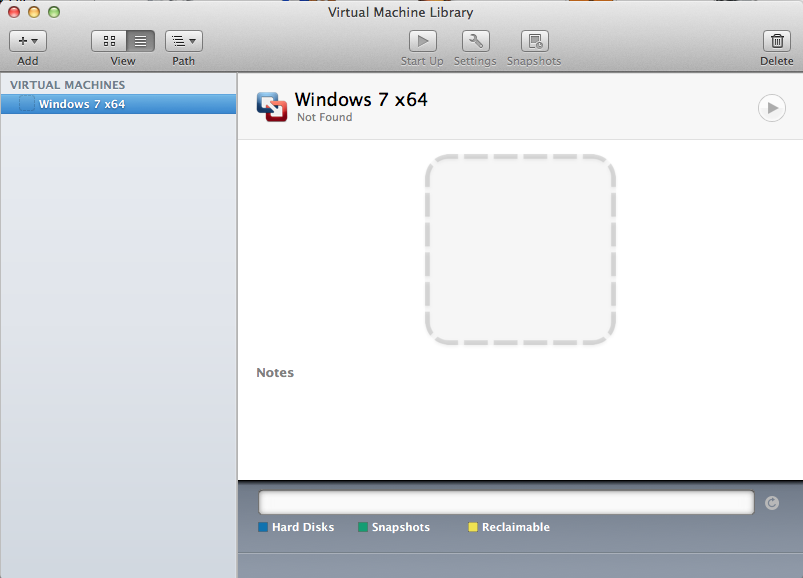
About the app: VMware Fusion for Mac is a desktop virtualization platform that allows Mac users to run other operating systems such as Windows or Linux, under the OS X operating system. Compared with its competitor Parallels Desktop, VMware Fusion is a little slower and less beginner-friendly. As a 3rd party app for Mac, it won’t be able to perform as well as the Boot Camp that is included with macOS, but overall it is a solid option for those who want to run another operating system on their Macs.
There are some circumstances in which users may try to uninstall VMware Fusion. The question is: how to perfectly remove VMware Fusion from your Mac? For that kind of virtualization software, it usually come with many plugins or widgets that are not so easy to get rid of. If you perform the uninstall improperly, it could be tough to finish a clean uninstallation again. Look for an effective solution to handle the uninstall issues you encounter? Continue reading to learn some removal tricks.
Perfectly Remove VMware Fusion within Clicks
Desired to uninstall VMware Fusion without hassle and no trace left? Here we would like to first introduce an all-in-one solution to help you get rid of unwanted apps.
Osx Uninstaller is a handy tool designed to fully remove problematic, stubborn and even malicious apps on Mac OS X. Any unneeded apps can be easily removed within a few clicks. First of all let’s see how it works to uninstall VMware Fusion on your Mac.
Note: before uninstalling VMware Fusion, all virtual machines it runs have to be shut down, and make sure they are not suspended, otherwise issues may show up like data loss or virtual machine corruption. And you also need to quite VMware Fusion before the uninstall, otherwise you may be informed that “The operation can’t be completed because the item ‘VMware Fusion’ is in use” when try to drag this app to the Trash.
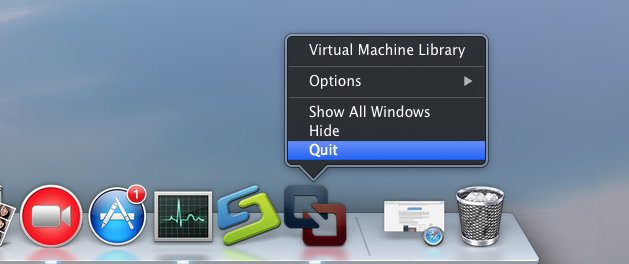
After doing the preparation, you can take simple steps to uninstall VMware Fusion:
1. Download Osx Uninstaller and install it by dragging it to the Application folder.
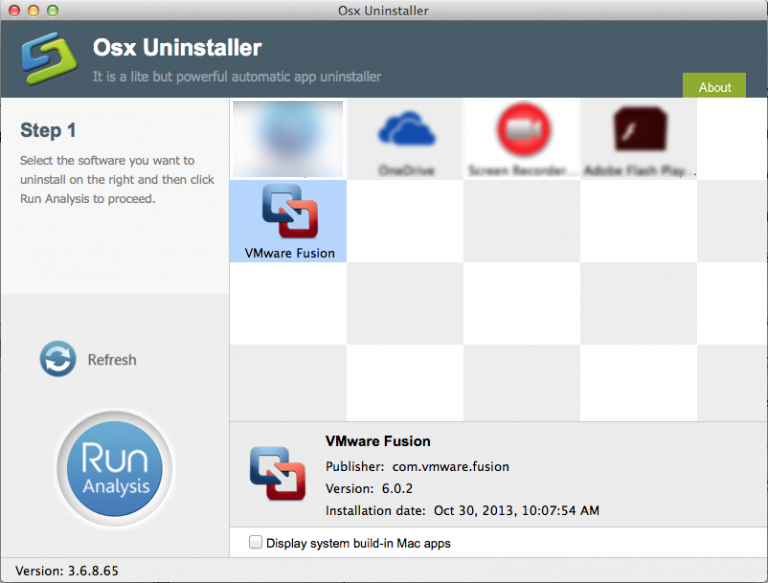
2. Launch Osx Uninstaller, select VMware Fusion, and click on Run Analysis button.
3. Review the components pertaining to VMware Fusion, click Complete Uninstall button, and then click Yes in the pop-up dialog box to perform a thorough uninstall.
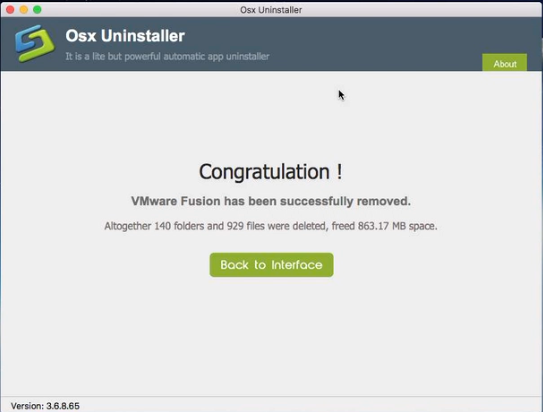
So here it is! You will take only a few clicks, and then the VMware Fusion and all associated stuffs will be instantly removed from your Mac. As a reputed clean tool, Osx Uninstaller is favored by both Mac beginners and experienced users.
How to Get Rid of VMware Fusion Manually
Using a professional uninstaller to get rid of unwanted apps is time-saving and hassle-free. But if you prefer to uninstall VMware Fusion on your own, we also offer a manual guide to assist you in removing this app. Now follow the instructions below.
1. Terminate related Processes
Before uninstalling VMware Fusion, you should quit the processes related to VMware Fusion, otherwise error message might pop up to interrupt normal uninstall process.
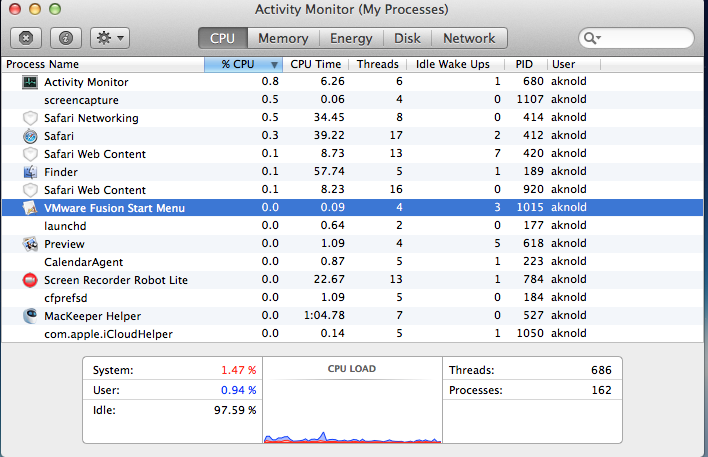
- Locate the Utilities folder in launchpad, and click Activity Monitor from this folder.
- Select VMware Fusion and click Quit Process icon in the left corner of the window.
- Click Quit in the pop-up dialog box (if that doesn’t work, then try Force Quit).
2. Uninstall VMware Fusion
Make sure that you have logged into your Mac with an administrator account, and you may be asked for a password again when you try to delete something in the Finder.
(1) Drag VMware Fusion to the Trash
- Open the Finder and head to the Applications folder on the left panel.
- Drag VMware Fusion to the Trash in the dock (or click it and press Cmd + Del).
- Right click the Trash icon on the dock, and choose Empty Trash option.
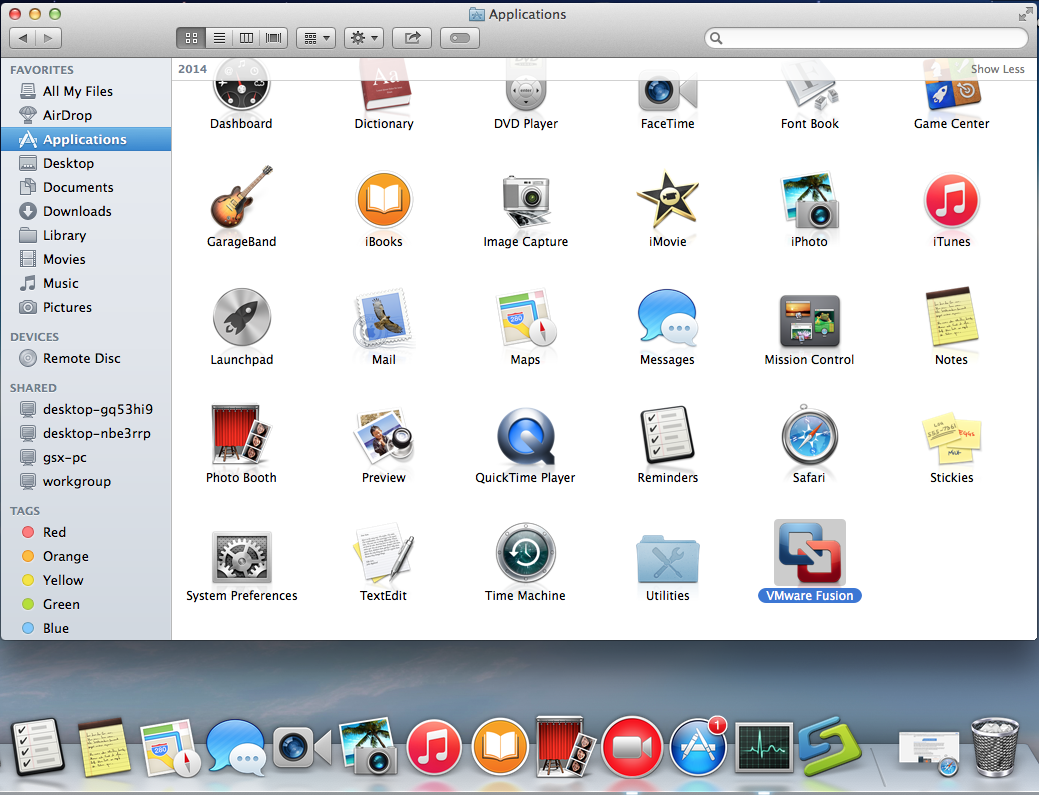
This is the regular method to uninstall most Mac apps in all versions of Mac OS X. In most cases it can smoothly remove the app you choose from sight, but if you fail to drag the app icon to the trash, try the following methods to perform the uninstall.
(2) Delete VMware Fusion in the Launchpad
- Open Launchpad, and type VMware Fusion in the search box at the top.
- Hold on VMware Fusion icon until the icon begins to wiggle and shows the “X” .
- Tap the “X” in the left top corner to remove VMware Fusion.
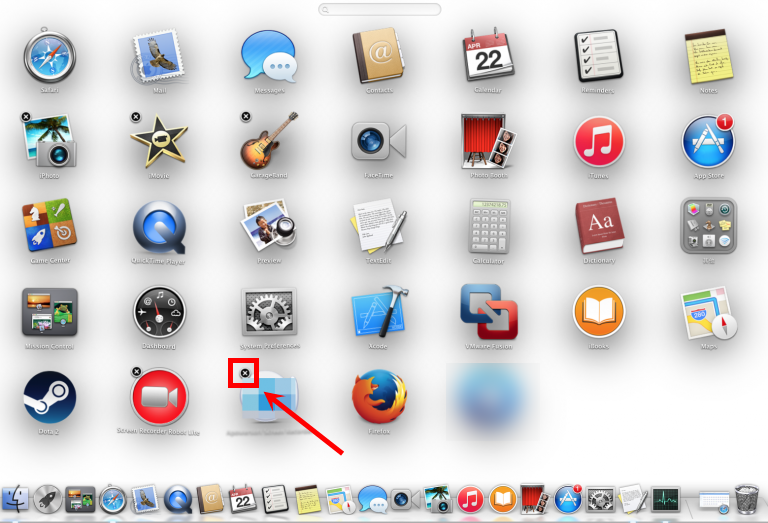
This way works for the apps which are downloaded and installed from the App Store. Once you click the X icon, the app will be uninstalled instantly from your Mac.
(3) Run VMware Fusion dedicated uninstaller
- Open Finder, press the Option key and click the Go menu at the top.
- As the Library folder opens, navigate to: /Application Support/VMware Fusion.
- Run the uninstall script named Uninstall VMware Fusion in the folder.
- Click Uninstall, enter your password, and click OK when the uninstall finishes.
Some Mac apps come with a specialized uninstaller in their folder. For that kind of apps, you can directly launch the specialized uninstaller to fully remove all the items. If you are running VMware Fusion 4.x, 5.x, 6.x, 7.x and 8.x, there is no uninstaller as most files are contained within the application bundle. But if you are using VMware Fusion 3.x and earlier, you are supposed to take this method to uninstall it manually.
Additional knowledge you need to know:
Uninstalling VMware Fusion does not delete any of the existing virtual machines it created on your Mac, and those virtual machines take up certain disk space. To free up the space, you need to locate them in the Finder and drag them to the Trash. The default location for the virtual machines should be in your Documents/Virtual Machines folder.
3. Clean out VMware Fusion Leftovers
Now you have removed VMware Fusion from the Applications folder, but its components are not fully deleted yet. Once installed, VMware Fusion creates preferences and support files which will remain even after VMware Fusion has been uninstalled. Now continue with the steps below to delete additional files and folders.
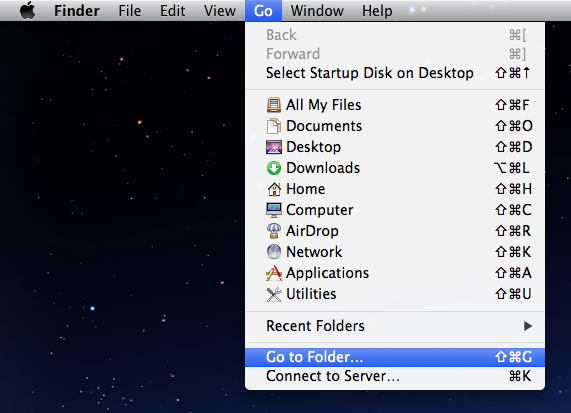
- Open the Finder, click Go in the Menu bar, and select the entry Go to Folder…
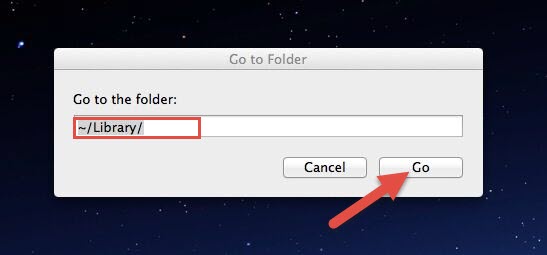
- Type the path of the current user’s Library Folder: /Library, and then hit Enter key.
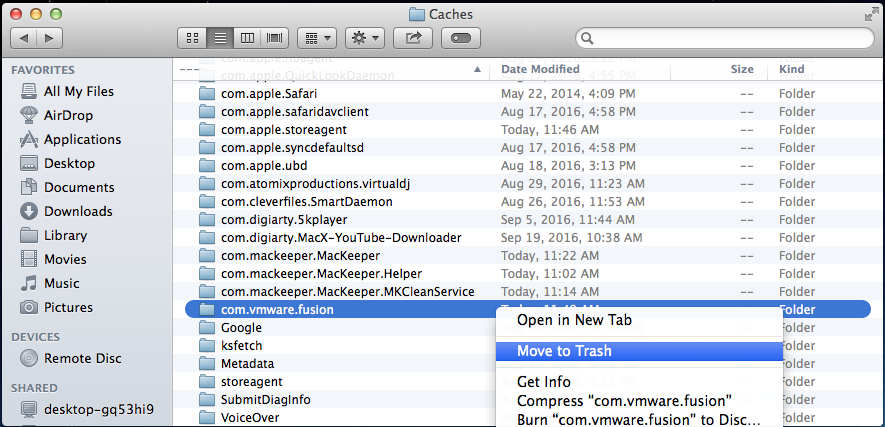
- Search any files or folders containing the name of VMware Fusion in these folders:
~/Library/Developer/,
~/Library/Preferences/,
~/Library/Application Support/
~/Library/Caches/ folders
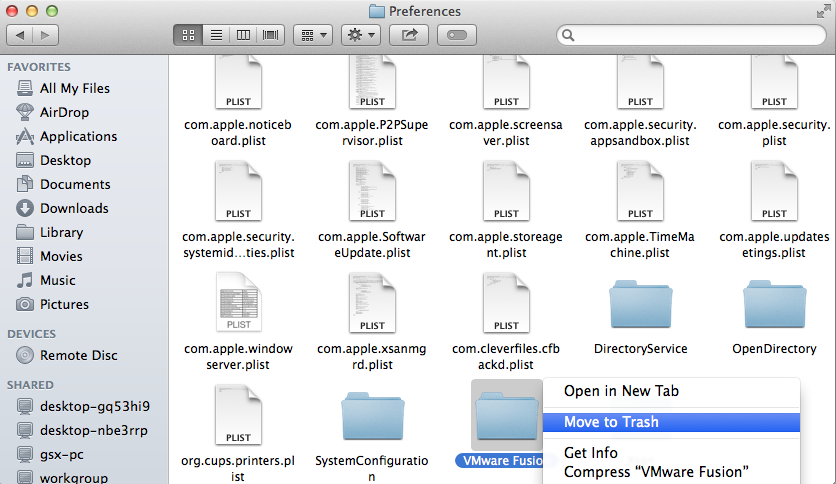
– Right click on the matched items and choose Move to Trash option.
- Meanwhile, search the following locations to delete associated items:
/Library/Developer/
/Library/Preferences/
/Library/Application Support/
/Library/Caches/
Usually the application kernel extensions are located in /System/Library/Extensions and end with the extension .kext. Besides, if there are some hidden files you fail to locate, do a web search about the app components. You can also utilize Terminal to list the contents of the directory in question and then delete the offending items.
4. Empty the Trash
Wanna delete VMware Fusion permanently? The last thing you need to do is to empty the Trash. Notice: the act of emptying the Trash is irrevocable, and everything in the Trash will be deleted immediately, so consider carefully before emptying your Trash.
- Right click on the Trash icon in the dock.
- Choose Empty Trash and click OK in the pop-up dialog.

Now you finally come to the end of manual uninstallation. The last important thing you need to do, is to restart your Mac. This ensures all VMware Fusion kernel extensions are unloaded from memory. In most cases,VMware Fusion should been successfully removed, along with its all associated components. But if you come across any unexpected uninstall issues, try the first method we recommended above.
Here comes the end of this post. We have discussed four ways to uninstall VMware Fusion for Mac. Have you finished the thorough removal of VMware Fusion yet? Which one do you think is the most time-saving and high efficient? Share your thoughts to help us improve this article. You are welcomed to contact us for further help.


 $29.95/lifetime