Available Methods to Remove CCleaner in Mac OS X
CCleaner is a useful registry cleaner and system optimization tool for computers. Yet you night have to remove it for some reasons, such as to fix crash issues of it by uninstalling the program and then reinstalling it, or you just want to ditch the program for some alternatives. This post will illustrate different methods guiding you to remove CCleaner and get rid of all the traces of it.
Now continue your reading and start to learn the available approaches to uninstall CCleaner entirely in Mac OS X one by one.
1. Remove CCleaner with traditional uninstall way
This is the most common approach that many Mac users know, yet few of them knows how to perform the complete instructions when to remove CCleaner manually. If you are one of those who just drag the icon of CCleaner to the Trash, thinking that you have totally uninstalled the program, then it is high time for you to learn the manual way here.
- Exit the process of CCleaner if it is running on the background.
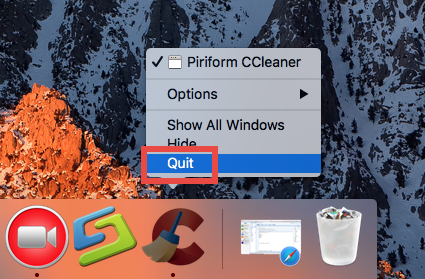
- If you fail to quit the app like that, try to force quit it via Activity Monitor:
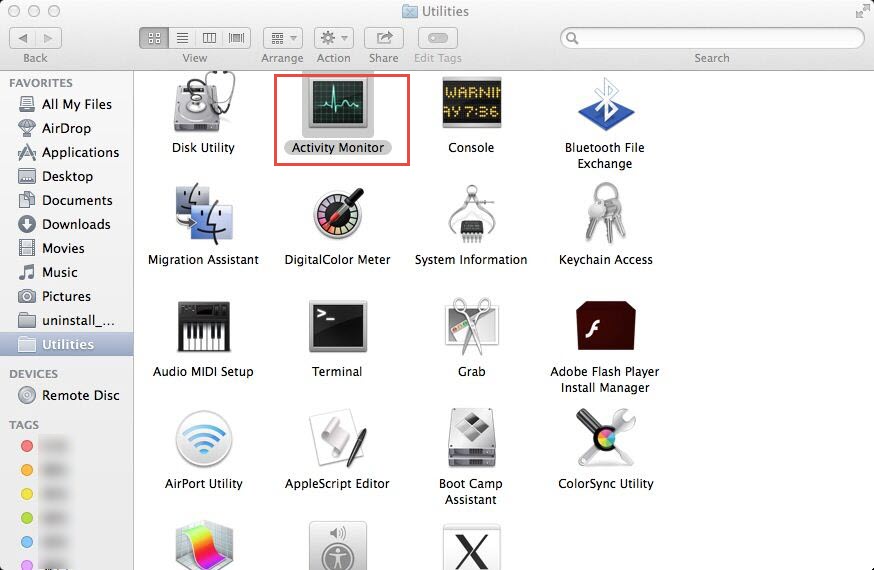
> Open Finder, find out and open the Utilities folder and then launch the Activity Monitor inside the folder.
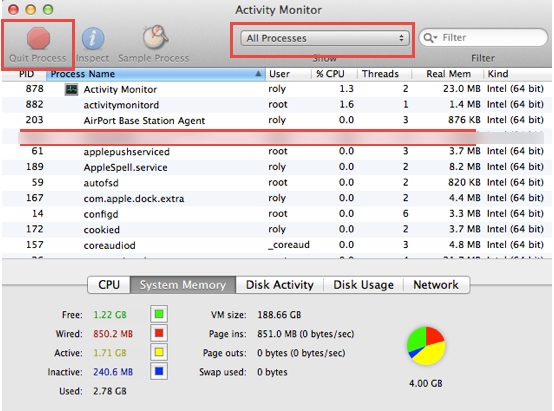
> Change the filter into “All process”, select the process of CCleaner if there are any active ones, and then click on the “Quit Process” button.
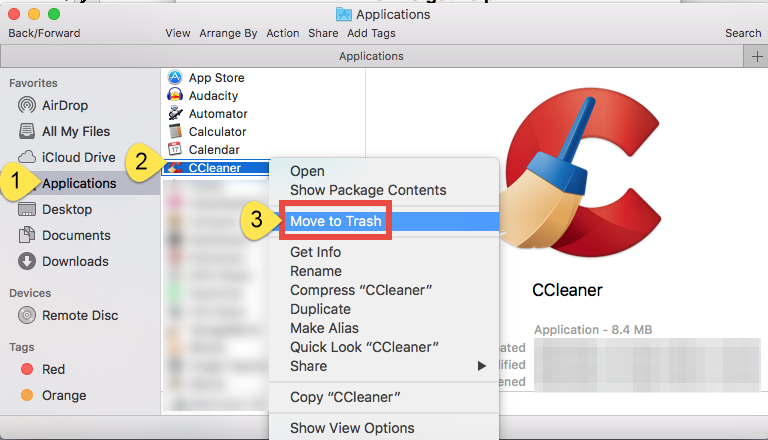
Remove the CCleaner from the Applications folder.
- Open Finder, and click on the Applicatons folder in the sidebar.
- Locate the icon of CCleaner, then drag and drop it to the Trash.
- Empty the Trans the perform the uninstall.
Detect and trash all the related files of CCleaner:
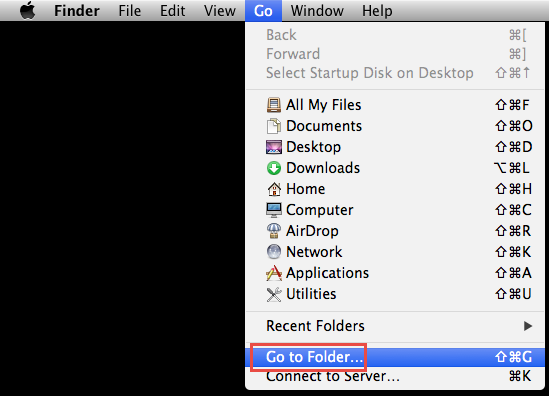
- Open Finder, click on Go menu on the top of your screen. Select “Go to Folder” from the pull-down list.
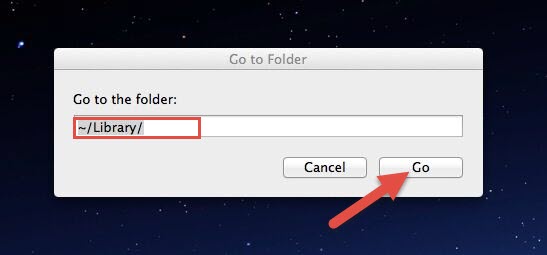
- Enter “~Library” in the search bar and then click on “Go” button.
- Open the Application Support folder, locate the files associated with CCleaner, and then select and delete all the target files.
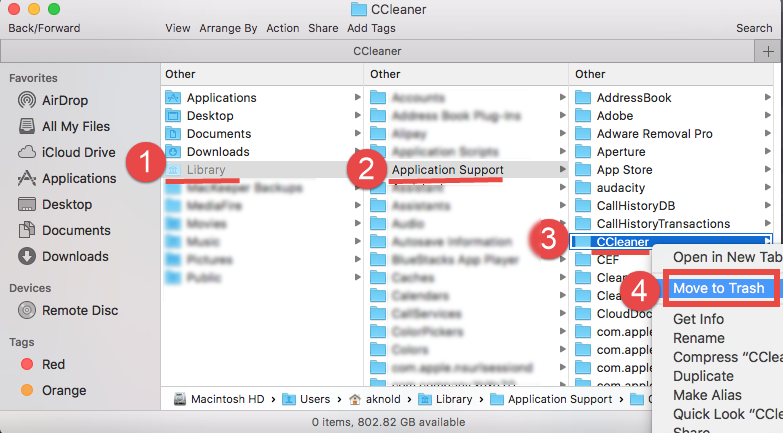
- Back to Library, and then open the Preferences folder and Caches one by one, and then delete the related files of the unwanted program respectively.
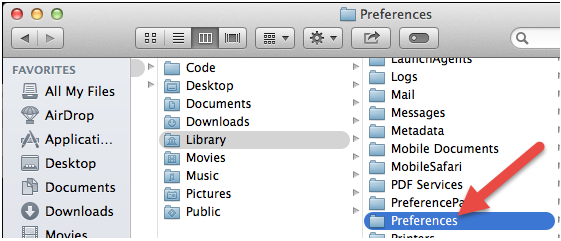
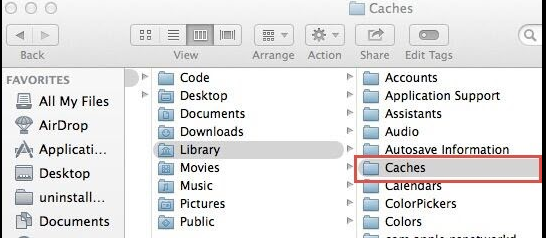
- Clear Trash. Right click on the Trash icon, select “Empty Trash”, and then make confirmation on the pop-up window. Make sure there are no any important files in your Trash before you perform empty Trash or you will loss them for this act cannot undo.
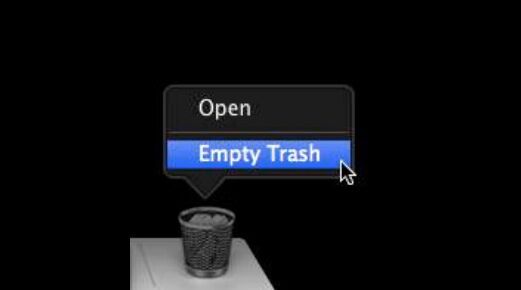
If you don’t want to detect the related items in each folder one by one, you can use the Search feature to perform a scan:
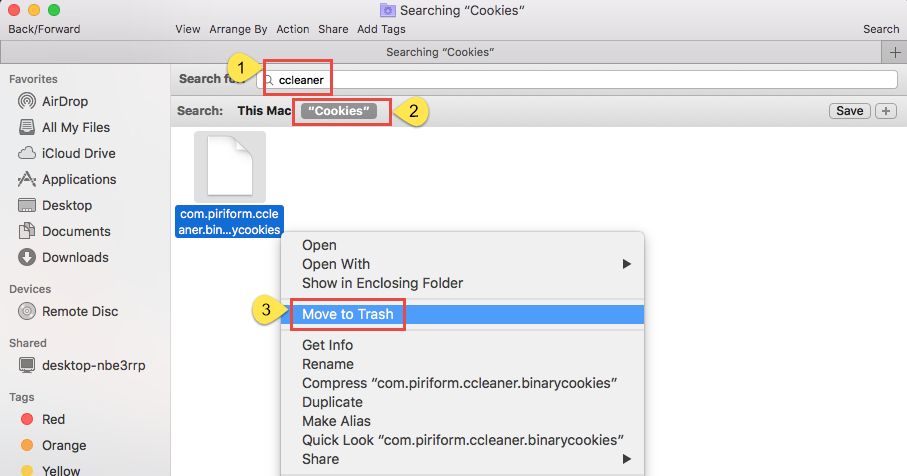
- Type CCleaner or piriform (its developer) in the Search box, and click on the Library icon.
- Verify the matched items in the result, and move them to the Trash.
2. Remove CCleaner from Launchpad
Users who downloaded or purchased CCleaner in App Store may prefer to uninstall CCleaner from Launchpad in this way:
- Open Launchpad in the DOCK, click and hold on the CCleaner icon until it wiggles, and then click on the cross icon on CCleaner to delete it. Pay attention to the word “delete” I use here.
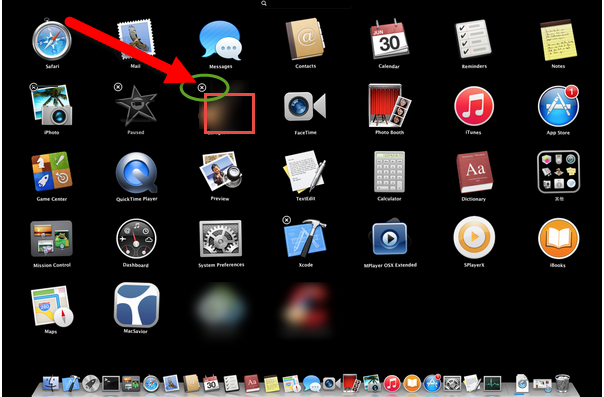
Yeah, actually when you perform the uninstallation like that, you are probably just deleting the unwanted program unless the target application is a packaged one. Thus, in order to completely remove CCleaner, you will also need to go through the instructions in the first method to detect and trash all the traces of CCleaner in case its leftovers slow down your Mac and even cause worst problems.
But if you don’t want to spend so much time to detect the remnant files of CCleaner during uninstallation, you can take a shortcut as bellow.
3. Remove CCleaner automatically with a professional uninstaller
This is a time-saving approach, which is suitable for both average and advanced Mac users. You can fulfill your goal to completely uninstall CCleaner with a few clicks.
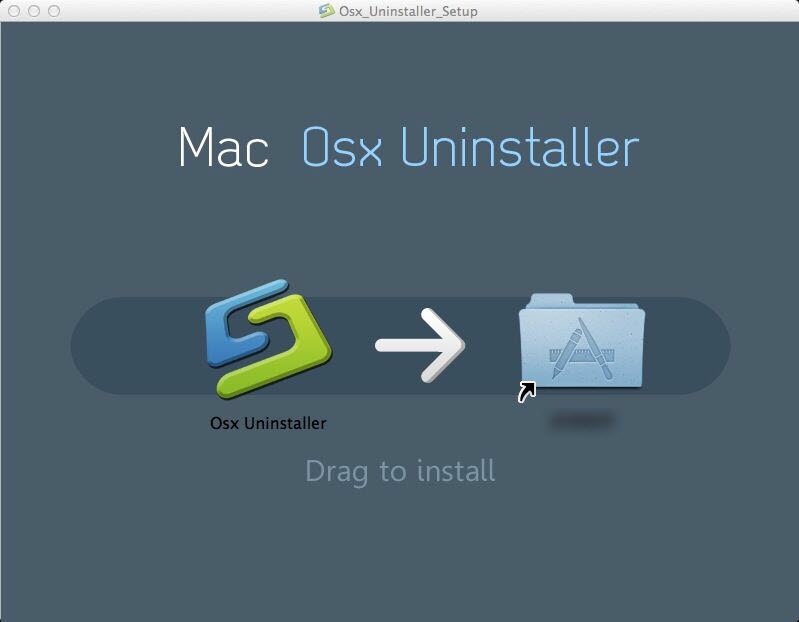
- Installed and activate the uninstaller
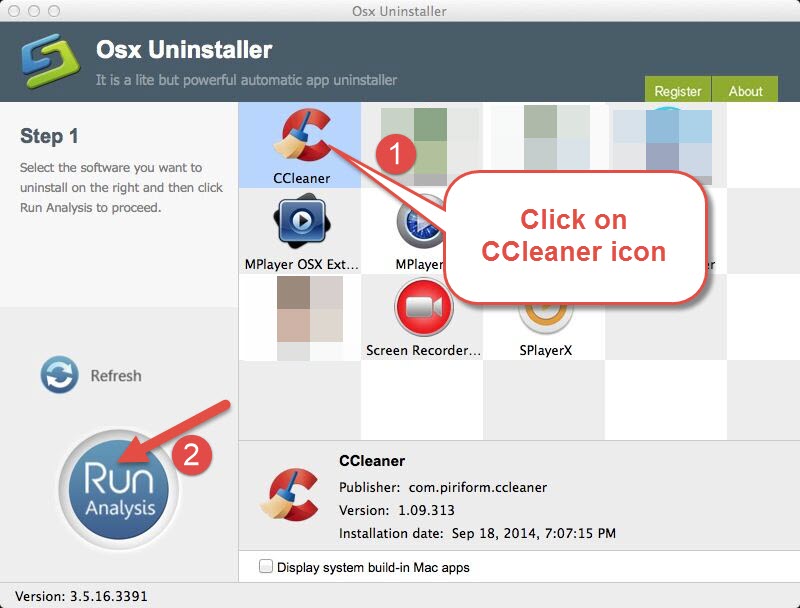
- Select the CCleaner icon and then click on “Run Analysis” button in the main interface.
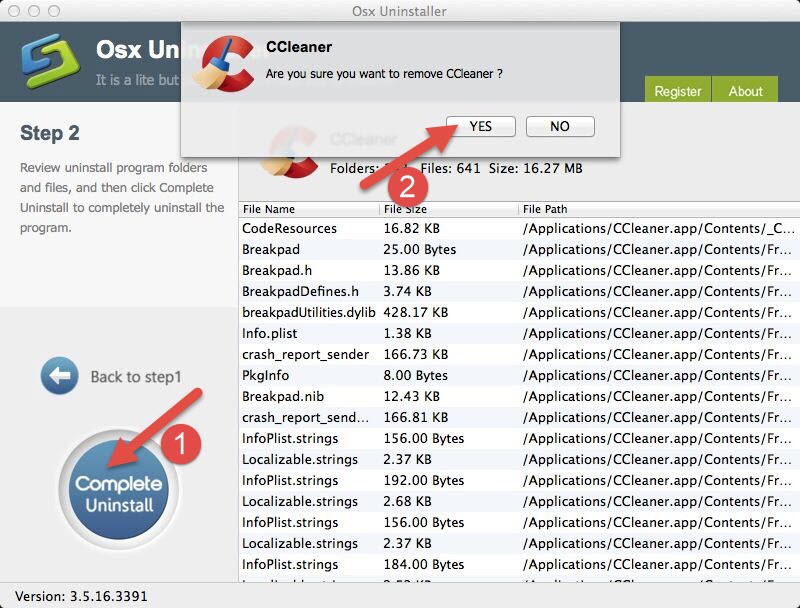
- Click “Complete Uninstall” and then choose “Yes” to complete the whole process of your uninstallation.
Comparison between the manual and automatic uninstall methods
When comparing the manual and automatic uninstall methods, you can easy find the differences.
With a manual removal method, you will
- need to cover several steps to remove CCleaner
- need much time to detect the leftovers of CCleaner
Yet with the automatic uninstall way, you will
- just need simple three steps including the installation of the uninstaller to uninstall CCleaner
- not have to detect the associated files of CCleaner and spend little to fulfill your uninstallation.
Comparing the different approaches to remove CCleaner, it can be easily concluded that a third party uninstaller is the better choice for Mac users of all level skills. Thus it is strongly recommended for you to adopt the automatic way if you need to uninstall CCleaner and want to get rid of all the components of the unwanted program from Mac.
See how you can easily and quickly uninstall CCleaner by this handy uninstall tool:
Users always make mistakes when using the manual way to uninstall applications in Mac OS X, and eventually the uninstallation results a failure or an incomplete one removal. With the remnant files leaving behind, your Mac computer will suffer from various problems. So, if your ultimate goal is thoroughly remove CCleaner, why not just take a shortcut? The smart uninstaller can not only help you uninstall CCleaner, but also can remove any other unwanted applications in your Mac.


 $29.95/lifetime