How to remove Spotify in Mac OS X—osxuninstaller.com

Can’t remove Spotify from your Mac? Don’t know how to completely uninstall the unwanted application in Mac OS X? If you are haunted by these problems, you will find your answer here. This post will illustrate the effective ways to help you completely get rid of Spotify from your Mac with different kinds of methods.
There are several ways that can be used to perform a thorough uninstallation of Spotify, if the drag-and-drop is the only one way you know to remove Spotify, it is high time to learn more now.
Problems caused by incorrect uninstallation on Mac
Don’t just drag the program icon to the Trash if you try to remove it, or what you get will be endless troubles in the feature, the most common problems you may encounter are as follows.
- Fail to remove Spotify due to unknown reasons
- There are still remnant files on your Mac after your uninstallation of the target program
- Spotify is still running in the background after you have uninstalled it.
- You Mac runs slowly and crashes a lot
Problems we have mentioned above are all caused by the improper or incomplete uninstallation of Spotify on Mac. To prevent the issues from occurring, you have to carry out the correct instructions to remove Spotify and get rid of the components of it while uninstalling.
Uninstall Spotify from Mac manually and completely
Actually, you can fulfill your goal to clean up all the traces of Spotify after uninstalling it with a manual way, though it is complicated to perform.
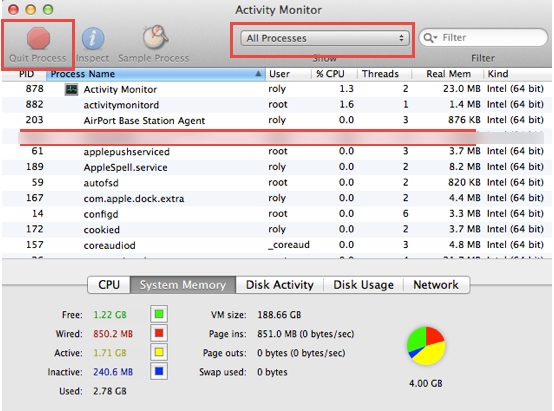
Step 1: Stop running the program via your Activity Monitor. Launch the Activity Monitor on your Mac, search for all the active processes by changing the filter into “All Process”. Find the related process of Spotify, click on it and then select “Quit Process”.
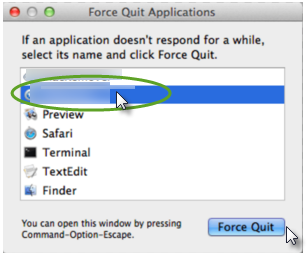
You can also force quit the process of Spotify by pressing down Command+ Option+ Esc on your keyboard. Select Spotify or the related process, click on “Force Quit”, and then make confirmation in the pop-up window.

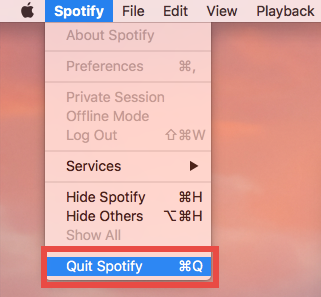
Or just head to the Spotify menu and choose Quit option.
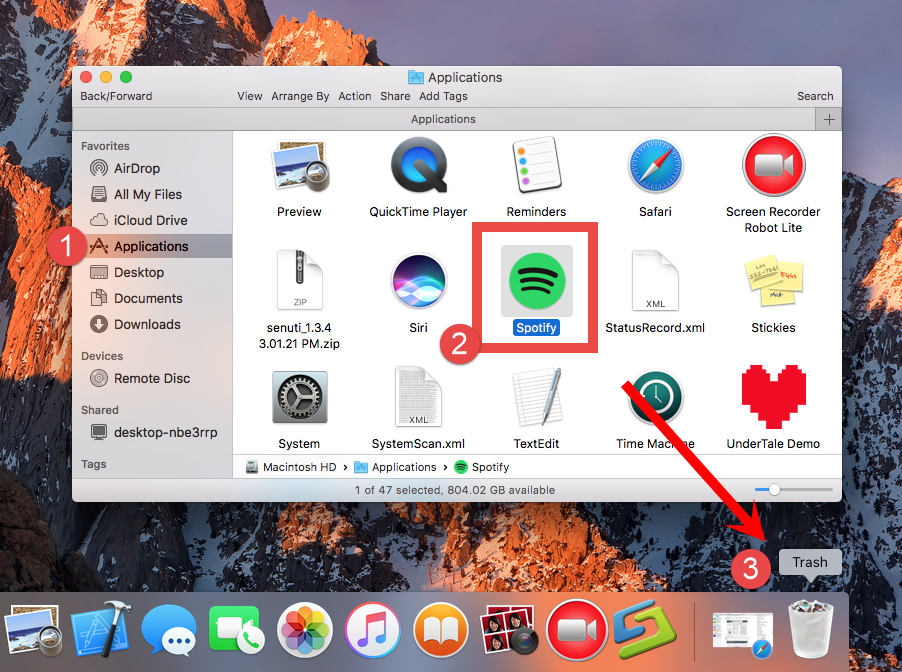
Step 2: Delete the executive files of Spotify by dragging the icon to the Trash.
Step 3: Open Finder, click on Go menu and select Library on the dropdown list. If you can’t directly find Library on the list, you can press down and hold on the Option key, click on “Go” and then select “Library”.
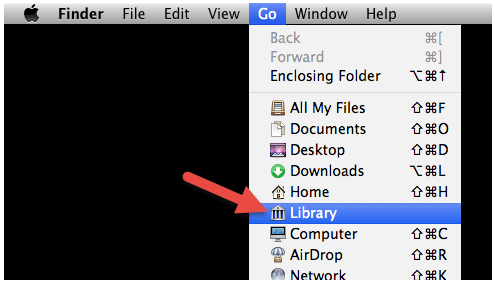
Still, if you can’t find the Library option, you may have hidden the user library folder. What you need to so first is to unhide the user library folder.
OS X Yosemite:
If you are using the OS X Yosemite, you can follow the instructions as bellow to unhide the user library folder.
Launch Finder and navigate to the home folder, and then successively click Macintosh HD – Users – Username
Click on “View” on the menu bar, and then select “Show View Options” or press “J”on your keyboard, and then you will be directed to a new window, click “Show Library Folder”.
OS X Mavericks and Older versions:
Open Finder, and navigate to Applications – Utilities – Terminal. Click Applications on the left-hand side bar in Finder, click “Utilities”, and then double click on Terminal to launch it.
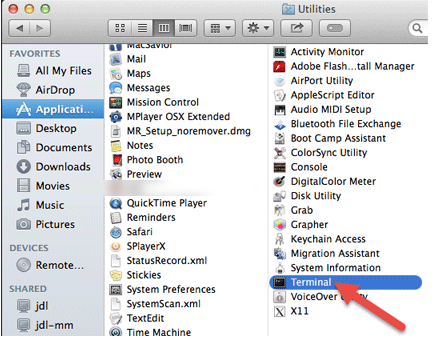
Enter “chflags nohidden ~/Library” into Terminal without the question marks and then press “Return” on your keyboard.

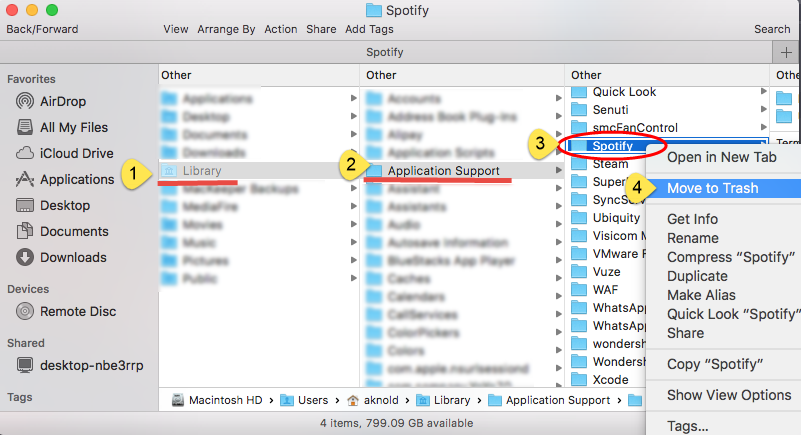
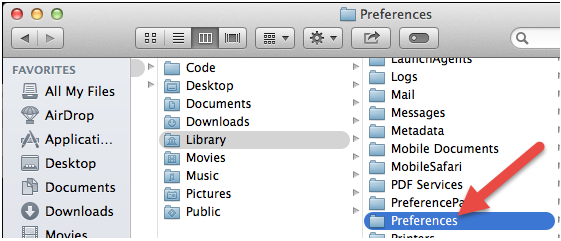
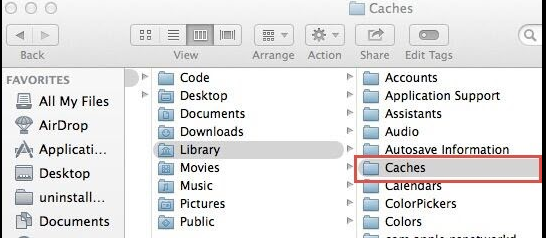
Step 4: Under the Library menu, find out the folders /Application Support/, /Preferences/, and also the folder /Caches/. Enter “Spotify” on the search bar on the right upper corner in the interfaces of the target folders, search for files in Preferences folder, Caches folder and Application Support folder respectively. Find out the files in the target folders and then move them to the Trash.
Delete Application Support files. Open Aplication Support folder, locate and open Spotify folder. Open the folder and subfolder in it and delete all the files there.
Trash Presences files.
Remove files in Caches folder.
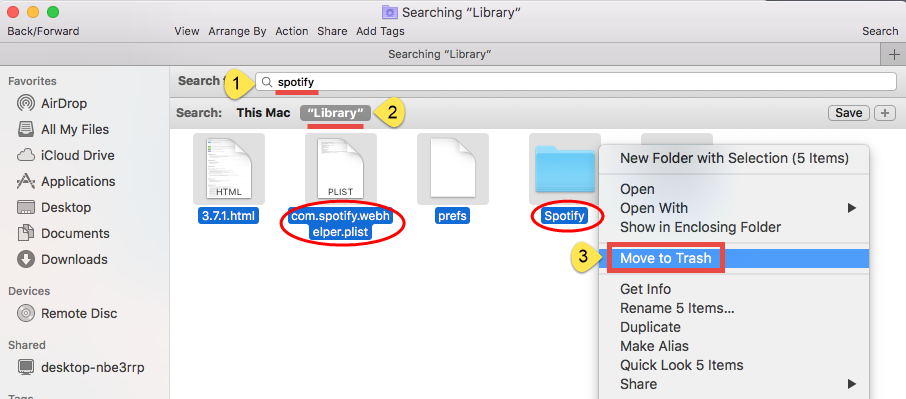
Here is a little trick you can apply to scan for Spotify leftovers: type Spotify in the Search bar, and then choose the Library. After a few seconds the items with the name of Spotify will appear in the result and you can delete those files all at once.
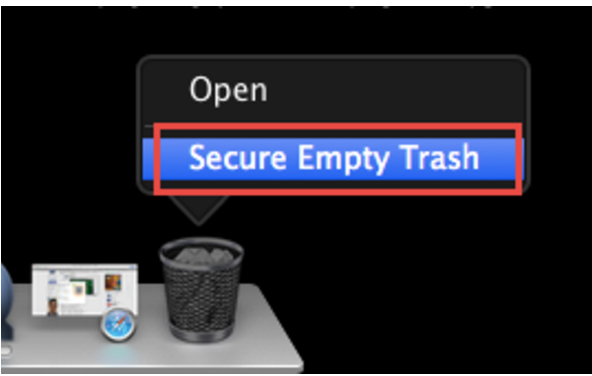
Clean up your Trash. Right click on the Trash icon, and select “Secure Empty Trash”.
Check the Trash bin before you perform this act in case you will lose anything important for good.
Remove Spotify from Launchpad in Mac OS X
If you purchased Spotify in App Store, you can remove the program via Launchpad following the instructions here.
Step 1: Open Launchpad, click and hold on the Spotify icon until it wiggles and shows a cross on the left upper corner on the icon.
Step 2: Click on the cross on the icon.
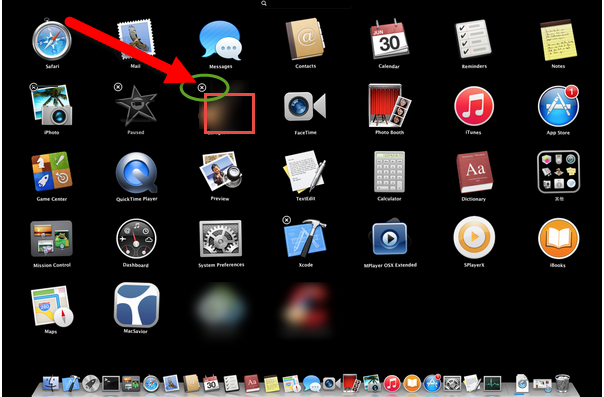
Do remember that you also need to locate and trash the components of Spotify after you remove it in Launchpad.
Recommended way to uninstall Spotify automatically on Mac
If you do feel it difficult to uninstall Spotify via the methods above, and want to perform a complete and fast removal of it, you do have a better choice here.
Before you start your removal, you will need to download and install a professional uninstaller onto your Mac, and the installation will charge you of nothing. So let’s see how you can completely remove Spotify with simple steps in seconds.
Step 1: Download and install the uninstaller. Launch the professional uninstaller in Finder or in the DOCK.
Step 2: Select the icon by clicking, and then click on the “Run Analysis” button, which will automatically scan out all the components of the unwanted application for you.
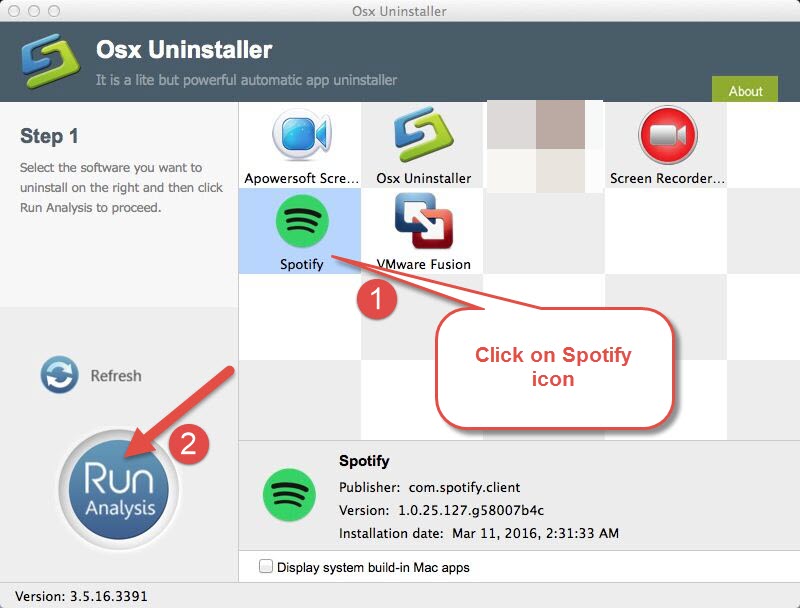
Step 3: Click on the “Complete Uninstall” button and then select “YES” to make confirmation of your operation to remove Spotify.
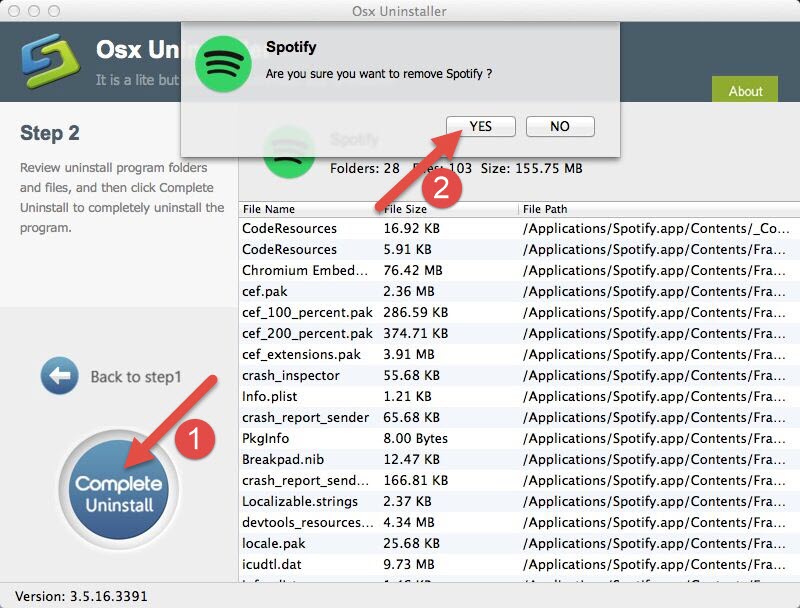
Obviously, it is easier to uninstall Spotify with the automatic way rather than the complex manual one comprised by several steps. Compared with the verbose typical method, it is a better choice for you to adopt the automatic one, which is simple to carry out and suitable for users of all level skills. So, if you want to completely remove Spotify, why not try a new and fast way?


 $29.95/lifetime