Proper Ways to Uninstall TunnelBear from Your Mac

TunnelBear is a virtual private network (VPN) app that provides Mac users a free version with the option to pay for more bandwidth. But if you want to get rid of this app for personal reason, it is recommended to perform a complete removal, without leaving any trace. So the question is: how can I uninstall TunnelBear from macOS?
There are mainly 3 problems that may occur when you try to uninstall TunnelBear:
> TunnelBear cannot be moved to Trash as it is in use
> The VPN settings will not revert to the original configurations
> Some components of TunnelBear still remain in deep system directories
Unsuccessful or incomplete uninstall could be triggered by various reasons. If you are seeking for a clean uninstall, make sure to follow the correct instructions below.
Question 1: what to do before the uninstall?
Cannot delete TunnelBear because it is still open? Here’s the fix: before uninstalling any app on Mac, always remember to shut down all its running processes. So, if the TunnelBear is active, you should first quit this app, and if necessary, launch Activity Monitor to check if there is any associated process running on the background.
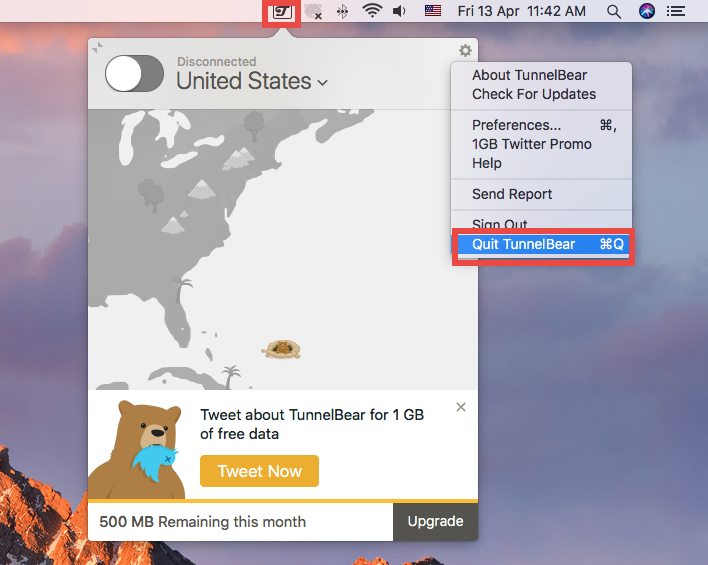
The macOS provides multiple options to quit a running or frozen app:
(1) Right click on the app icon on the Dock, and choose the Quit option
(2) Click the app icon in the Menu Bar, and choose Quit [app name]
(3) Launch Activity Monitor, select the process pertaining to the target app, then click the X button on the upper left corner, and click (Force) Quit in the pop-up dialog.

What if the target app cannot be shut down even in Activity Monitor? To solve this issue, you can reboot your Mac into Safe Mode, and then perform the uninstall.
Question 2: how to uninstall TunnelBear for Mac?
After shutting down TunnelBear entirely, you can uninstall this app by trashing it in Finder. Here are the details about how to uninstall TunnelBear on macOS/Mac OS X:
- Click Finder in Dock, and then click the Applications from the sidebar.
- Locate TunnelBear, right click on its icon and choose Move to Trash.
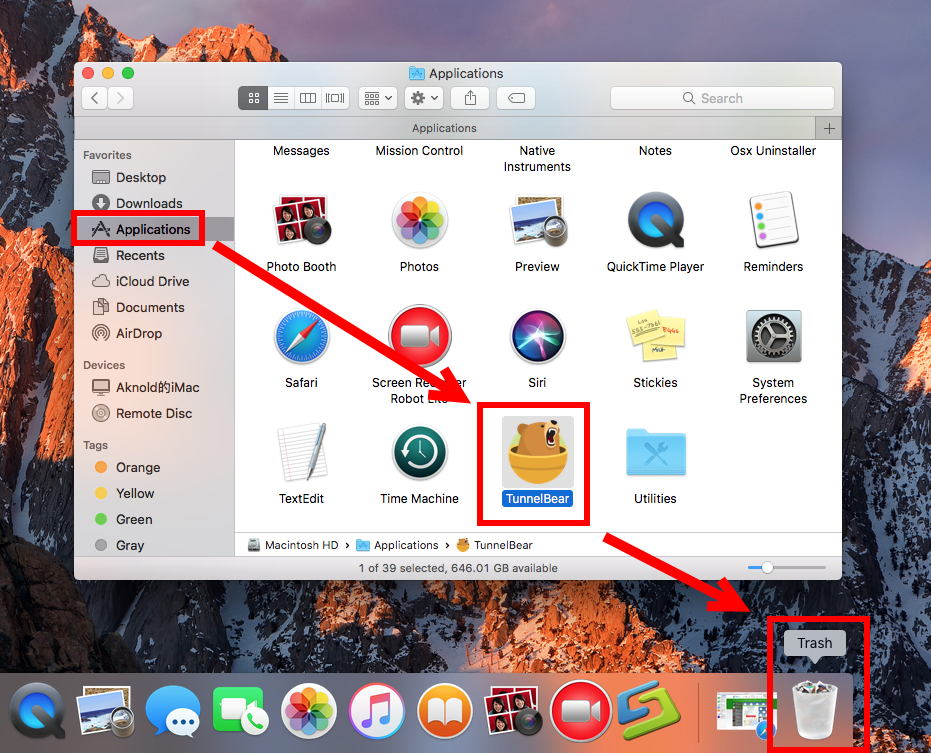
- Head to the Trash, right click TunnelBear there and choose Delete Immediately. Or you can choose Empty Trash in Finder menu to delete anything thrown into Trash.
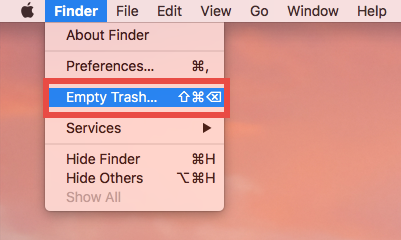
Note: Be cautious when trying to empty the Trash. Deleting TunnelBear individually in the Trash avoid the risk of mistakenly deleting other files that may still be needed.
For some apps that come with a dedicated uninstaller, you can locate the uninstaller in the folder that contains the app, and launch the tool to start the removal. For the apps that are installed through Mac App Store, you can head to the Launchpad, press and hold the target app icon until it starts to jiggle, and then click the Delete button.
Besides, if the VPNs created by TunnelBear remain in System Preferences > Network, you can remove it by selecting the VPN and clicking the minus icon below.
Question 3: how to delete TunnelBear leftovers?
Quite easy to uninstall TunnelBear, right? But it would not be so easy to remove all its traces scattered around the system. Mac beginners may get lost in this part. Well, here are the details about how to sweep out app leftovers after a standard uninstall:
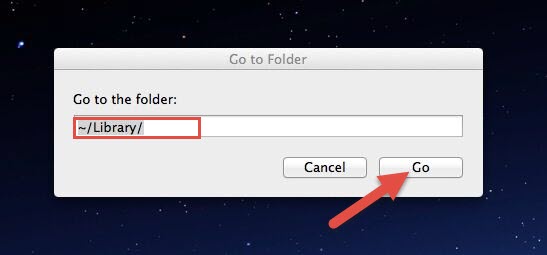
- In an active Finder window, choose Go > Go to Folder from the Menu bar
- Type ~/Library in the box, and hit Enter key to access to the hidden folder.
- Click the Search icon in the upper right corner of the Finder window, type TunnelBear in the search bar, and then click Library under the search bar.
- Identify the matched items in the search result, and remove them to the Trash.
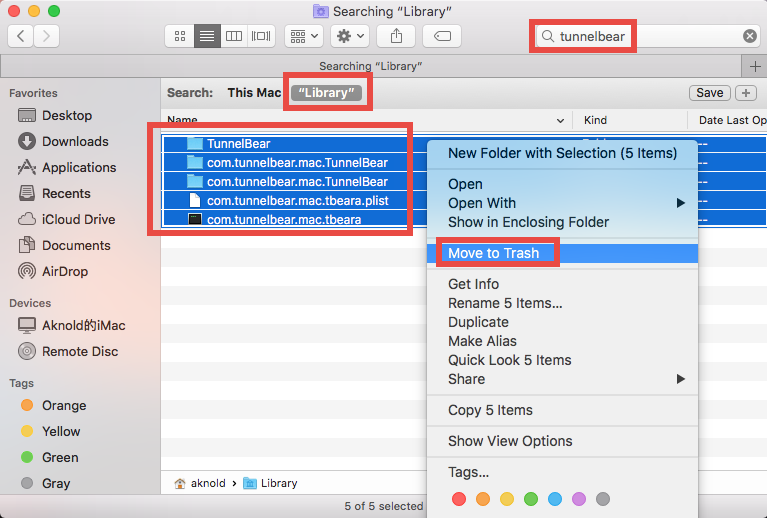
Here are the directories that may contain TunnelBear components:
~/Library/Caches, ~/Library/Preferences, ~/Library/Application Support, ~/Library/Saved Application State, ~/Library/LaunchAgents, ~/Library/LaunchDaemons, ~/Library/PreferencePanes, ~/Library/StartupItems
- Again, search for and delete TunnelBear-related items in the /Library folder.
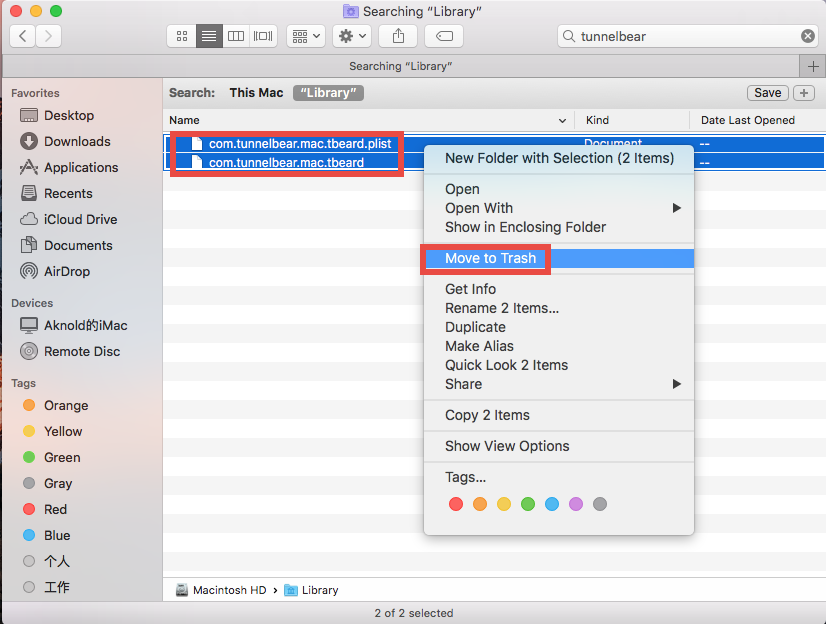
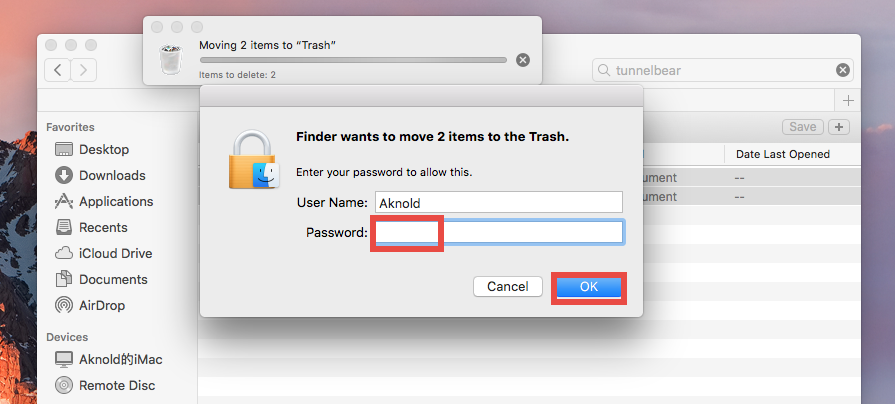
- Type the password in the pop-up window, and click OK to allow the deletion.
- Finally, empty your Trash to permanently get rid of TunnelBear components.
It should be pointed out that, some items created by TunnelBear may not contain the name of the app, and that means you may still fail to track down all the components. To solve this uninstall issue perfectly, adopt the recommend solution shown below.
Question 4: how to perfectly remove TunnelBear?
A handy, reliable uninstaller may be a necessity if you need to frequently uninstall various apps on your Mac. Among so many similar products in the market, which one is the most suitable one for you? Osx Uninstaller stands out as a high-efficiency tool to help all-level users remove problematic, stubborn and malicious apps in blinks.
This clip shows how Osx Uninstaller works to quickly uninstall TunnelBear:
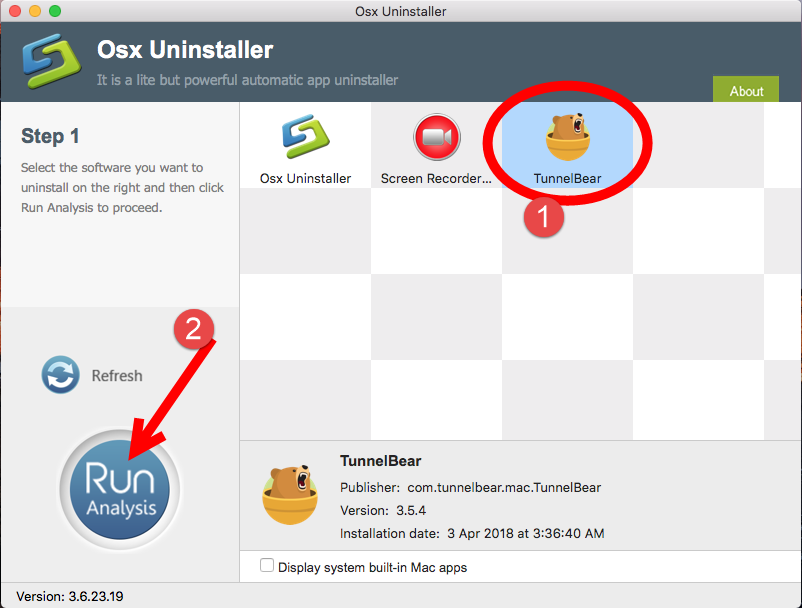
- Step 1. Deactivate TunnelBear first, and then launch Osx Uninstaller.
- Step 2. Select TunnelBear, and click Run Analysis to start the scanning.
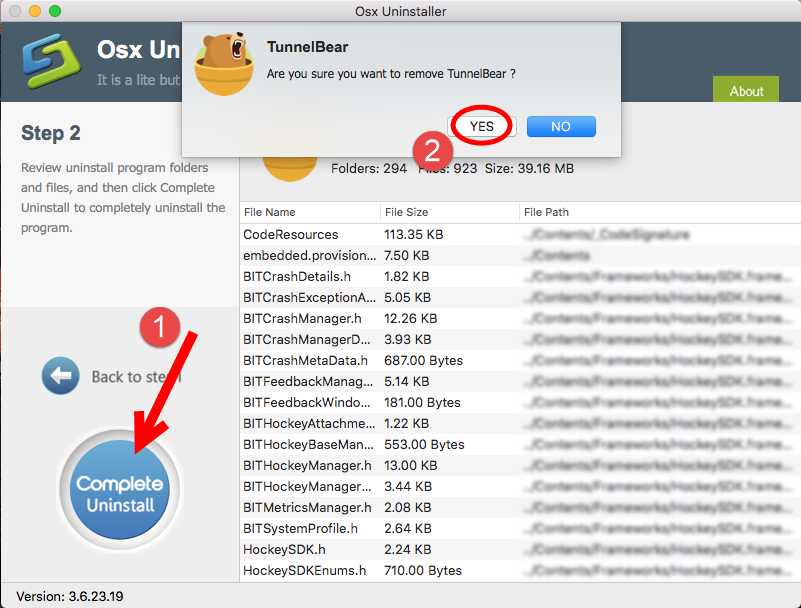
- Step 3. Click Complete Uninstall, and click Yes in the confirmation dialog.
- Step 4: Click the Back to Interface button to display currently installed apps.
By far you should have totally removed TunnelBear along with all its components. Is it the automated solution more attracting to you? Maybe give it a try now?
To summarize, we discuss four key questions about uninstalling TunnelBear for Mac, and two different solutions are listed to help you compare which come better. Briefly speaking, manual method cost nothing but a little more time and patience, while using a handy tool like Osx Uninstaller, though save a lot of trouble, requires you to buy a valid serial number. You can make your choice based on your uninstall demand.


 $29.95/lifetime