How to Uninstall Intego VirusBarrier X9 for Mac and Get Rid of any Trace of Intego
Someone might be confused and wondering how to thoroughly uninstall Intego VirusBarrier X9 from Mac OS X, so today we are going the right ways to get rid of VirusBarrier X9 for Mac without anything left behind. If you have the questions about how to remove VirusBarrier X9 from Mac computer, please keep it tight to read this blog.
VirusBarrier X9 for Mac is a kind of Mac antivirus protection for business, which is belong to Mac Premium Bundle X9, and other products included in Mac Premium Bundle X9 are NetBarrier X9, Mac Washing Machine X9, ContentBarrier X9 and Personal Backup 10.9, all of them come from Intego that is making security and utility software exclusively for Apple products since 1997. Intego VirusBarrier for Mac provides real-time antivirus protection for Macs, and scans files whenever they’re accessed to keep your Mac free of malware.
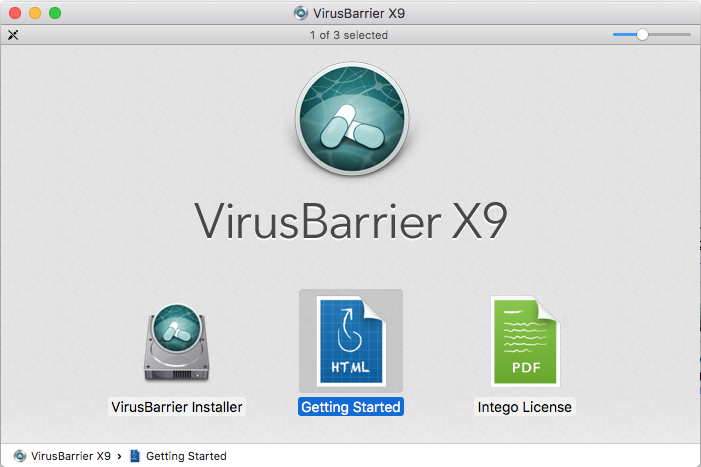
Different options to uninstall Intego VirusBarrier X9 for Mac
In this blog, we will provide you several different ways to remove Intego VirusBarrier X9 for Mac, if you have failed in this way that you could move to the next one, or you can choose one as you think it’s better.
Before you do anything to uninstall Intego VirusBarrier X9, quit the running app firstly.
Remove Intego VirusBarrier X9 for Mac as it Provided
Intego VirusBarrier X9 for Mac will bring the uninstall software in the procedure of installation, that means if you have already tried to manually uninstall portions of Intego software.
You will need to first reinstall Intego VirusBarrier before being able to proceed to a clean and complete uninstall. Then easily click Uninstall software:
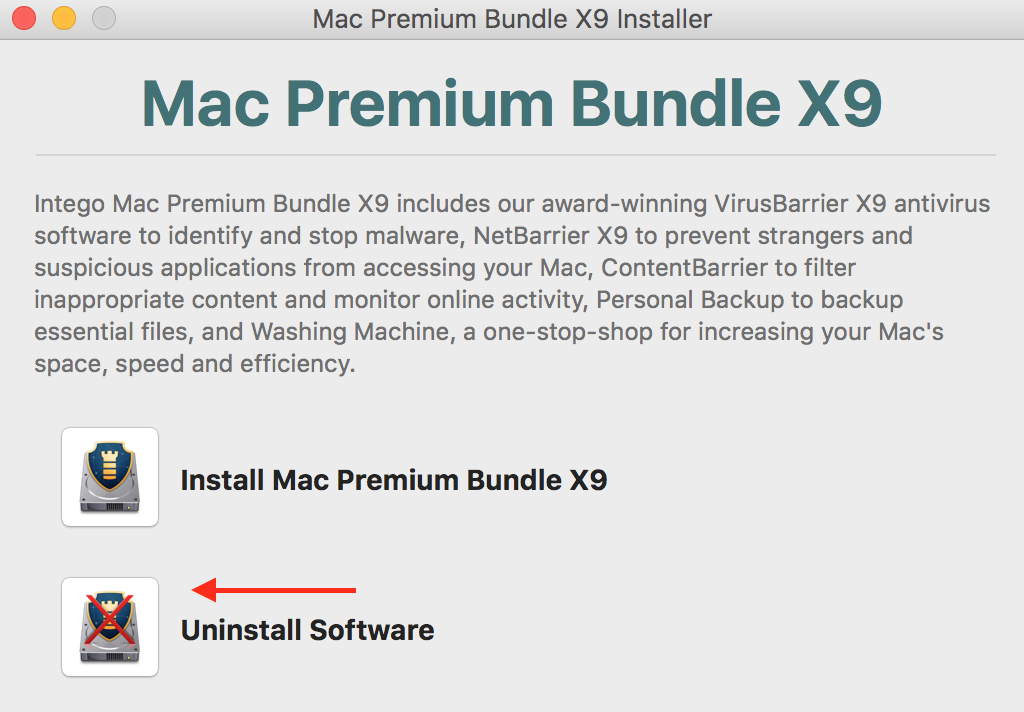
Fast uninstall Intego VirusBarrier X9 for Mac, you need to…
But if you are not willing to reinstall again the APP to bring troubles to your computer, then other method could uninstall Intego VirusBarrier X9 very fast and safely, not only for the software VirusBarrier but for all of installed Mac apps, that Osx Uninstaller could easily handle the program removal and avoid any further issue.
Spend a few minutes to watch the video of completely uninstall &remove Intego VirusBarrier X9 from Mac OS X:
Remove Intego VirusBarrier X9 step by step:
Step 1. Locate the target
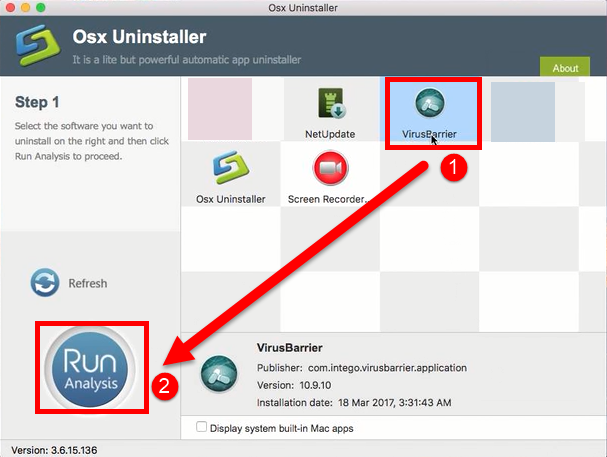
You can easily find Intego VirusBarrier X9 in the interface in this tool, because all of the installed apps on your Mac are listed here. Then click the button “Run Analysis” on the left panel;
Step 2. Start removal
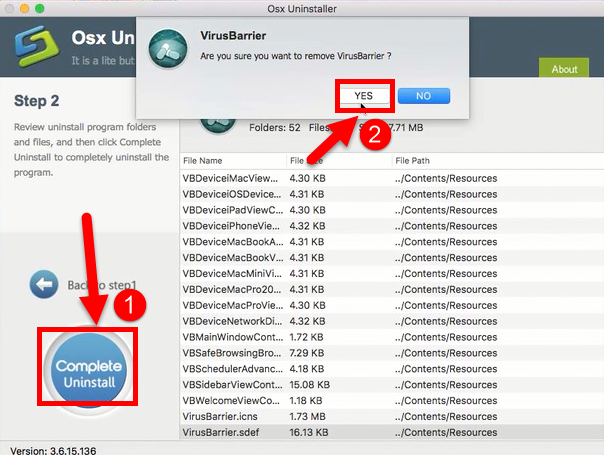
Osx Uninstaller will actually scan all the components or folders belonging to Intego VirusBarrier X9 for Mac remained in hard drive on the interface. Just a few second, click the button “Complete Uninstall” to delete all leftovers. Click Yes when finished scanning to confirm removal;
Step 3. Removed successfully
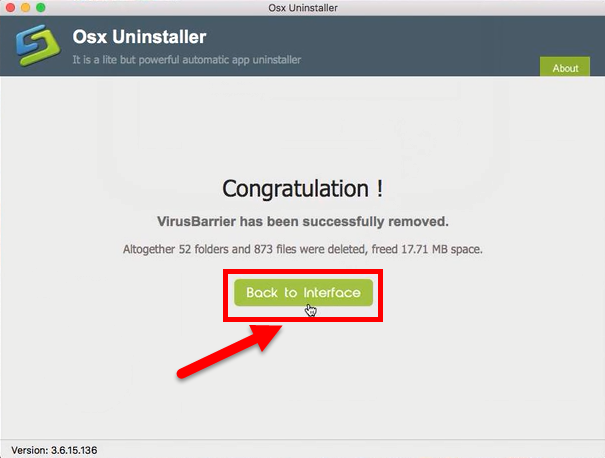
Congratulations, Intego VirusBarrier X9 is gone from your computer, check the leftovers by clicking the button “Refresh” in step 1, you’ll find no remaining files left.
The most common way to get rid of Intego VirusBarrier X9 for mac
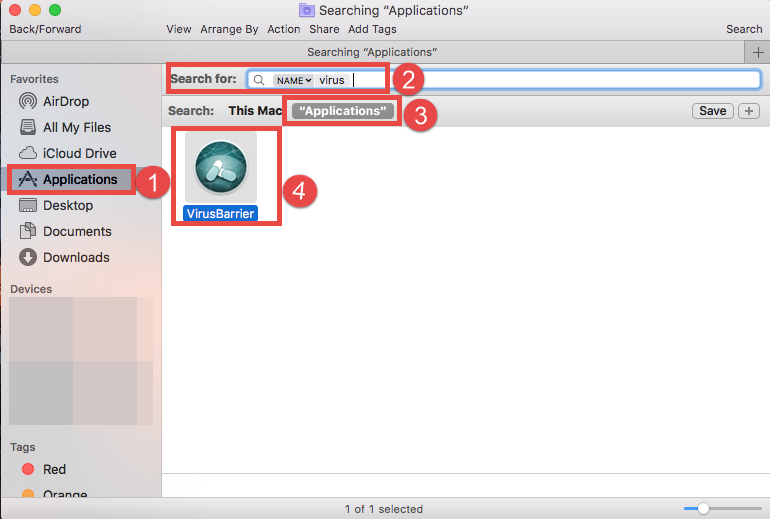
It is believed that almost everyone has known this way to uninstall software on Mac OS X, that is, move the application from the Applications folder to the Trash in the Finder to uninstall Intego VirusBarrier X9:
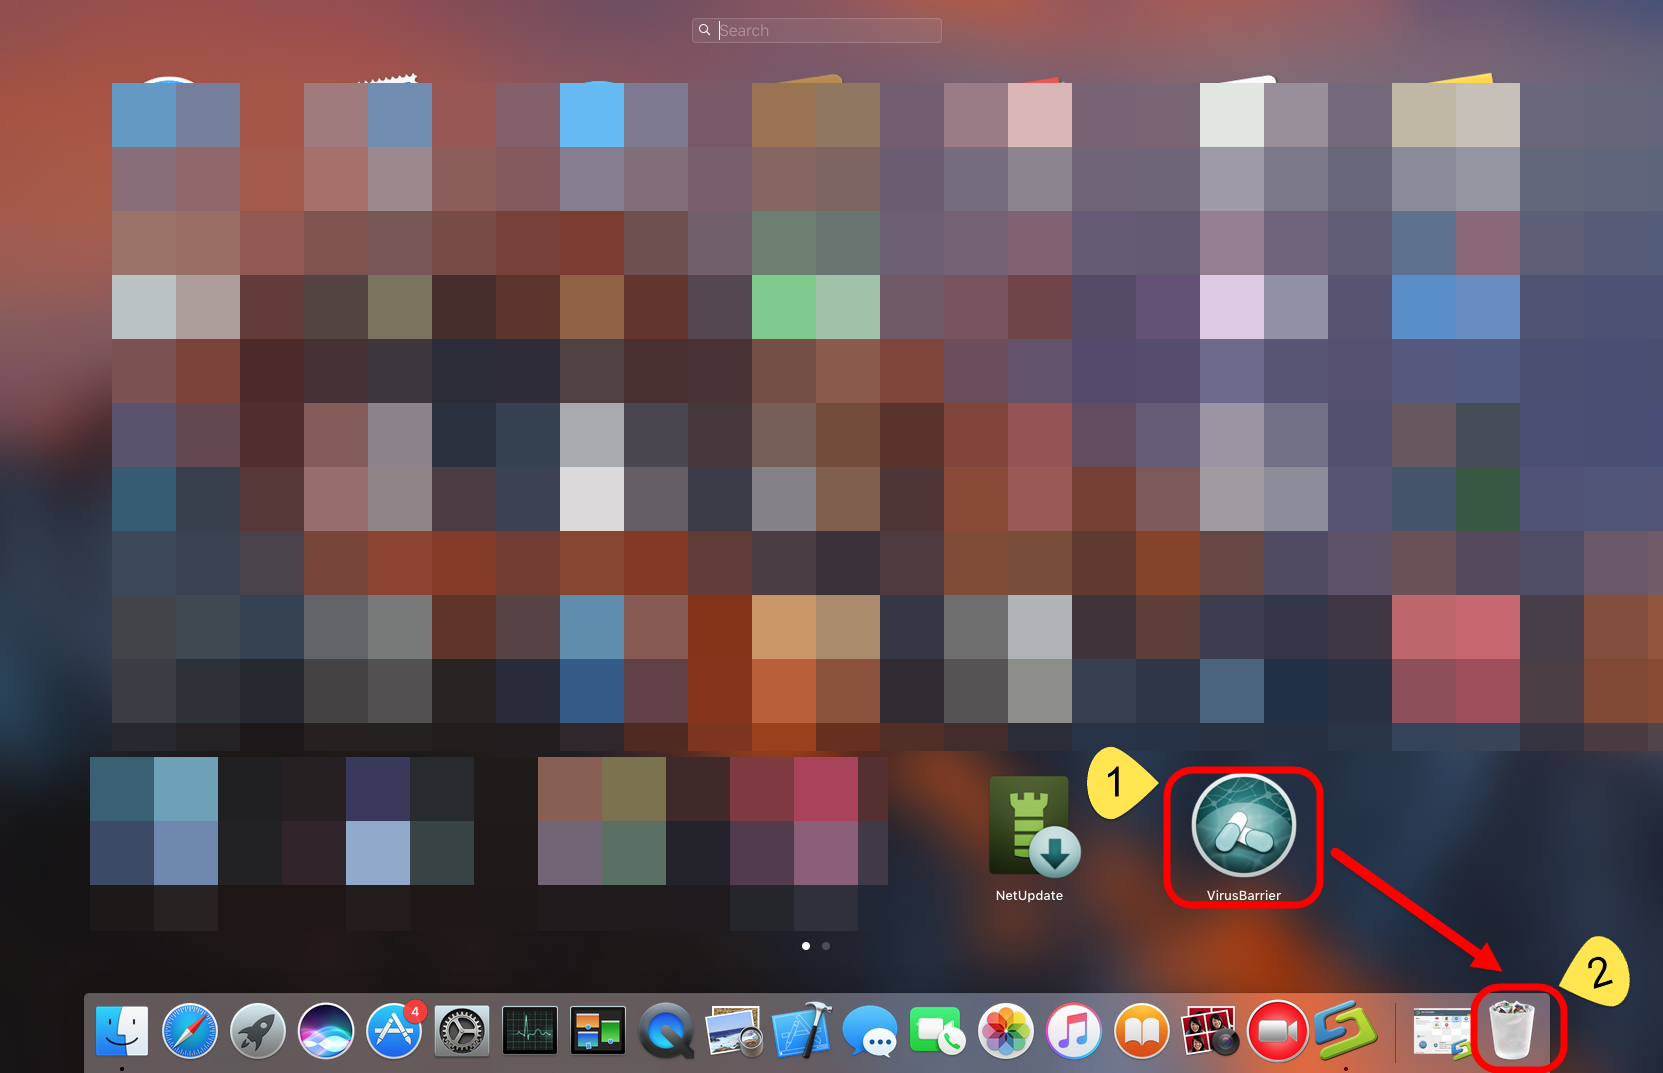
Or open Launchpad to drag it into Trash after it showing “X” in right corner by clicking it still for a while.
Now, all you have to do is to delete its components and remained files on hard drive:
Usually, these remain will be stored in three folders of hard drive:
- /Library/Preferences/
- /Library/Application Support/
- /Library/Caches/
But not sure its remains will be stored in other folders that you don’t know
1. Open “Finder”
2. Go to Menu Bar, and select Go > Go to Folder…
3. Type “~/library/” in the box, hit Go
4. Search the files in the name of Intego VirusBarrier X9 in Application Support
5. Back to Library folder, repeat the same operation in Preferences and Caches
6. Once any trace relates with Intego VirusBarrier X9 is appeared in the list, delete it
7. Finally, right-click Trash, choose Empty the Trash to confirm your whole removal
Unfortunately, those remaining files of VirusBarrier are not stroed in those folders at all, but I can tell you where:
In ~Library/C
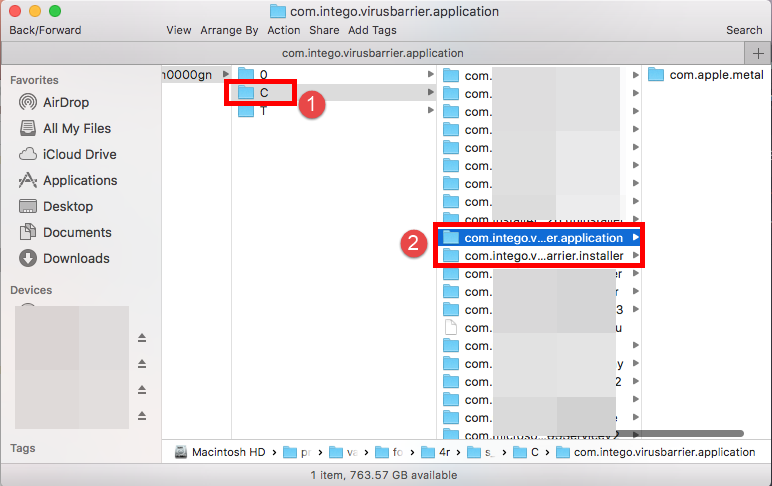
~Library/Intego:
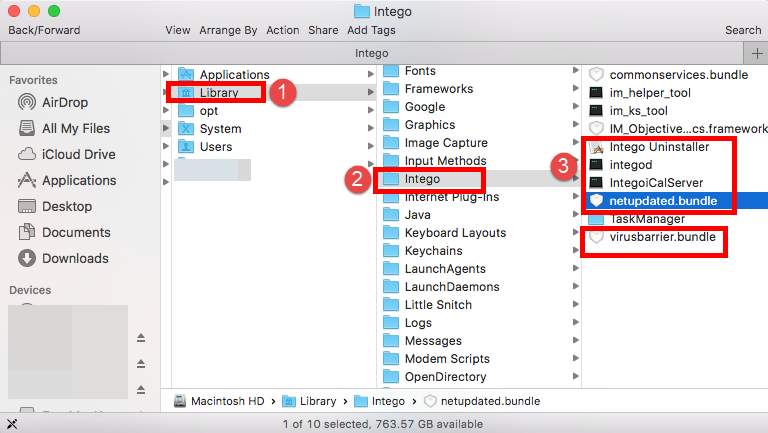
~Library/LaunchDaemons and LaunAgents:
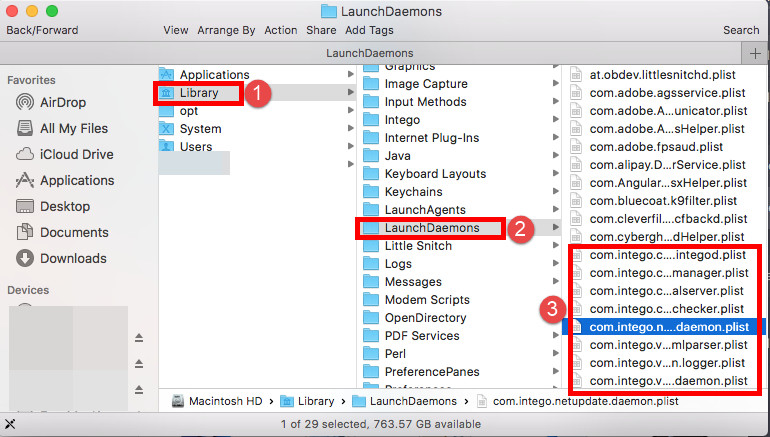
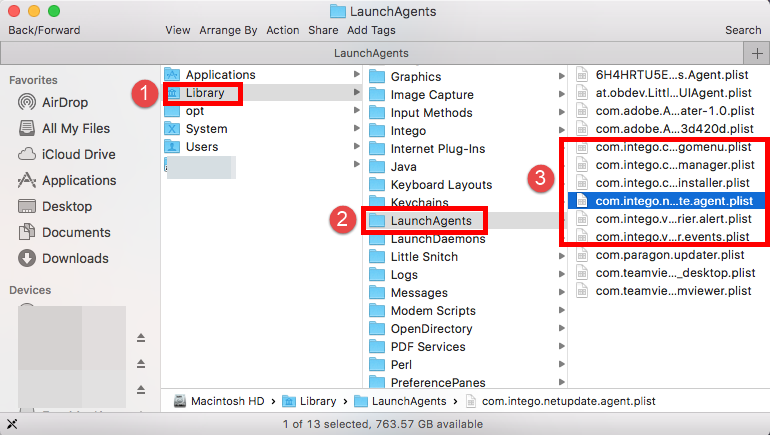
When met problem to uninstall Intego VirusBarrier, what to do?
Macs needs Antivirus Protection Software, just like any other computer, perhaps you might have installed more than one antivirus protection software in it, the bellow trouble will be occurred during you try to uninstall Intego VirusBarrier X9 for Mac like “victorhcardoso”, a VirusBarrier X9 users who had asked for help in the site.
“How to get rid of any trace of Intego? I’ve uninstalled it, but know every time I try to install Norton I got a message saying that I have to previously uninstall Intego firstly.” Victorhcardoso ask question about what to do to fully uninstall Intego VirusBarrier X9, in that case, we strongly recommend you to choose the automatic approach to help (option 2), because the step 2 will scan all traces of VirusBarrier and delete them quickly, which is the core technology of this uninstaller.
Conclusion: think you have the answer how to choose when uninstall Intego VirusBarrier X9 from Mac OS X, I really wish you are not join in them of whom has problem with Mac app removal. Once you have download Osx Uninstaller, every kind of removal troubles will be solve very easily, if you still have questions about how to use it, please feel free to connect our technician team for 24 hrs/ 7 days.


 $29.95/lifetime